

Users & Group Managment In Linux
Redhat & Centos Servers Commnds Saikat Biswas pwd Shows the current working directory’s path cd Changes the working
Saikat Biswas
Users & Group Management Commnd
1.How to Create a User Set Password
useradd kedar
passwd kedar
2.How To Change username
usermod -l newusername oldusername
3.Change User ID (UID
usermod -u <newUID> username
5.How To Set expiry date for account
usermod -e YYYY-MM-DD username
6.Change Group ID (GID)
usermod -g <newGID> username
7.How To Change group name/Rename a group
groupmod -n newgroupname oldgroupname
sudo groupmod -n test demo
8.Home Directory
useradd -d /etc/kedar/home kedar
9.Add users from a group
groupmod -m -m user1,user2 developers
10.How to Add User to Group
sudo adduser user_name new_group
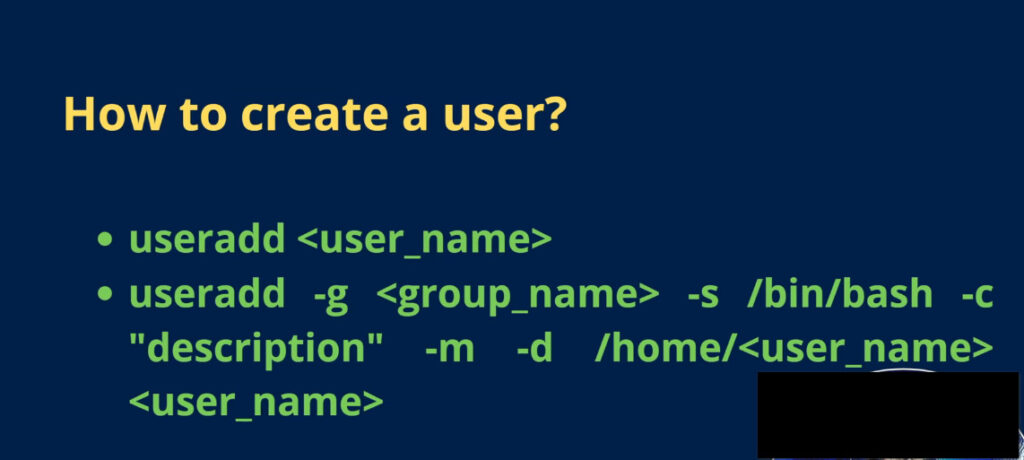
11.Use the useradd command to add a user
sudo useradd –G new_group user_name
12.Usermod command to add a user to a group
sudo usermod –a –G group_name user_name
13.Add a User to Multiple Groups at Once
sudo usermod –a –G new_group,new_group2,new_group3 user_name
14.Create a User and Add to Group
sudo useradd –G new_group new_user
15.Assign a password to the new user
sudo passwd new_user
16.Add user to supplementary groups
usermod -aG group1,group2 username
17.Remove users from a group
groupmod -M user1,user2 developers
sudo gpasswd –delete user1 demo
18.Delete a group
sudo groupdel demo
19.Check a newly added user
tail -1 /etc/passwd
20.List All Groups on the System
getent group
21.How to Add a User to the Root Group
sudo usermod -aG wheel username
groups username
All user account related information is stored in /etc/passwd, /etc/shadow and /etc/group files to store user information
22.Check for Running Processes of the User
Before deleting a user account, it’s important to check for any
running processes associated with the user. This will help you
avoid issues caused by deleting an account with active processes.
To check for running processes, use the ps command
ps -u username
In Linux, different users have different roles or responsibilities. Some users might need the ability to execute applications, while others are restricted from accessing specific files and folders.
Groups let you create categories of users with pre-set permissions. Instead of managing permissions for each user account, you can simply add a user to a group to grant the appropriate permissions.
The primary group is set to the logged-in user. Any files the user creates are automatically added to that group. A user can only belong to one primary group at a time. A primary group with the same name as the user is created, and any files created by the user are included in that group.
A user can belong to any number of secondary groups (including none). Secondary groups are created to manage individual files and software applications. Members of the group inherit the read, write, and execute privileges for that group.
In Linux, there are several types of users, each with different levels of permissions and roles. The main user types are:
Root User (Superuser Admin Full Right):
Regular Users (Non-root Users & Standard Users):
sudo command)./home/username), where they can store personal files.System Users:
sudo command.www-data for the web server).useradd ram <New User Add From ram>
usermod -p 123 ram <User Password Setup>
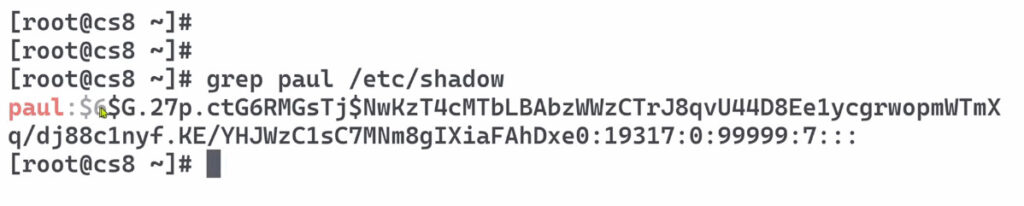
grep ram /etc/shadow
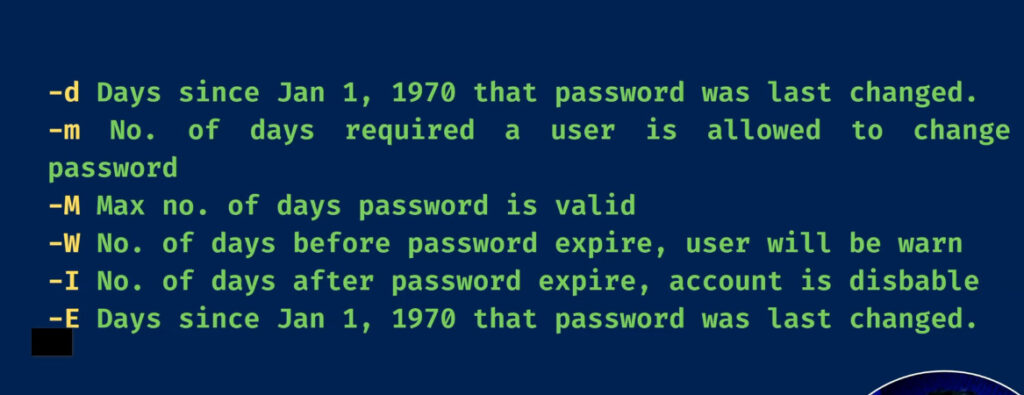
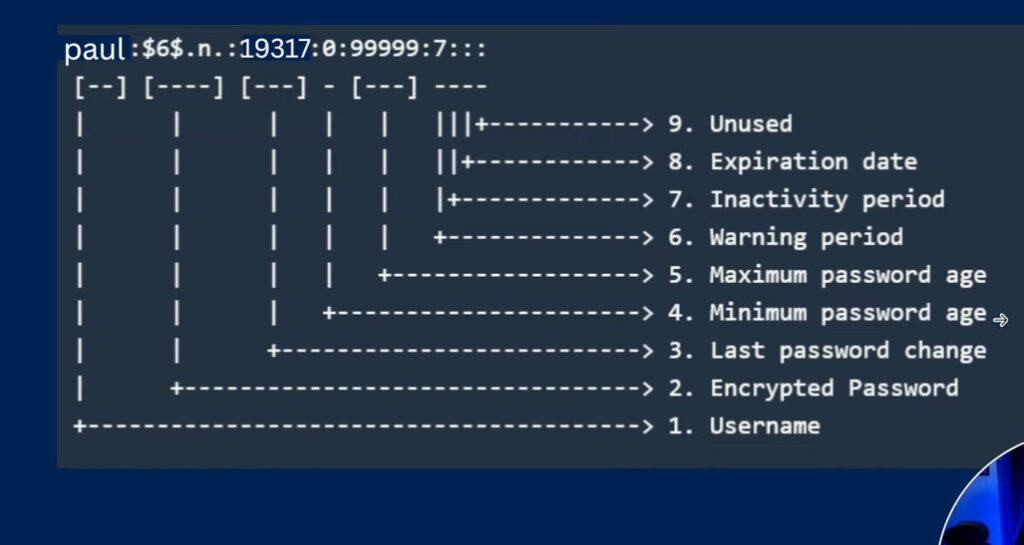
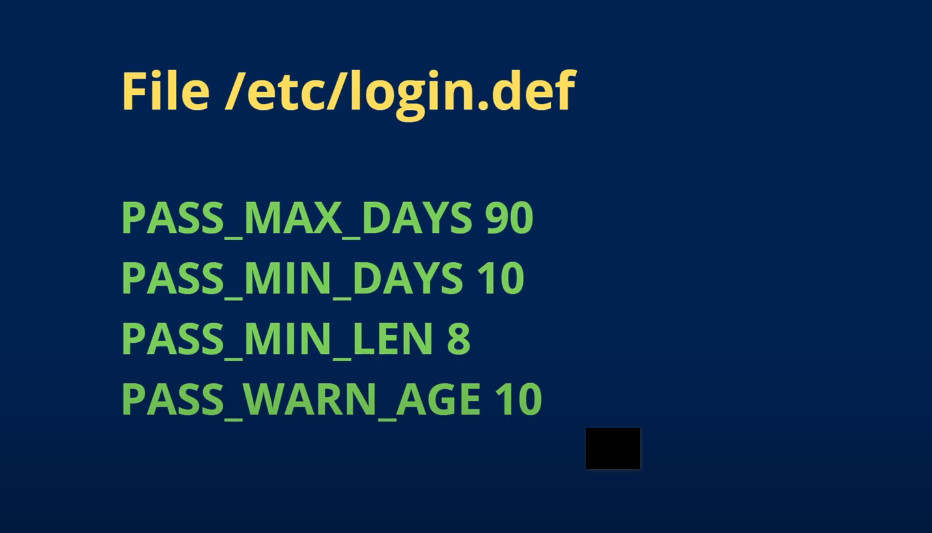
ram:123:19172:0:99999:7:: username:password:last password change:min. password age:max.password age:warning label:
inactive period:expirey date
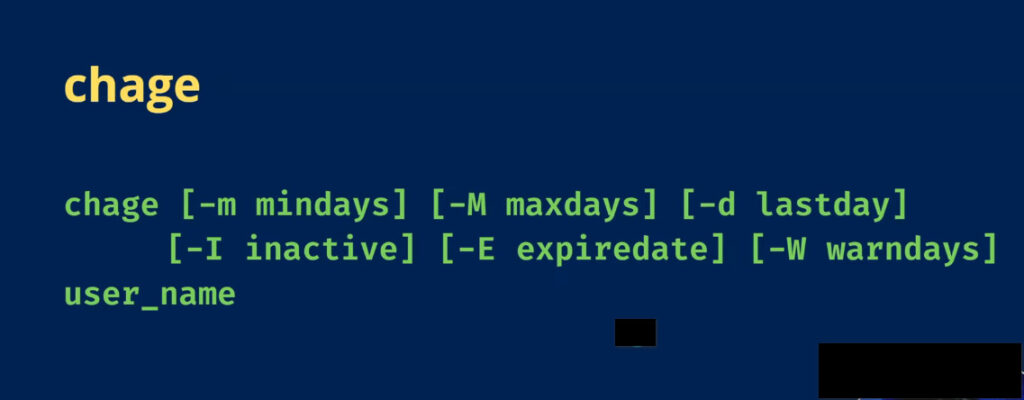
chage -l ram <all Information Like User Password Change Date etc>
/etc/passwd – User details
/etc/shadow – User password information
Useradd – add new user
Usermod – modify existing user
Userdel – delete existing user
adduser ram – Create New User
id ram – Display User ID Ram
adduser ram – Create New User
id ram – Display User ID Ram
grep -w ram /etc/passwd – Grep Commnd View Only Ram R related all user view But with -w Commnd match Text Viewing Only Ram User Details Example Format Example ram:x:1001:1001::/home/bin/bash
Username Ram:Password Ram:UseridRam:Groupid:Commnt:Home Directory:Shell
useradd -c “This is Ram From IT Department” shyam – User Description Add -c Commnt use
grep -w Shyam /etc/passwd – Checking description shyam
useradd -d /user1 user1 – User Home Directory customize means Location Change user Profile directory
grep user1 /etc/passwd – Checking
useradd -e 07/02/2024 user2 – User expairy Date Setup Month Date Year
chage -l user2 – Checking View expairy Date
useradd -f 15 user4 – inactive user 15 Dayes
grep user4 /etc/passwd
Example – Output user4:x:1006:1006::/home/bin/bash
useradd -g 1007 user4 – Change Group ID
tail -n 7 /etc/group – Last 7 user Group Showing This Tail Commnd Means Filter
useradd -G IT,Admin sumita – Add User To Group sumita user add to IT and Admin Group
useradd -N user8 – N Commnd Without group User create
cat /etc/default/useradd – By Default User8 add to user Group And default Member ID 100
useradd -p 123 user9 – Plain Text Password set Help Of -P Commnd Make sure Plain text password user can not login From GUI Set encrpt Password Need
passwd user9 – Encrypted User Password Commnd
Importend Notes – User Jotokhon na Login korbe mesine Totokhon kintu user home profile toiri hobe na Example – Picture,Music,download
tail -n 5/etc/shadow – Checking last 5 user password records
useradd -r user12 – Create System Service User Like shutdows,Mysql,Nagios etc
grep user12 /etc/passwd – Checking User records
useradd – u 60000 user13 – Modify user ID 60000 Manual – Tarmane amra je user gulo banachi tar user id amader icha moto modify kore nite parbo kintu id range modhey thakte hobe by default standard user range holo 1000-60000
id user 13 – Checking Id no commnd for user13
All features One commnd deployment
useradd -c “Hello” -d /user123 -e 07/15/2022 -f 10 -g 5000 -G IT,Admin,Sales -p 1234 -u 6000 sumita
cat/etc/passwd | grep user15 – Use pipe and grep commnd show only user15 data
-c – Any Description Add
-d – Customize user Home Directory
-e – User account Expaire
-f 10 – inactive before date 10 dayes
-g – User group id
-p – User plain text password set
-u – Customize User ID Number 6000
–G – User adding to Multiple Group
Sumita – User account name
Usermod & Userdel Command
usermod – modify existing user
tail -n 15 /etc/passwd – Last 15 User show terminal
I wan to Change User Description or Any modification related Work Then use usermod commnd
usermod -c “New description” sumita – Change description user sumita
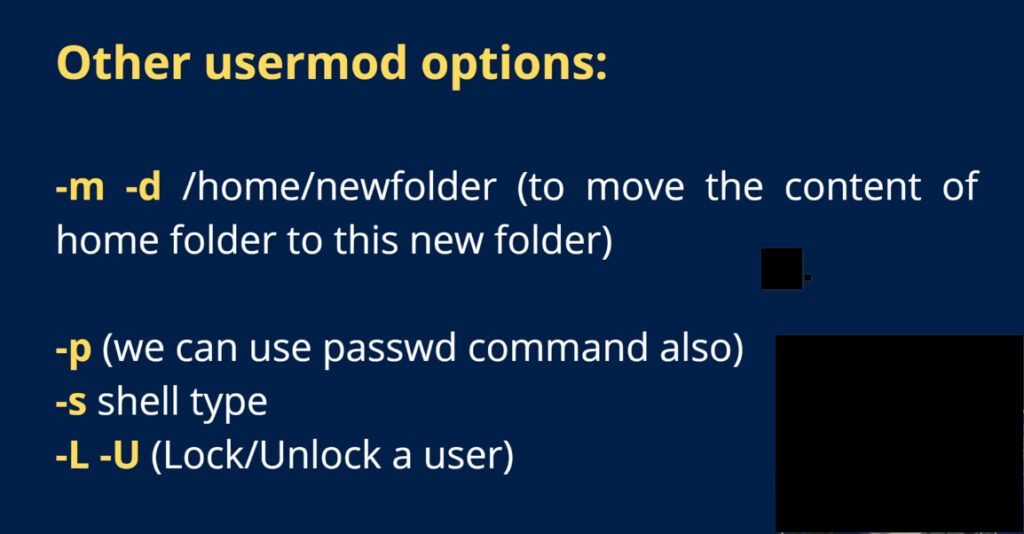
usermod -d /user10 sumita – Change Directory For sumita User
chage -l user10 – User Expaire date
grep user10 /etc/shadow
usermod -e 07/03/2022 user10
usermod -g 5000 user10 – Change Group id help of Usermod Commnd -g
usermod -u 4000 user10 – Change User id help of Usermod Commnd -u
usermod -G IT,Admin,Sales user10 – User10 Add to Multiple Group Like IT,Admin Group Help of usermod -G Commnd
usermod -l abc user10 – Username change Commnd user10 to abc new name but not change user10 home directory
grep -w abc /etc/shadow
usermod -L abc – Lock account abc do not show login screen
usermod -U abc – unlock user abc showing login screen
grep -w abc /etc/passwd – Showing abc userid records
usermod -u 20000 abc – Change User id number abc
Notes- 1000 kimba tar Besi User id number hole tahole seta standard user bola hoy
usemod -s /sbin/nologin abc – Change shell Bash Mane user Login korte Parbe na shell change hoye gache
grep -w abc /etc/passwd – Checking shell bash Status
Notes- Shell Holo amader task define kore amra ki ki kaj korbo jemon shutdown shell alada sysnc shell alada ata dekhar jonny cat /etc/passwd commnd type kore dekha jabe.Potita user jonney alada alada shell toiri hoy.
useradd -u 20000 -d /user1 abc – user id customize 20000 and directory folder customize -d user1
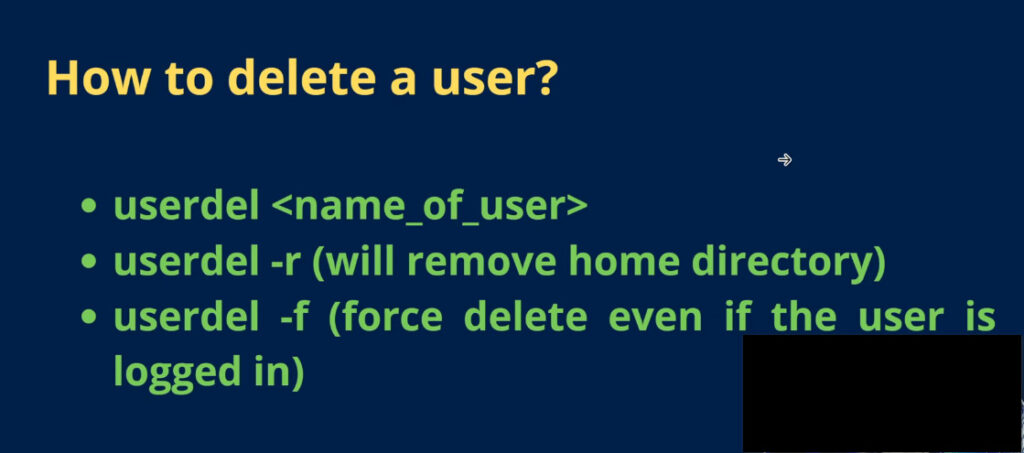
userdel -f abc – User Force Fully remove
userdel -rf abc – Remove User Directory all file with mailbox file
Group Management
Group management in Linux is essential for several reasons, primarily related to system administration, security, and efficiency. Below are key reasons why group management is needed in Linux:
/etc/group – Details or information about groups
tail -n 10 /etc/group – View All group
group-name:password:group-id:group-members
/etc/gshadow – Secure group information Examle group password showing
tail -n 10 /etc/gshadow
group-name:password:list-of-group-admins:list-of-group-members
groupadd – Add a new group
groupmod – Modify an existing group
groupdel – Delete a group
gpasswd – Manage group
tail -n 3 /etc/group
groupadd test – Create test new group
groupadd -g 50000 test1 – Change Group id test1 50000
groupadd -p 123 test2 – Create group test2 and plain text password protected
tail -n 3 /etc/gshadow – Checking group create or not show group password
groupmod -g 5000 test2 – change group id -g means group
groupmod -n test4 test1 – Change group name test1 to test4 -n means group name
groupmod -p 456 test2 – Change group plain text password
tail -n 3 /etc/gshadow – Checking of group password showing
gpasswd test2 – Group encrypted password setip this commnd
tail -n 3 /etc/gshadow – Checking for group encrypted password create or not
useradd user1
useradd user2
useradd user3
ls/home – Showing user home directory folder
groupdel -f user1
groupdel -f user2
groupdel -f user3
tail -n 3 /etc/gshadow
grep test2 /etc/gshadow – Ai test2 group encrypted password add kora ache akhon amra
user1 user2 user3 ai user gulo test2 group add korbo
gpasswd -a user1 test2 – User1 add to test2 group
grep test2 /etc/gshadow – Checking user group addd or not
gpasswd -d user1 test2 – Remove user -d commnd test2 group


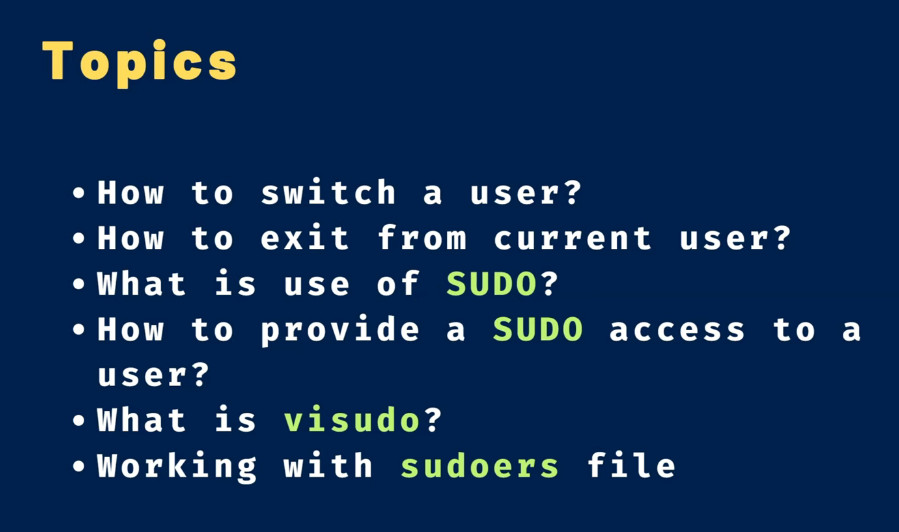
What is Sudo
The sudo command in Linux and Unix-based systems stands for “superuser do” and allows users to execute commands with the privileges of another user, typically the root (administrator) user. This is important because some tasks, such as installing software or modifying system files, require administrative privileges that are not granted to regular users for security reasons
Why Need Sudo Access
Sudo access (short for “superuser do”) is necessary because it grants elevated privileges to a user, allowing them to execute commands with the same authority as the system administrator (root). In most operating systems, particularly in Linux and Unix-like systems, normal users are restricted from performing sensitive or potentially dangerous actions that could affect the system’s stability or security.
Here are some key reasons sudo access is required:
apt install or yum update require sudo because they affect the entire system (like installing software or updating packages).

whoami – show current user loged in name
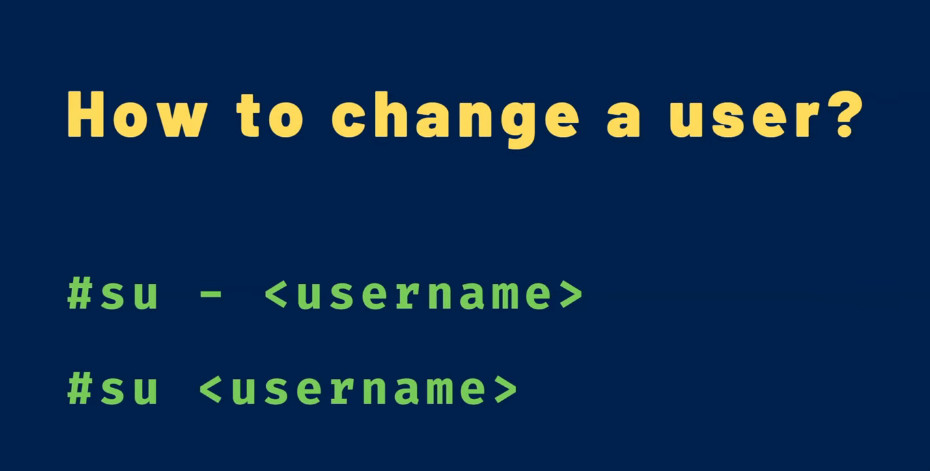
su – paul – Switch user nick account to paul account
exit – Exit paul account to nick
su– Switch user to root account
yum install apache – without root access and normal user root permisson can not install apache webserver
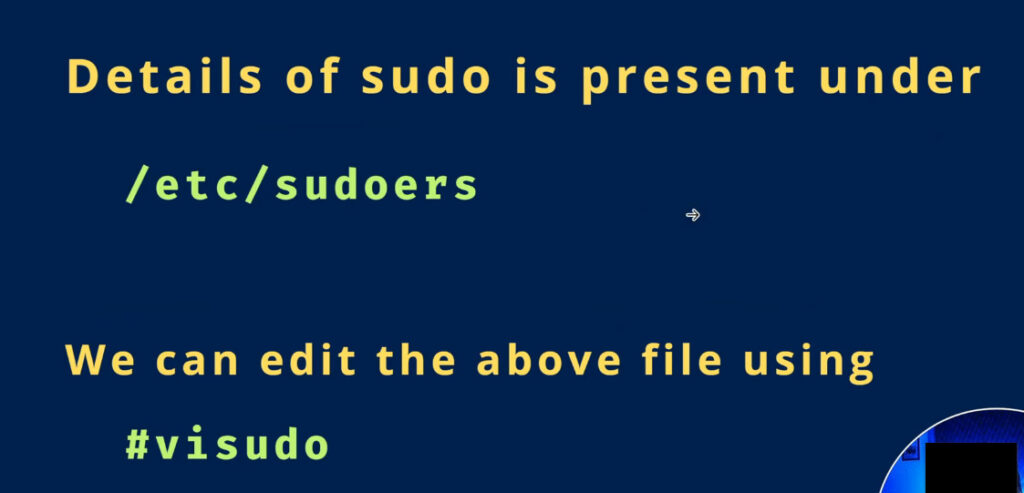
less /etc/sudoers

usermod -aG wheel nick – nick user add to root group
How to Create a User Group
sudo groupadd new_group
How to Add User to Group
Add an Existing User to an Existing Group
1. Use the adduser command to add a user to a group:
sudo adduser user_name new_group
2. Use the useradd command to add a user:
sudo useradd –G new_group user_name
3.You can also use the usermod command to add a user to a group:
sudo usermod –a –G group_name user_name
Add a User to Multiple Groups at Once
Use the usermod command to specify multiple groups to add to:
sudo usermod –a –G new_group,new_group2,new_group3 user_name
Create a User and Add to Group
1. This is useful for creating a new user on the fly for a specific software application. Enter the following:
sudo useradd –G new_group new_user
2. Next, assign a password to the new user:
sudo passwd new_user
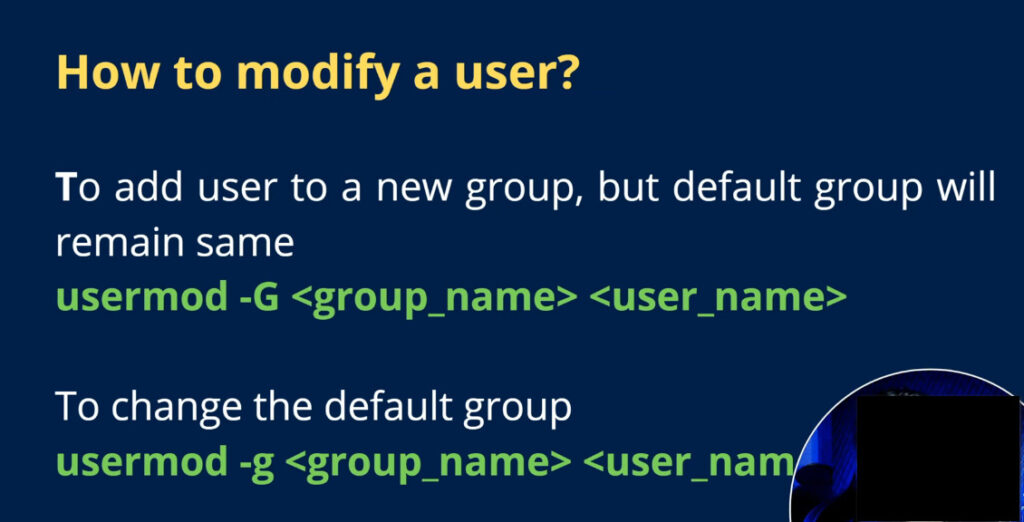
Change a Users Primary Group
All previous commands have been used to manage the secondary groups a user belongs to. In most cases, a user’s primary group is the same as their username.
To change a users primary group, enter the command:
sudo usermod –g new_group user_name
The lower-case –g specifies the primary group. (Upper-case –G refers to a secondary group.) A user can only have one primary group, so the old primary group user_name won’t be primary anymore for this user
How to Remove a User From a Group
The gpasswd tool is used for managing groups. To remove a user from a group:
sudo gpasswd –d user_name new_group
Delete a Group
To delete a group, use the command:
sudo groupdel new_group
How to List Groups in Linux
Linux comes with several different groups by default. Some of these, like the sudo group, can be used to grant permissions. Others are hidden, used for system tasks.
1. To view a list of groups on your system by displaying the /etc/groups file:
sudo nano /etc/groups
groups
Basic System Administration CentOS Commands
yum: Package Management
yum is the package manager for CentOS and RHEL, which helps to install, update, and remove packages. However, AlmaLinux and Rocky Linux use dnf (Dandified Yum) as the default package manager. dnf is the successor to yum and has the same syntax as yum.
To install a package on CentOS systems, you can run:
yum install package_name
To remove a package, you can use:
yum remove package_name
systemctl: Service Management
systemctl is the service manager which controls the startup, stopping, and restarting of system services. It provides a unified interface for managing various system processes.
To start a service, you can use:
systemctl start service_name
To stop the service, you can use:
systemctl stop service_name
You can also enable the service to start at boot up:
systemctl enable service_name
To check the status of service, you can use:
systemctl status service_name
firewall-cmd: Firewall Management
Another popular CentOS command is firewall-cmd, a command-line tool for configuring the firewall. It allows you to define rules for incoming and outgoing network traffic, protecting your system from unauthorized access.
To display the status of the firewall, run the command:
firewall-cmd –state
Output:
running
To allow traffic on a specific port, you can run the following command.
firewall-cmd –permanent –add-port=port_number/tcp
useradd, userdel, usermod: User Management
useradd creates new user accounts, specifying their login name, password, and other attributes. usermod modifies existing user accounts, changing their login name, password, or group memberships. userdel deletes user accounts, optionally removing their home directory.
To add a new user to the system, you can use the command:
useradd username
To remove a user from the system, you can run the command.
userdel username
To change the login name for a user account, you can use the usermod command with -l option.
usermod -l username
passwd: Change Passwords
The passwd command is used to change the password for a specific user account. It prompts the user to enter their current password and set a new password. However, with root access, you can directly set a new one.
pwd username
selinux: Security Enhanced Linux
selinux is a security module that provides mandatory access control (MAC) for CentOS. It restricts the access of processes to system resources, enhancing security and preventing unauthorized access.
Displays the current status of SELinux.
sestatus
scp – Secure Copy Files
scp securely transfers files between remote systems over SSH, preserving file attributes and ensuring encrypted data transmission. With syntax like scp file user@host:/destination, administrators can quickly copy files between servers. It’s widely used for backups, migrations, and transferring data across systems, making it essential for remote file management.
Syntax: scp [source] [destination]
To copy a single file to a remote server, you can run:
scp file.txt user@192.168.1.10:/home/user
This command copies the file named “file.txt” to “/home/user” directory in the remote server “192.168.1.10”.
To copy a directory recursively, you can use the -r parameter.
scp -r /local/dir user@remote:/remote/dir
This command copies all files and sub-directories present in the local directory to the target remote directory.
Process Management CentOS Commands
top: Real-time System Monitoring
top provides real-time insights into system processes, CPU usage, memory consumption, and more. It continuously updates and allows users to monitor which processes consume the most resources. System administrators use top to track system performance and troubleshoot performance bottlenecks. Sorting processes by memory or CPU usage is key to identifying resource-logging processes.
Syntax: top
Example: Start top
top
ps: Process Monitoring
ps provides a snapshot of the running processes on a system. With ps -ef, users can view detailed information such as process IDs, user information, and CPU usage. It’s often used to identify and track specific processes, find orphaned or zombie processes, or monitor processes owned by specific users. It’s crucial for managing and analyzing system workloads.
Syntax: ps [options]
The following command shows all processes on the system.
ps -ef
Output:
To display processes for a specific user, you can use:
ps -u root
This command shows processes running as root.
kill: Terminate Processes
kill is used to terminate processes by sending signals. It’s commonly used with kill -9, which forcefully kills unresponsive processes. By using the process ID (PID), administrators can stop a specific process without affecting others. The command is critical when processes hang or consume too many resources, ensuring the stability of the system by removing problematic tasks.
Syntax: kill [signal] [PID]
To gracefully stop a process having ID “1234”, you can use:
kill 1234
To forcefully kill a specified process, you can use:
kill -9 1234a
Additional CentOS Commands
df: Disk Usage
The df command displays information about the disk usage of mounted filesystems. Using df -h shows human-readable output, providing details like total, used, and available space. It’s useful for monitoring storage availability and quickly identifying filesystems that are running out of space. This command is critical for managing system storage and preventing disk space exhaustion.
Syntax: df [options]
To check disk usage in human-readable format, you can use this command:
df -h
To show filesystem types, you can use:
df -T
crontab: Schedule Tasks
crontab allows users to schedule recurring jobs or tasks, automating repetitive tasks like backups, updates, or log cleaning. Administrators edit crontab files using crontab -e to define tasks that run at specific intervals, like daily, weekly, or monthly. It’s widely used for maintenance activities, enabling efficient system management without manual intervention.
Syntax: crontab -e
Example:
Edit crontab to schedule a job:
crontab -e
List scheduled tasks:
crontab -l
tar – Archive and Extract Files
tar is used to create and extract tarball archives. With tar -cvf, administrators can bundle multiple files or directories into a single compressed file, while tar -xvf extracts them. It’s heavily used for creating backups, transferring large groups of files, or preserving directory structures. It’s a fundamental tool for file management and data archiving on CentOS.
Syntax: tar [options] [archive_name] [files]
Example:
Create an archive:
tar -cvf backup.tar /var/www
Extract an archive:
tar -xvf backup.tar
grep – Search Text
grep searches for patterns in files, making it indispensable for analyzing logs or configuration files. With grep ‘pattern’ file.txt, users can filter output to display only lines containing a specific string. It supports regular expressions and recursive search, making it highly versatile. Administrators use grep to troubleshoot issues by searching logs for errors or specific keywords.
Syntax: grep [pattern] [file]
Example:
Search for a keyword in a file:
grep ‘error’ /var/log/messages
Search recursively in directories:
grep -r ‘keyword’ /etc
Other Useful CentOS Commands
File Management
cp, mv: Copying and Moving Files
The cp command copies files and directories from one location to another.
The mv command moves files and directories, renaming them if necessary.
rm: Removing Files
The rm command deletes files and directories. Use caution when using this command, as deleted files cannot be recovered.
find: Searching for Files
The find command searches for files and directories based on various criteria, such as name, size, modification time, and location.
Redhat & Centos Servers Commnds Saikat Biswas pwd Shows the current working directory’s path cd Changes the working