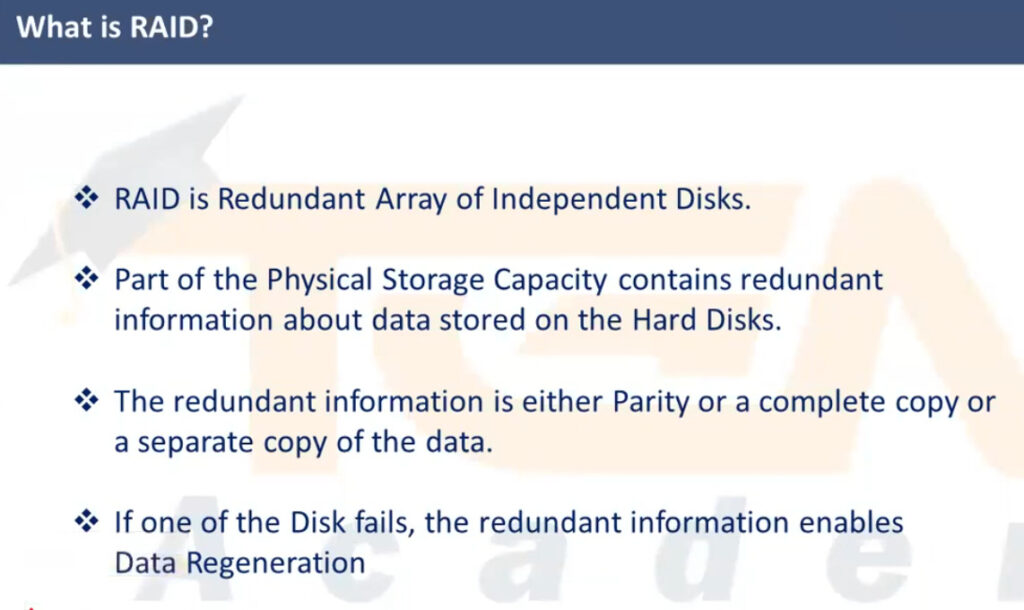
RAID (Redundant Array of Independent Disks) is a technology used to combine multiple physical hard drives or SSDs into a single logical unit for improved performance, data redundancy, or both. The goal of RAID is to increase data availability, fault tolerance, and/or speed depending on the configuration chosen. There are several RAID levels, each offering different trade-offs between performance, redundancy, and capacity.
Common RAID Levels:
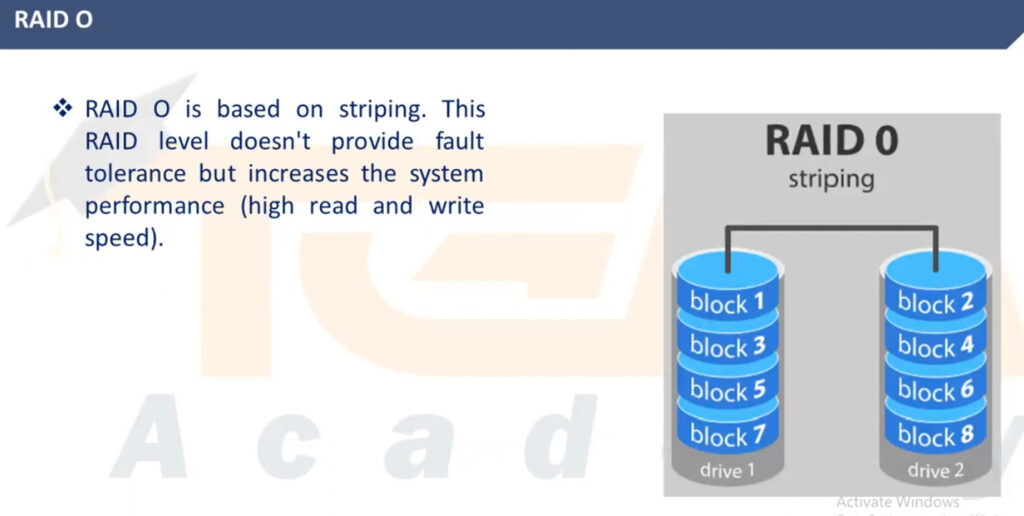
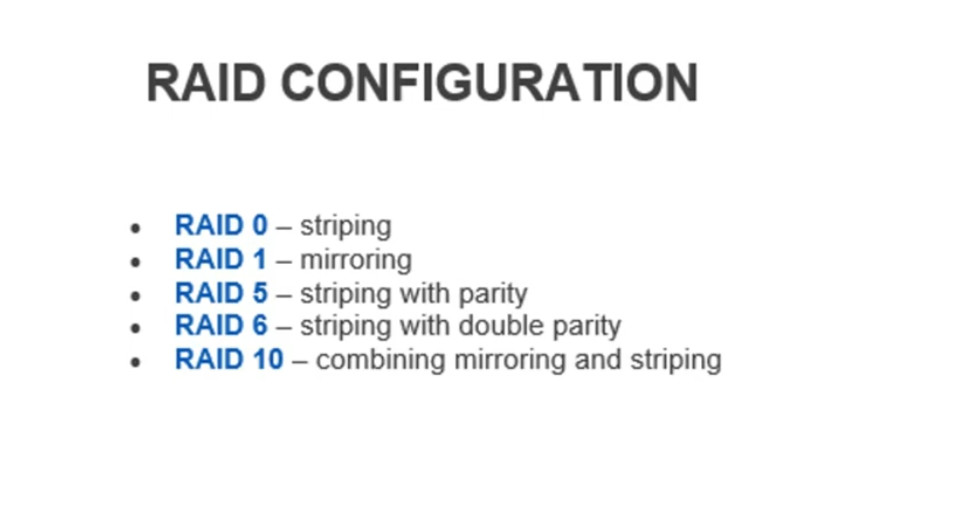
RAID 0 (Striping):
Purpose: Performance boost.
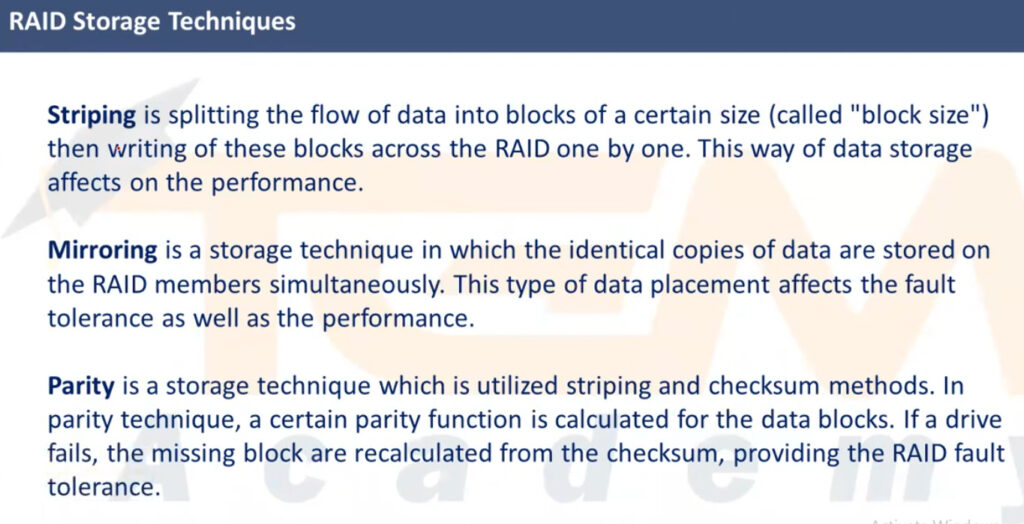
How it works: Data is split (striped) across two or more drives, with each drive storing part of the data.
Pros: High performance because data is accessed in parallel from multiple disks.
Cons: No redundancy; if one drive fails, all data is lost.
Minimum drives: 2
Use case: Gaming, video editing, or other applications where speed is critical but data loss is not a major concern.
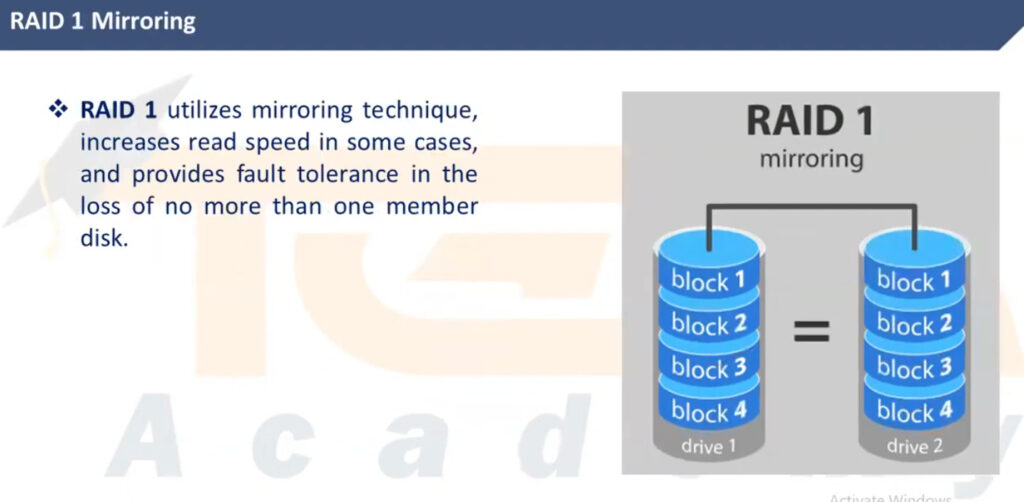
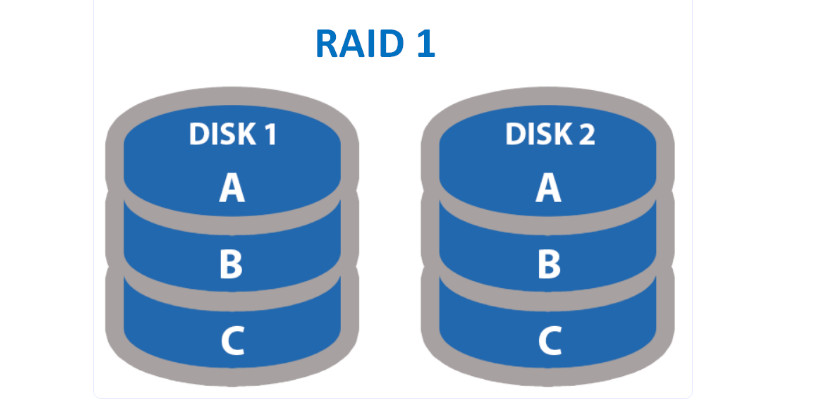
RAID 1 (Mirroring):
Purpose: Redundancy and data protection.
How it works: Data is duplicated (mirrored) on two or more drives.
Pros: High redundancy, as the same data is stored on multiple drives. If one drive fails, the data is still accessible from the other drive(s).
Cons: Storage capacity is halved since each drive contains an identical copy of the data.
Minimum drives: 2
Use case: Systems where data protection is critical (e.g., databases, small business servers).
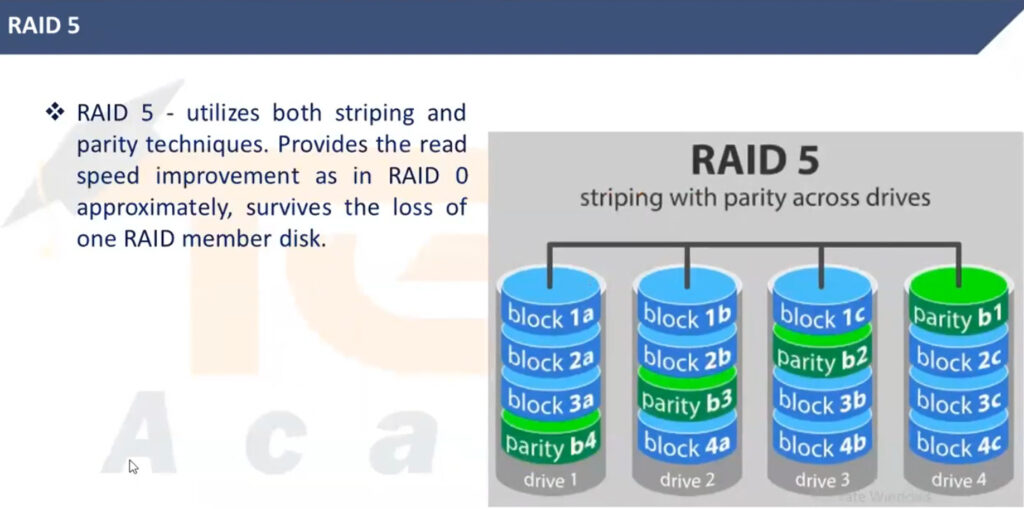
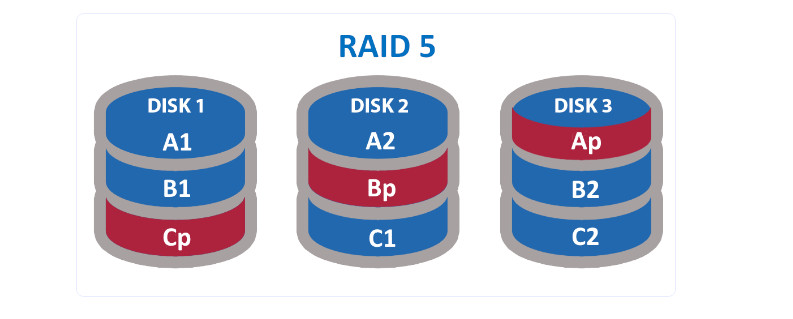
RAID 5 (Striping with Parity):
Purpose: Performance with redundancy.
How it works: Data is striped across three or more drives, and parity information is distributed across all drives. Parity is a form of error-checking that allows data recovery in case of a single drive failure.
Pros: Good balance of performance, redundancy, and storage efficiency. It can tolerate the failure of one drive.
Cons: Write performance can be slower due to parity calculations.
Minimum drives: 3
Use case: Enterprise environments and file servers where redundancy is needed but storage space is also important.
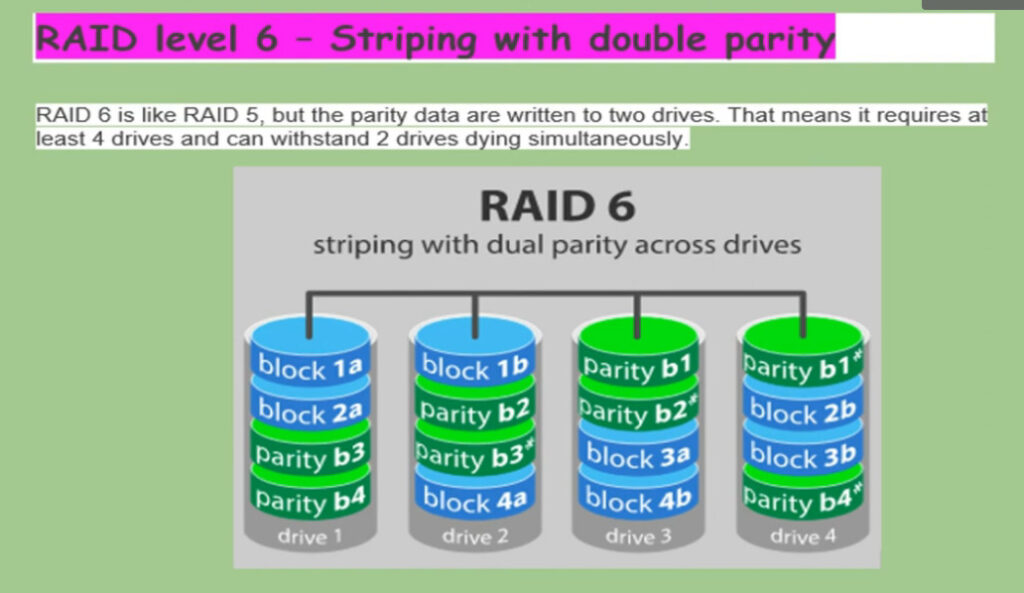
RAID 6 (Striping with Double Parity):
Purpose: High redundancy.
How it works: Similar to RAID 5, but with an additional layer of parity, which allows RAID 6 to tolerate the failure of two drives.
Pros: Higher redundancy than RAID 5.
Cons: Lower write performance due to double parity and slower rebuild times. Requires more storage overhead.
Minimum drives: 4
Use case: Large data storage systems where fault tolerance is very important, such as in cloud storage or archival systems.
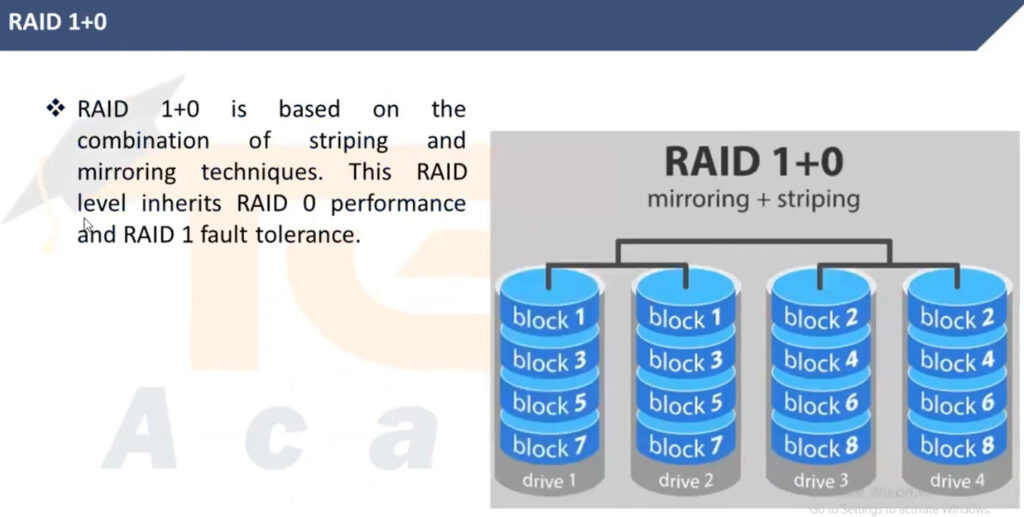
RAID 10 (1+0, Mirroring and Striping):
Purpose: Performance with redundancy.
How it works: Combines RAID 1 (mirroring) and RAID 0 (striping). Data is mirrored for redundancy, and then striped across multiple drives for performance.
Pros: High performance and redundancy. Can tolerate multiple drive failures, as long as no mirrored pair loses both drives.
Cons: Expensive in terms of storage capacity because of mirroring.
Minimum drives: 4
Use case: Systems that require both high performance and high redundancy, such as database servers or virtualized environments.
RAID 50 (RAID 5+0):
Purpose: Enhanced performance and redundancy.
How it works: Combines RAID 5 (striping with parity) with RAID 0 (striping) across multiple sets of RAID 5 arrays.
Pros: Improved performance over RAID 5, with better fault tolerance than RAID 0 alone.
Cons: Complex to set up and manage. Still has overhead due to parity.
Use case: Large-scale enterprise systems needing both high performance and fault tolerance.
Other RAID Configurations:
RAID 2, 3, 4, 7: These are less commonly used today due to inefficiencies or the lack of widespread support, but they still exist in niche applications.
RAID 1E: A variation of RAID 1 with an odd number of drives, offering both striping and mirroring.
RAID Considerations:
Fault Tolerance: RAID levels like RAID 1, RAID 5, RAID 6, and RAID 10 provide fault tolerance, meaning your data can survive hardware failures.
Performance: RAID 0 offers the best performance but with no redundancy. RAID 10 balances both.
Capacity: Some RAID levels (like RAID 1) use the capacity of the smallest disk in the array for redundancy, reducing usable storage space.
Rebuild Time: When a disk in a RAID 1, 5, or 6 array fails, the array can be rebuilt. However, rebuild times can vary greatly depending on the size of the drives and the RAID level.
RAID Software vs Hardware:
Hardware RAID: Uses a dedicated RAID controller to manage the RAID array. Typically offers better performance and more advanced features but requires a compatible RAID card.
Software RAID: Managed by the operating system, such as Windows Disk Management, Linux mdadm, or macOS Disk Utility. It’s easier to configure but can be less efficient than hardware RAID.
Benefits of RAID:
Increased Performance: RAID 0, RAID 10, and RAID 5 can provide faster read and write speeds by distributing data across multiple drives.
Data Redundancy: RAID levels like RAID 1, RAID 5, RAID 6, and RAID 10 ensure that data is preserved even in case of hardware failure.
Capacity Expansion: RAID allows you to combine multiple drives into one logical unit, increasing storage capacity.
Disadvantages of RAID:
Cost: More drives are required, which increases hardware costs.
Complexity: RAID configurations can be complex to set up and maintain, especially for advanced RAID levels.
Single Point of Failure: If the RAID controller fails in some systems, the entire array could be lost.
Not a Backup Solution: RAID is not a replacement for backups. Data corruption or accidental deletion won’t be prevented by RAID alone.
In summary, RAID offers a range of benefits from performance improvements to data protection, but the right choice depends on your specific needs—whether you prioritize speed, redundancy, or a balance of both.
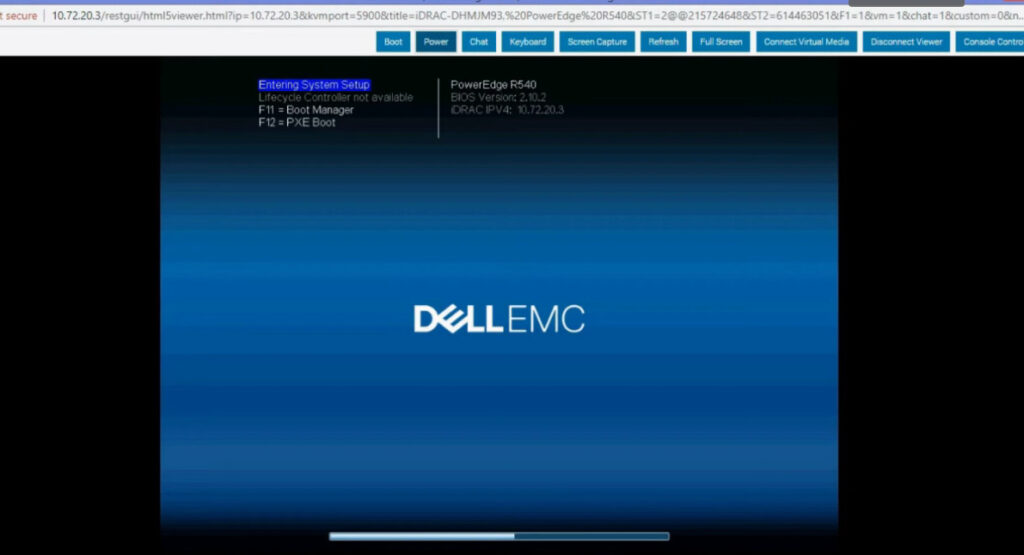
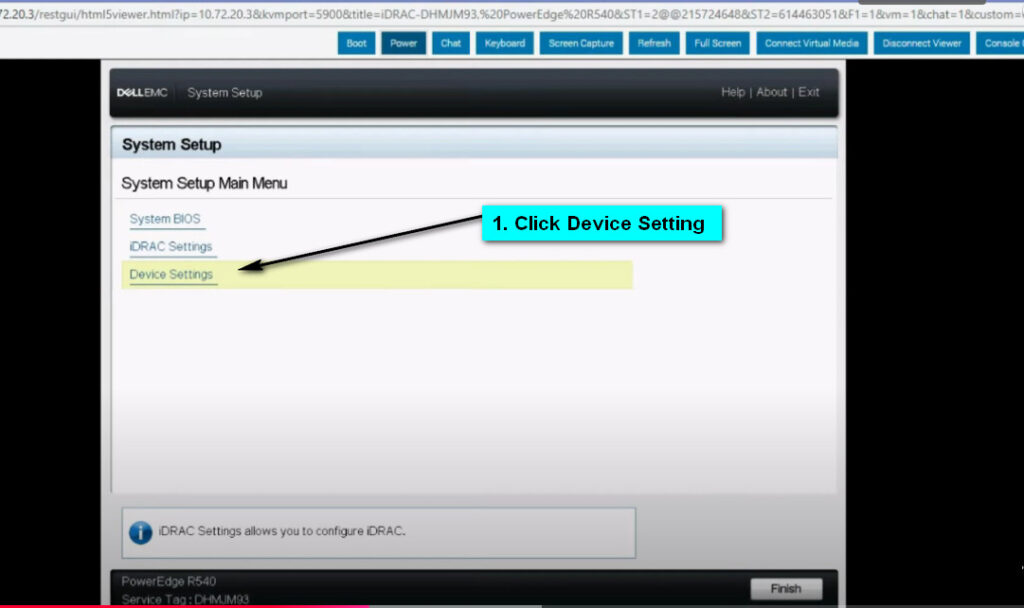
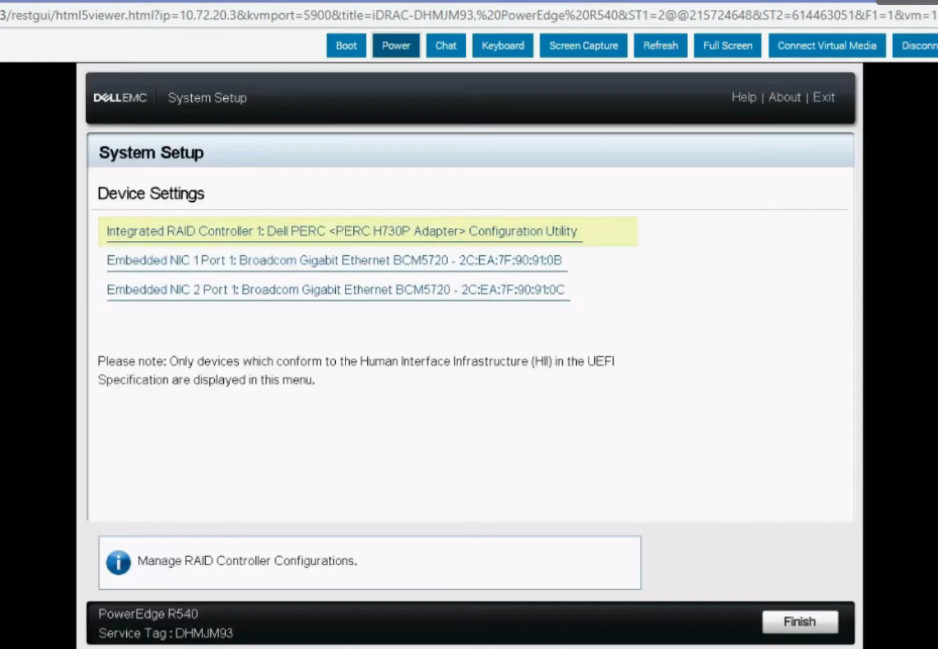
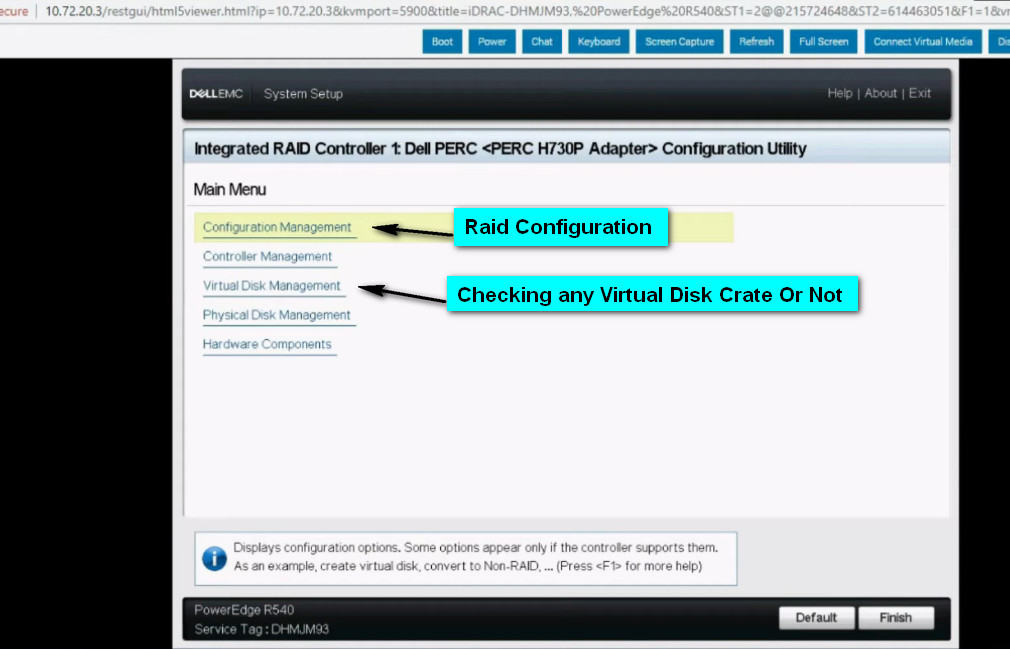
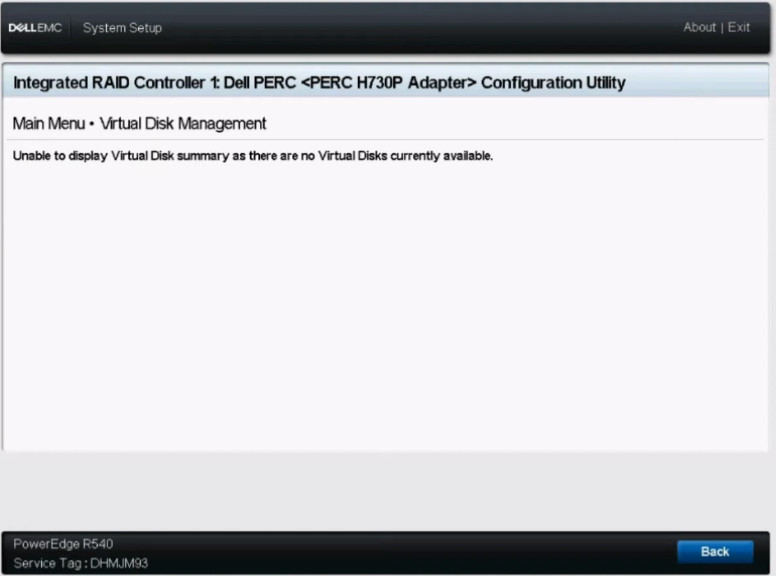
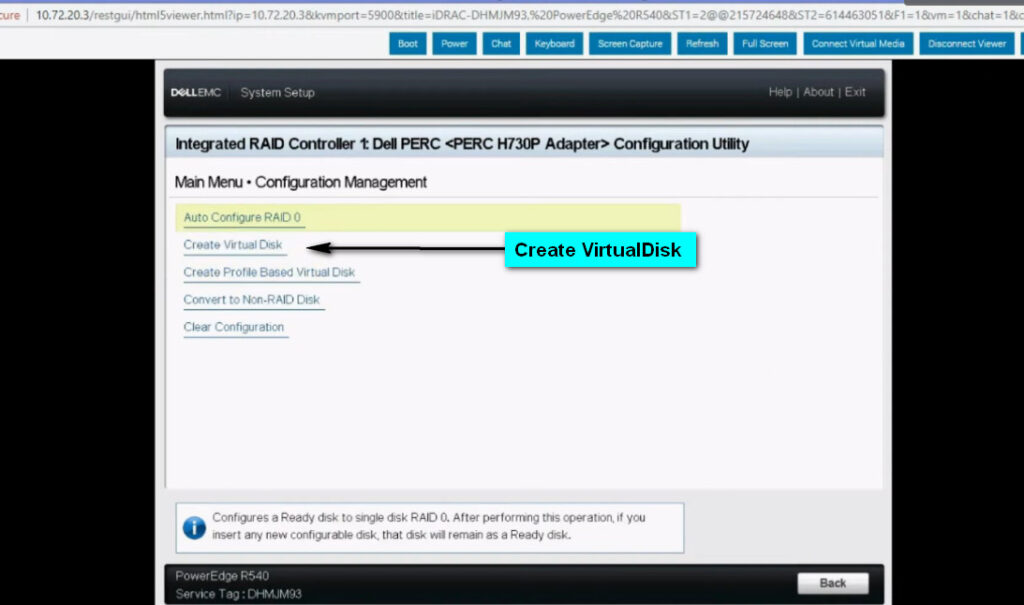
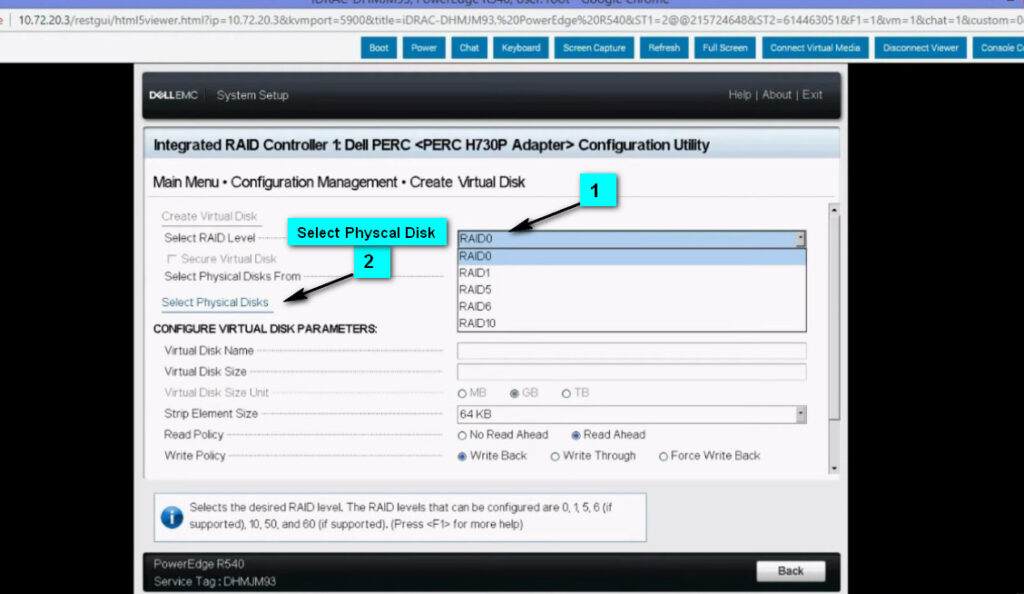
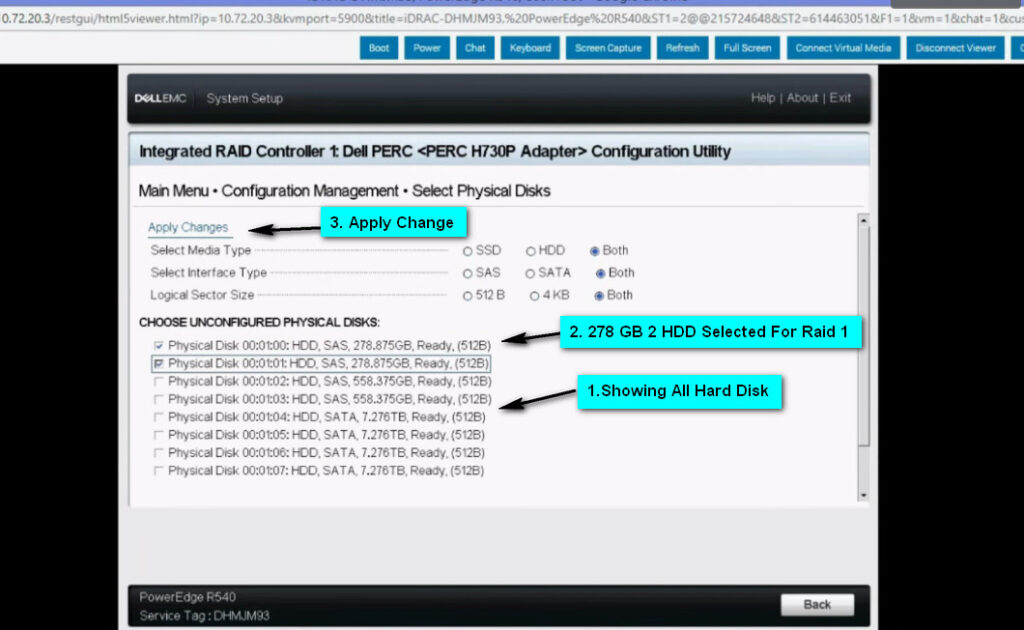
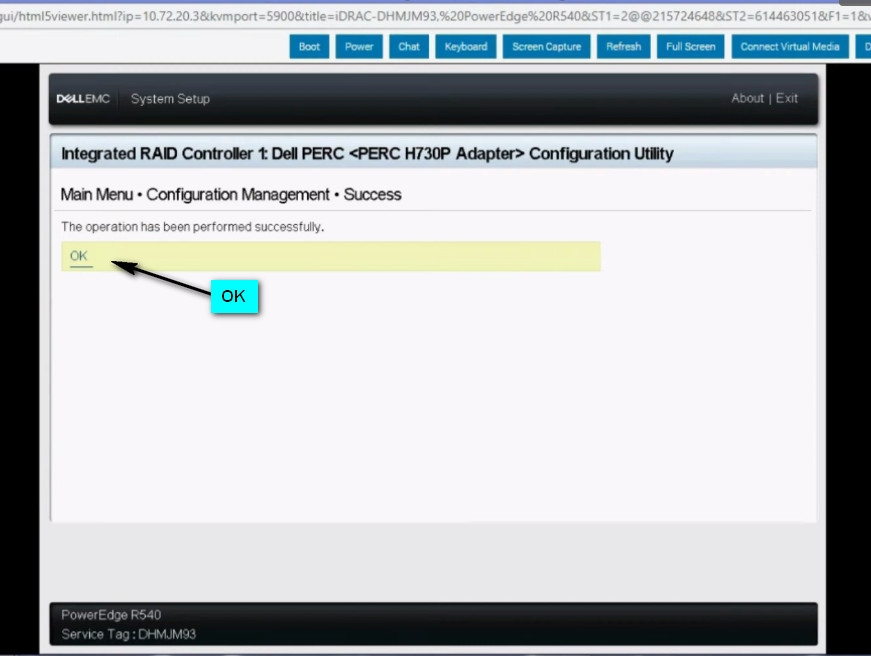
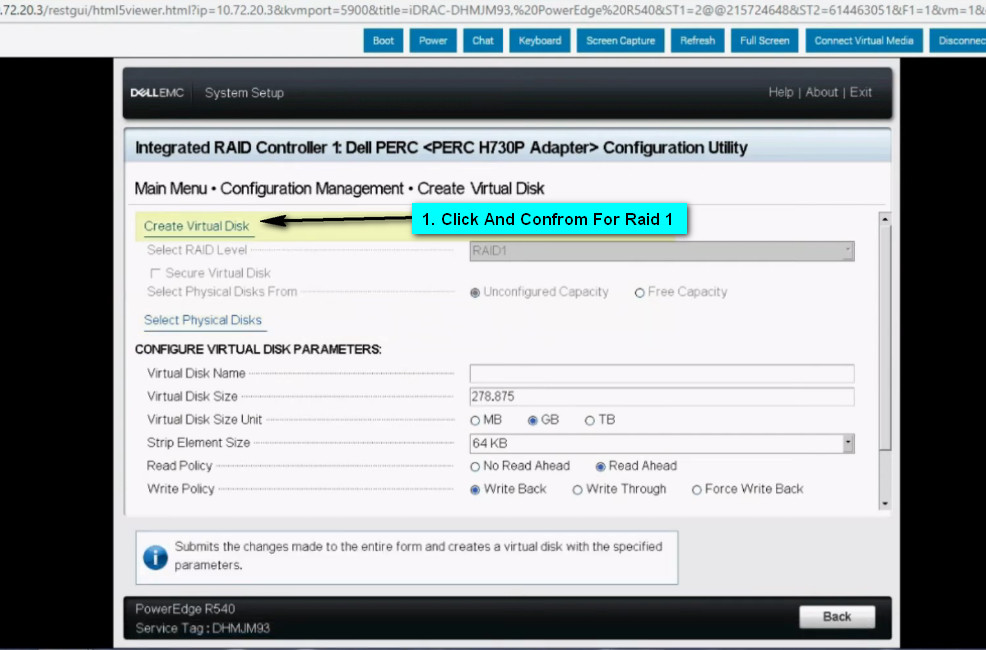
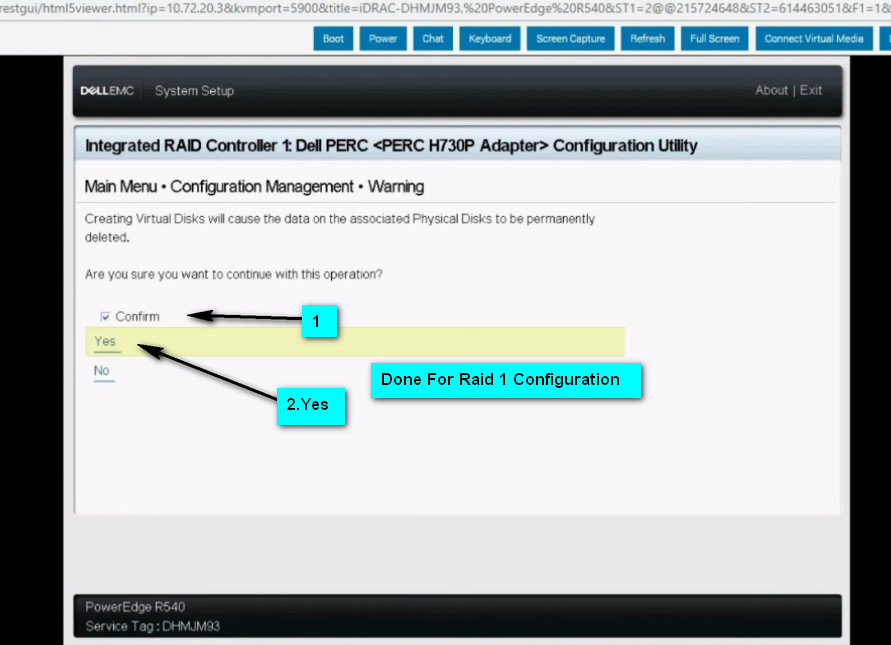
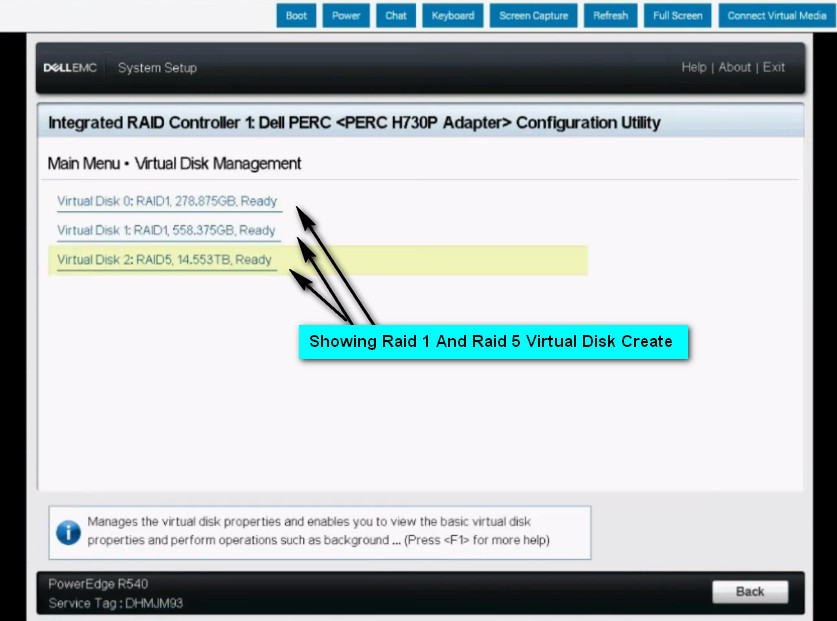
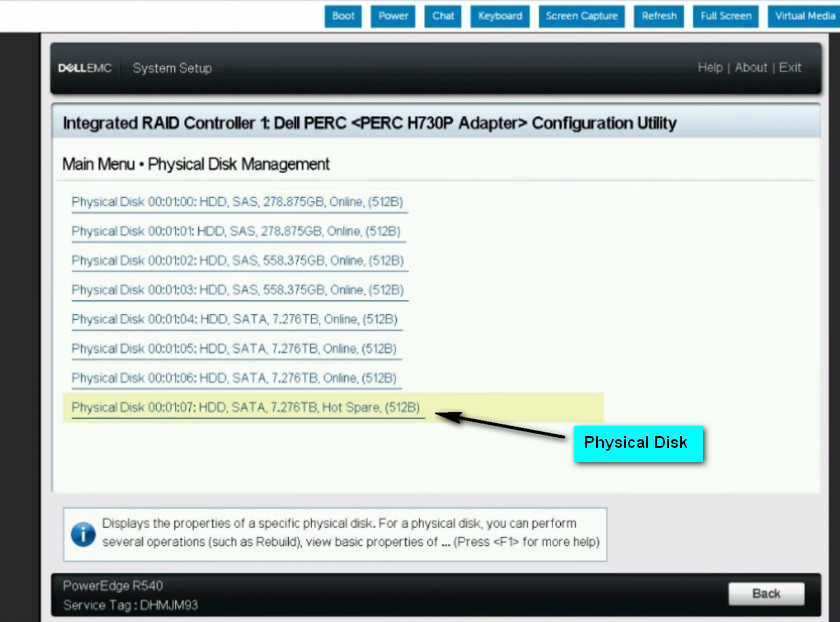
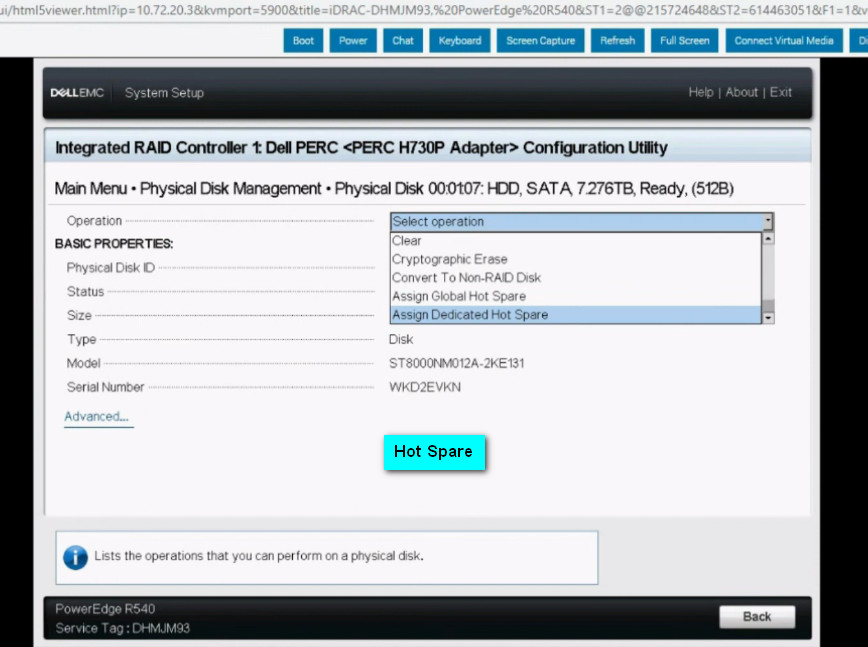
Configure RAID1,5 in Dell Servers through IDRAC
Power On Dell Servers
Press F2 Key For BIOS Setting
How to Set Up Software RAID in Windows Server
About software RAID
RAID is a technology that allows a volume (partition) uses together with the space on the multiple disks, in this way, disk’s utilization and system performance can be improved. There are a variety of different types and implementations of RAID, each with its own advantages and disadvantages. In the IT world, hardware failure does not occur often, but in the event, the running server may lose large amounts of important data. How to protect server data? Many users choose to use RAID to deal with the risk of hardware failures. Usually, RAID 1 and RAID 5 are widely used to solve the risk problem of server data storage.
Hardware RAID can be implemented by requiring high hardware requirements, in the form of special disk controllers, but also needs computer motherboard support. This means it takes a high cost to set up hardware RAID. Software RAID is well supported by the operating system, which is implemented by OS kernel module, and no required extraordinary hardware. It is the best choice for common personal users and server users. Usually, Windows Professional Edition and Windows Server Edition systems can support it. It is a trend, and you can flexibly set up software RAID via Windows Disk Manager.
How to set up software RAID 1 step by step?
RAID 1 is usually implemented as mirroring, is a fault-tolerant volume that duplicates data on two different physical disks. Software RAID 1 is supported on dynamic disks and provides data redundancy by using two identical copies (mirrors) of the volume. If either drive fails, the other continues to work as a single drive until the failed drive is replaced. Conceptually simple, RAID 1 is popular for those who require fault tolerance and don’t need top-notch read performance.
You can accomplish RAID 1 configuration on Server 2000/2003/2008/2011/2012 and Windows 7/8 Ultimate Edition, except for Windows 2000 Professional, XP, and Vista. However, you can use a computer that is running XP Professional to setup mirrored volumes on remote computers that are running Windows 2000 Server, Windows 2000 Advanced Server, or Windows 2008 Datacenter Server, or the equivalent versions of Windows Server 2003.
At the same time, the implementation of software RAID1 is based on two dynamic disks. One stores the data which is being used, and another keeps a copy of the previous one. If your disks not dynamic, please see “Regarding Basic Disk convert to Dynamic Disk” for more information. To set up software RAID, do as following:
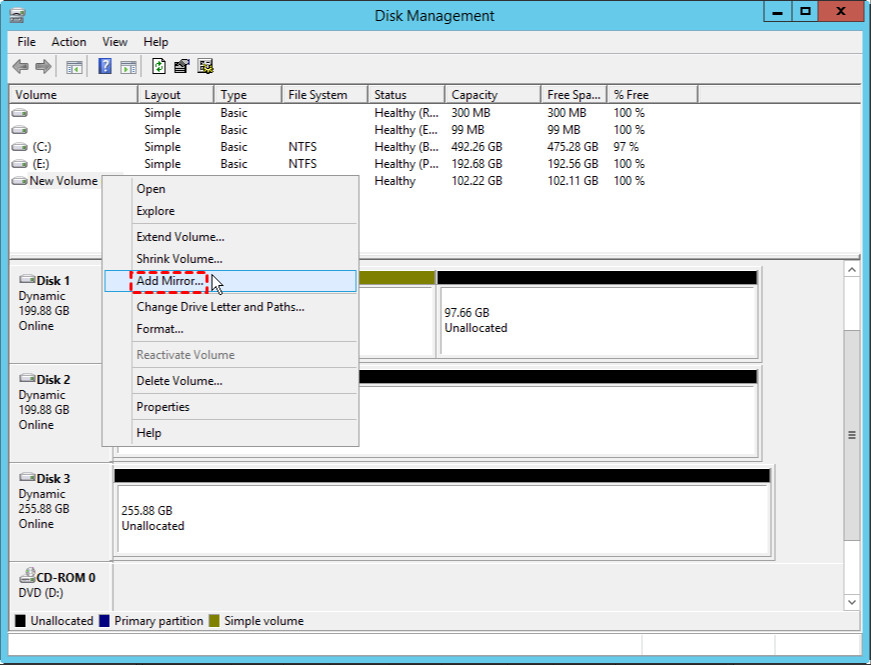
1. Open Server Disk Management. Right-click one of the volumes on the dynamic disk and select the “Add Mirror”
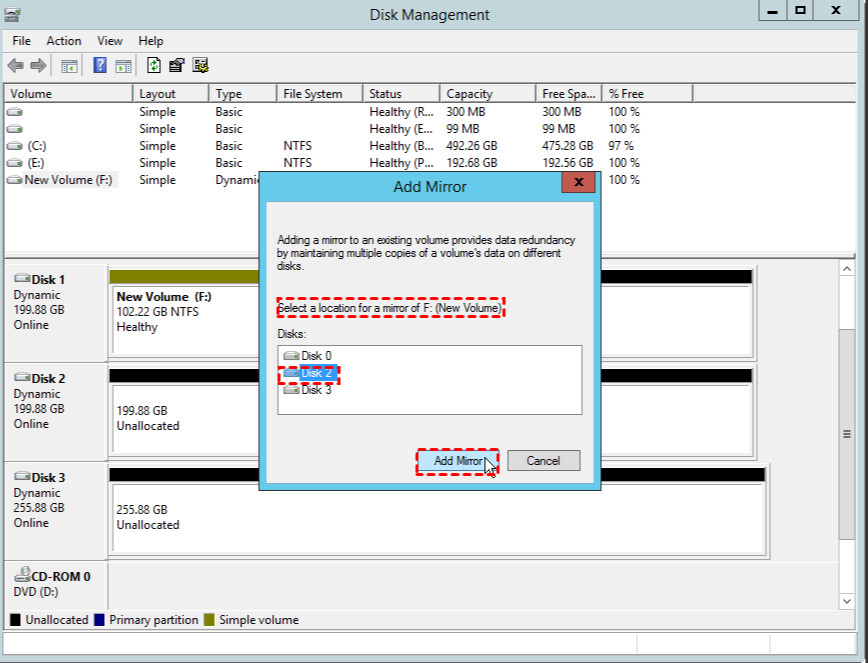
2. Then, open a window. Please tick another dynamic disk, and click “Add Mirror” button:
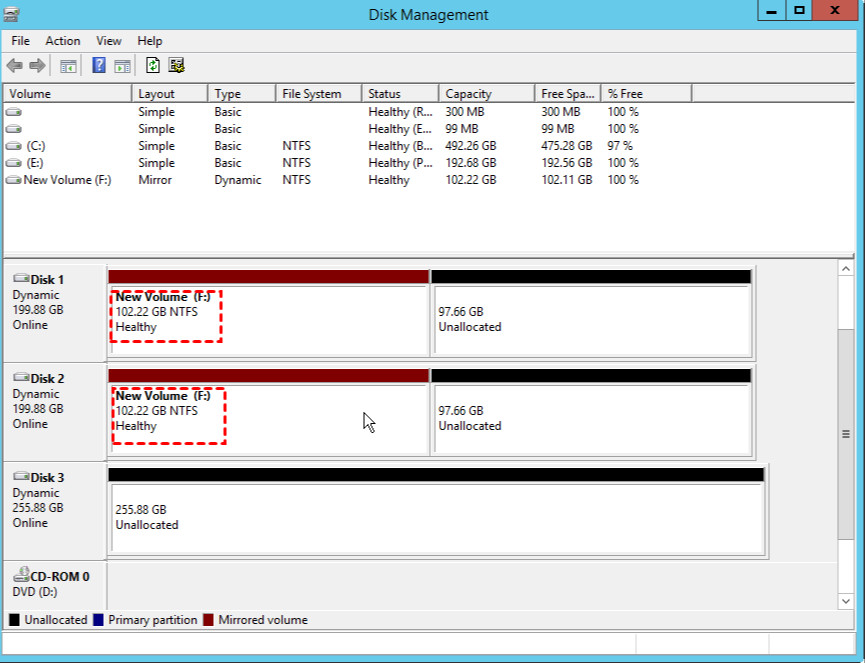
3. After completing, you will see the following screen.
In software RAID 1, due to some reasons, you may need to convert dynamic disk back to basic disk. To convert dynamic disk back to basic in Server Disk Manager, you have to delete all existing partitions before conversion. To do the conversion without removing partitions or losing data, you can try the Dynamic Disk Converter of AOMEI Partition Assistant Server.
How to set up software RAID 5?
A software RAID 5 requires three disks at least; it not only can enhance the efficiency of the disk but also provide the best fault-tolerant. A RAID 5 is a fault-tolerant volume in which the data is striped across an array of three or more disks. Parity (a calculated value that can be used to reconstruct data after a failure) is also striped across the disk array. If a physical disk fails, the portion of the RAID 5 that was on that failed disk can be recreated from the remaining data and the parity.
The following is how to set up software RAID5.
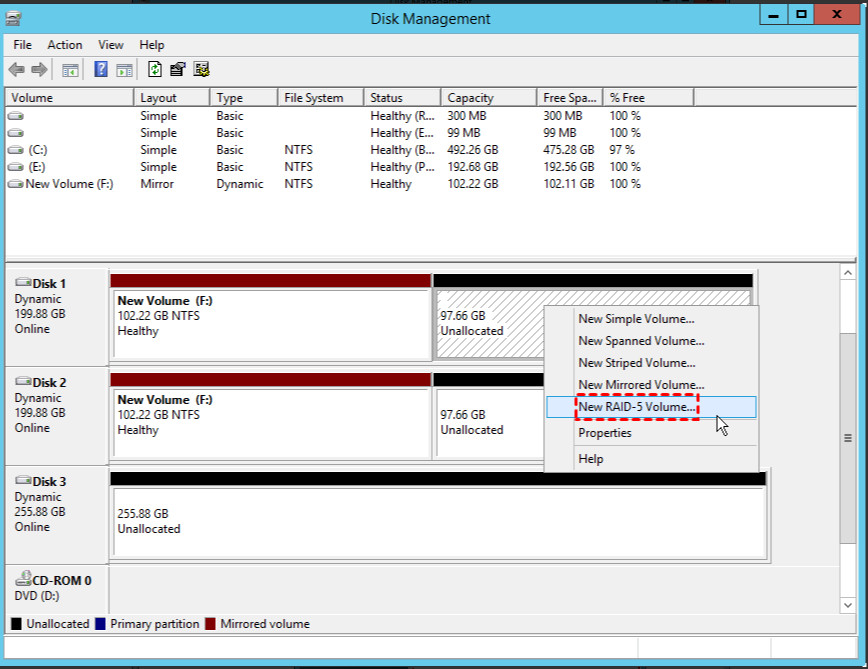
1. Right-click the unallocated space and choose “New RAID-5 Volume”.
2. Then click on the “Next” in the pop-out “New RAID-5 Volume Wizard”.
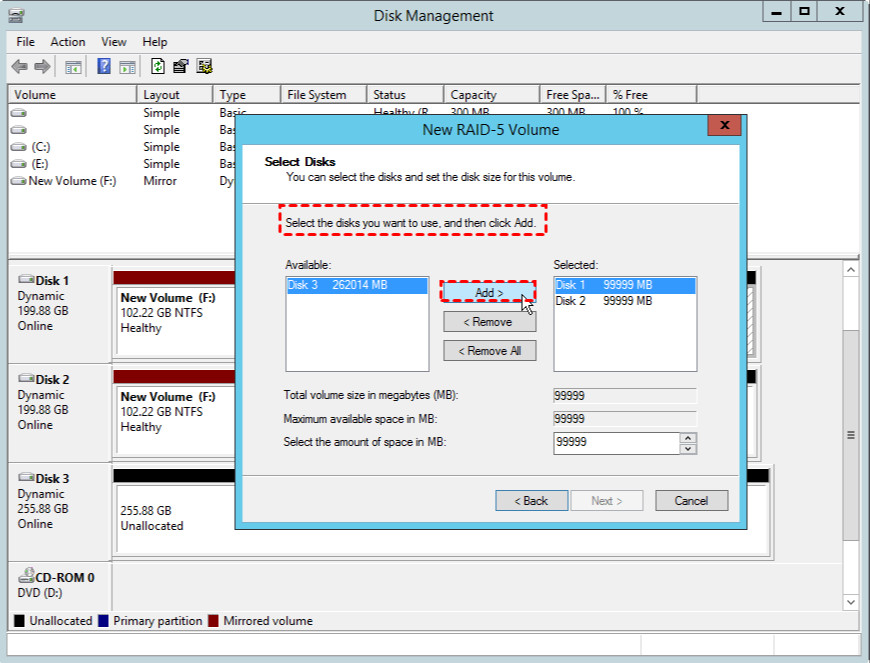
3. Then select the disks you want to use for creating RAID-5 volumes, and click on “Next”. At least 3 disk will be required.
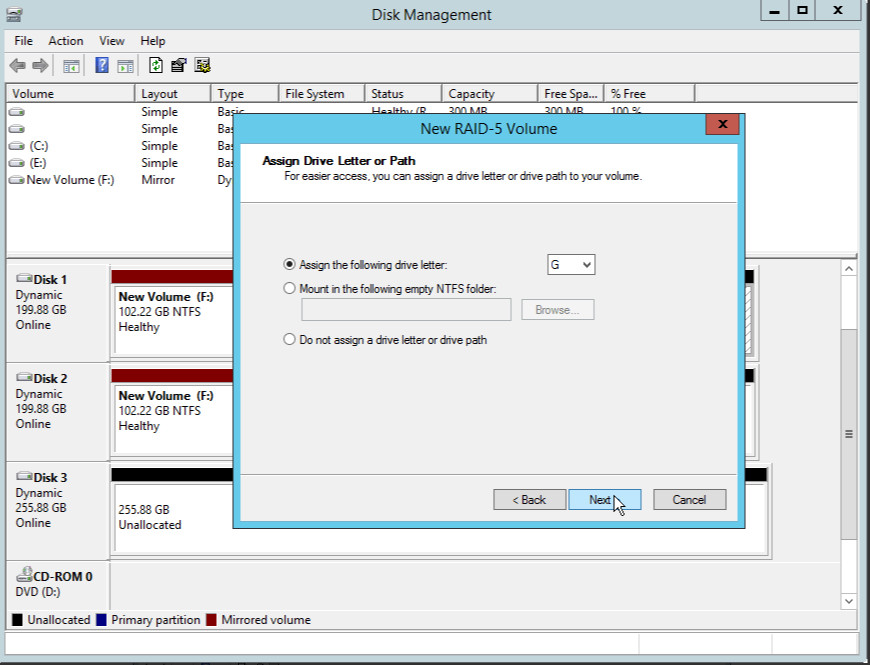
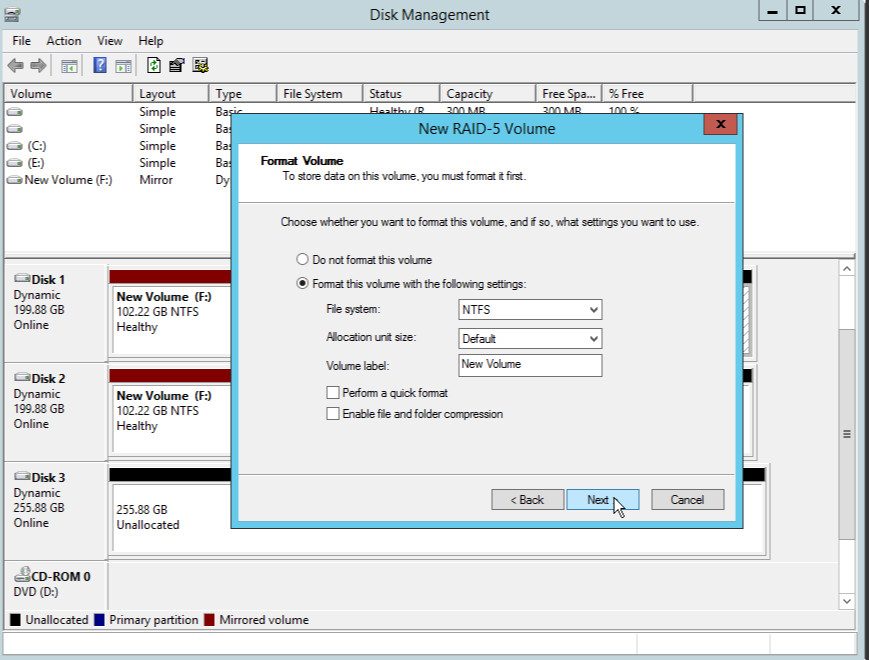
4. Now, you can assign a drive letter to the RAID 5 volume and format the volume and click on “Next”.