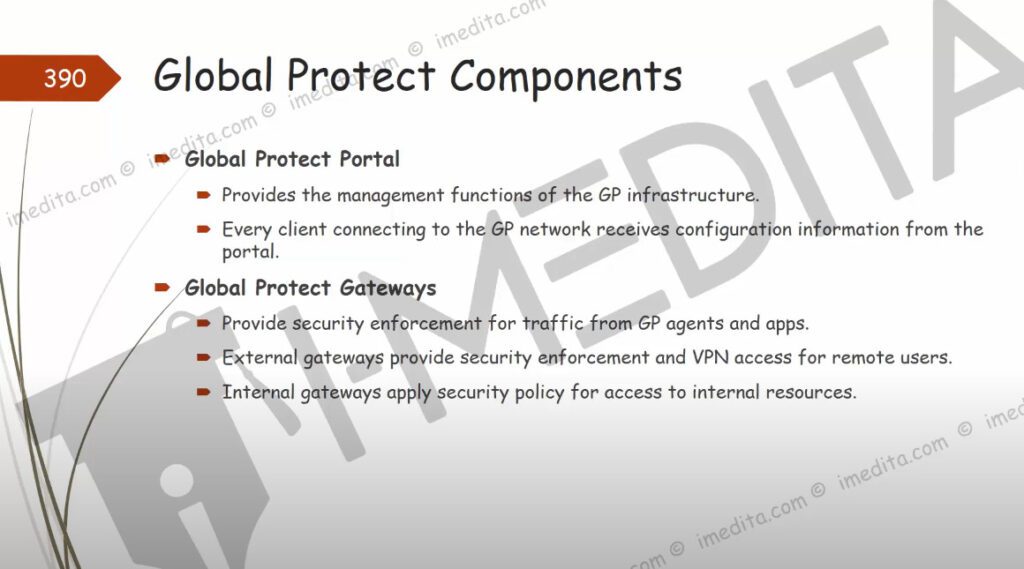
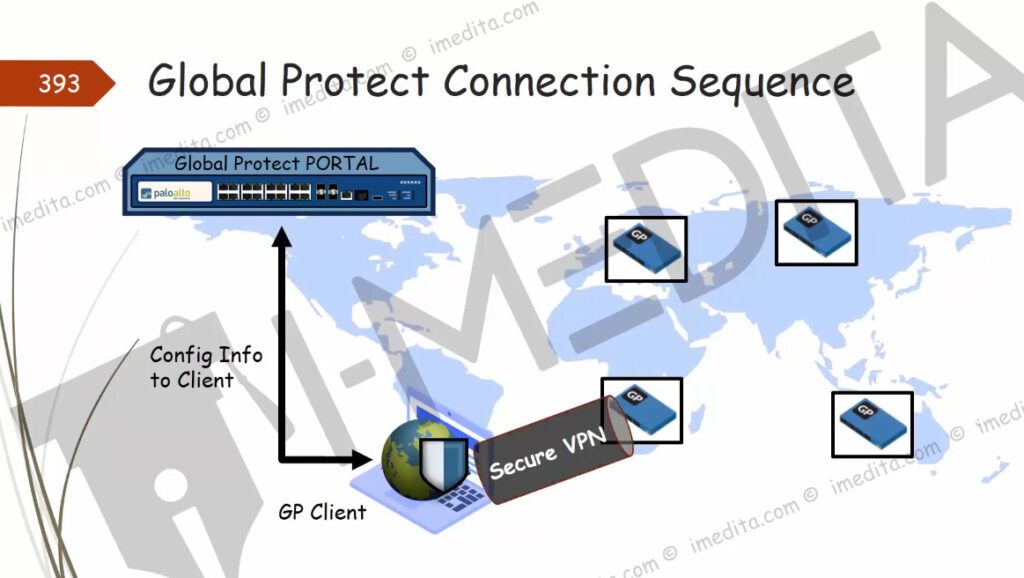
GlobalProtect Portal—Provides the management functions for your GlobalProtect LSVPN infrastructure. Every satellite that participates in the GlobalProtect LSVPN receives configuration information from the portal, including configuration information to enable the satellites (the spokes) to connect to the gateways (the hubs). You configure the portal on an interface on any Palo Alto Networks Next-Generation Firewall.
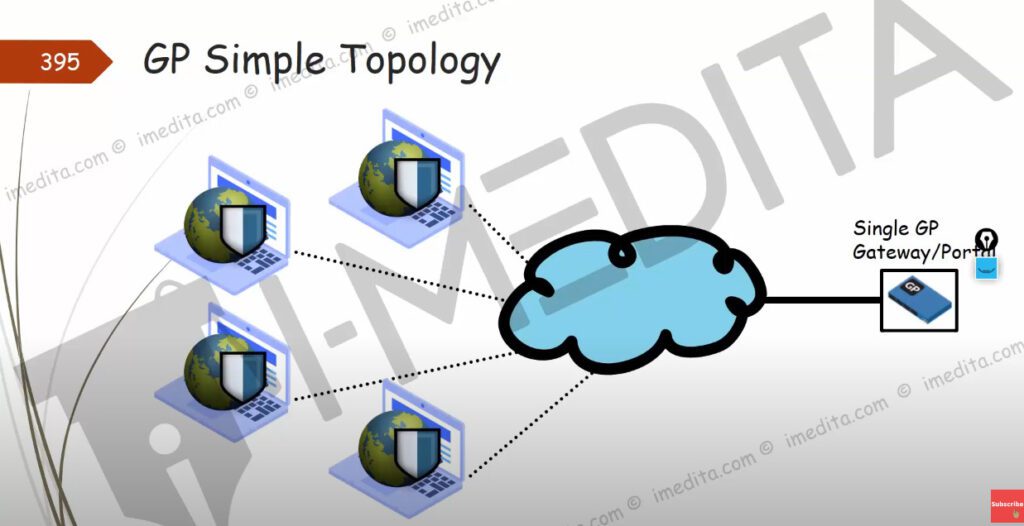
GlobalProtect Gateways—A Palo Alto Networks firewall that provides the tunnel endpoint for satellite connections. The Satellites access resources that you protect using Security policy rules on the gateway. It isn’t required to have a separate portal and gateway; a single firewall can function both as portal and gateway.
GlobalProtect Satellite—A Palo Alto Networks firewall at a remote site that establishes IPSec tunnels with one or more gateways at your corporate office(s) for secure access to centralized resources. Configuration on the satellite firewall is minimal, enabling you to scale your VPN quickly and easily as you add new sites.
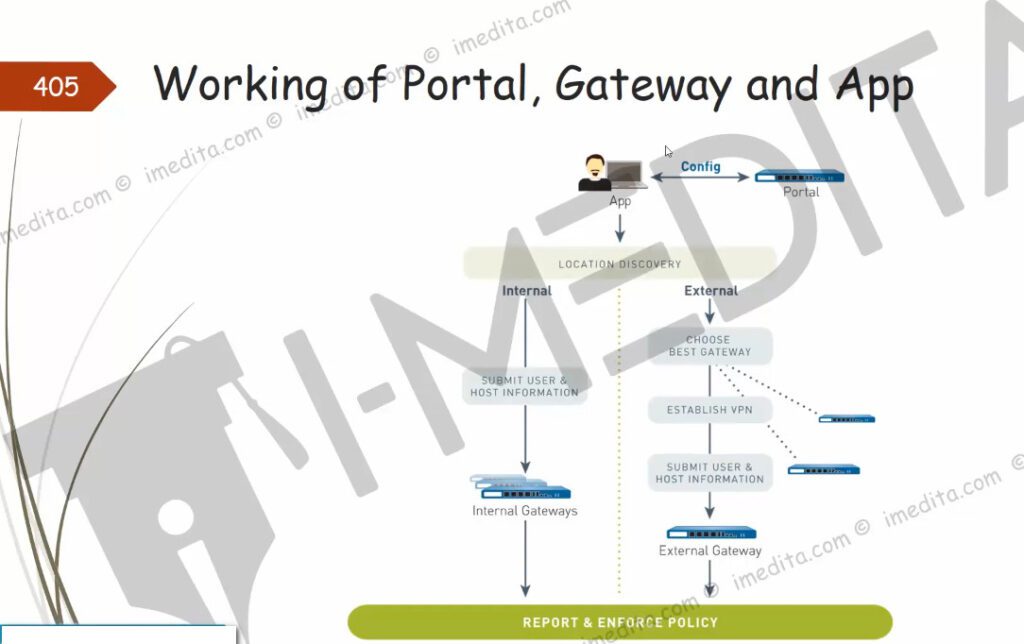
The following diagram illustrates how the GlobalProtect LSVPN components work together.
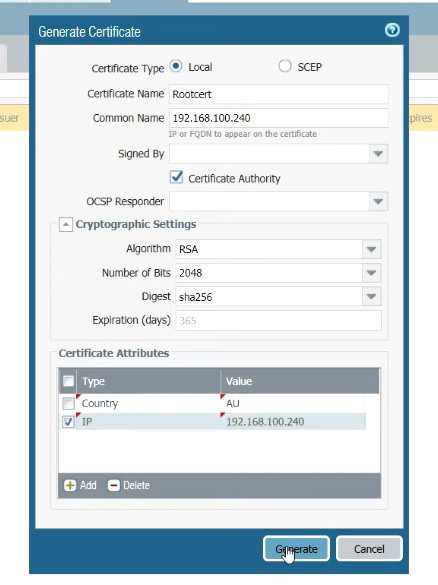
Step 1.Generating a Self-Sign Certificate for GlobalProtect. Click on Device >> Certificate Management >> Certificates >> Device Certificates >> Generate. Now, just fill the Certificate filed as per the instruction appears on screen.
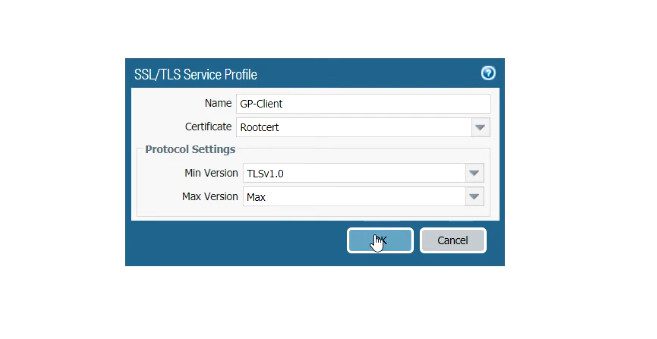
Step 2. Creating an SSL/TLS Service Profile.
Click on Device >> Certificate Management >> SSL/TLS Service Profile >> Add. Select the certificate of TLS.
Step 3. Creating Local Users for GlobalProtect VPN Authentication.
Click on Device >> Local User Database >> Users and click on Add.
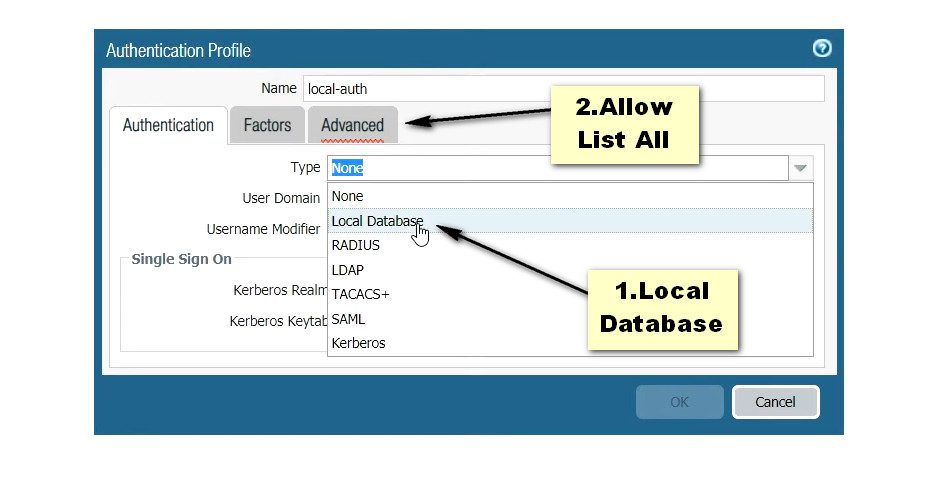
Step 4. Creating Authentication Profile for GlobalProtect VPN.
Click on Device >> Authentication Profile and click on Add. Open the Advanced tab and add users to Allow List.
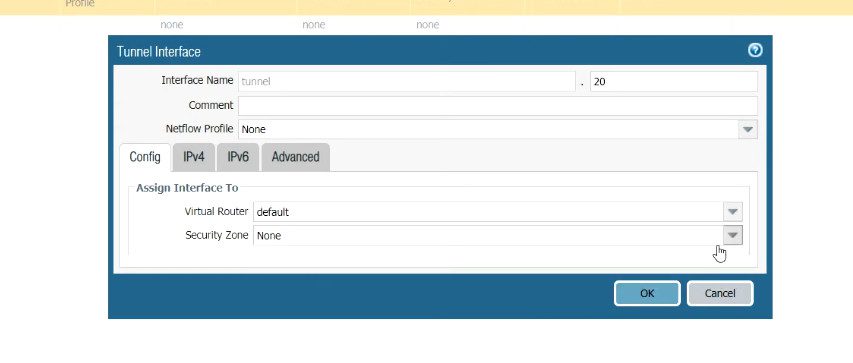
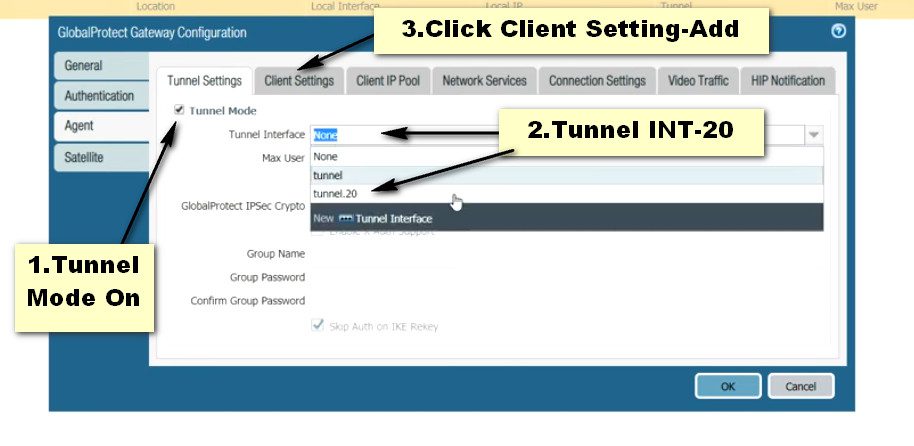
Step 5. Creating a tunnel interface for GlobalProtect.
Click on Network >> Interfaces >> Tunnel >> Add, to create a tunnel interface.
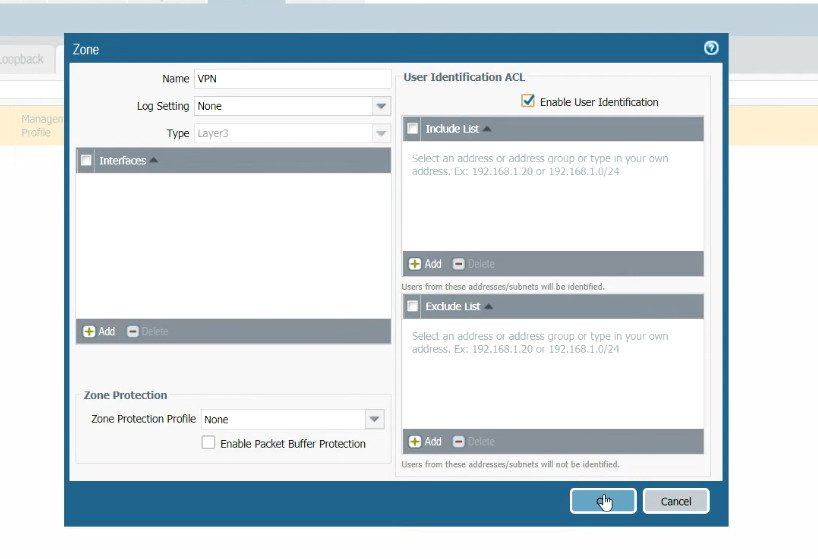
Step 5. Creating a zone for GlobalProtect VPN Traffic.
To create Security Zone, click on Network >> Zones >> Add.
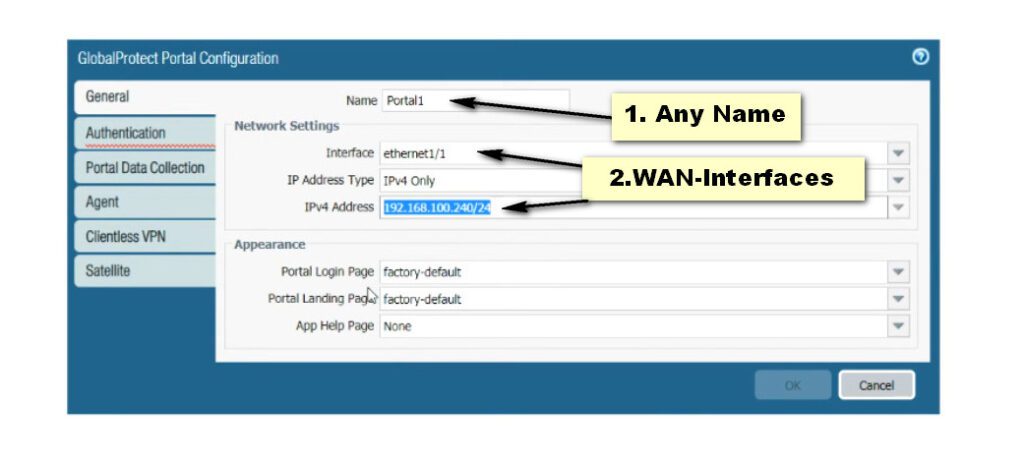
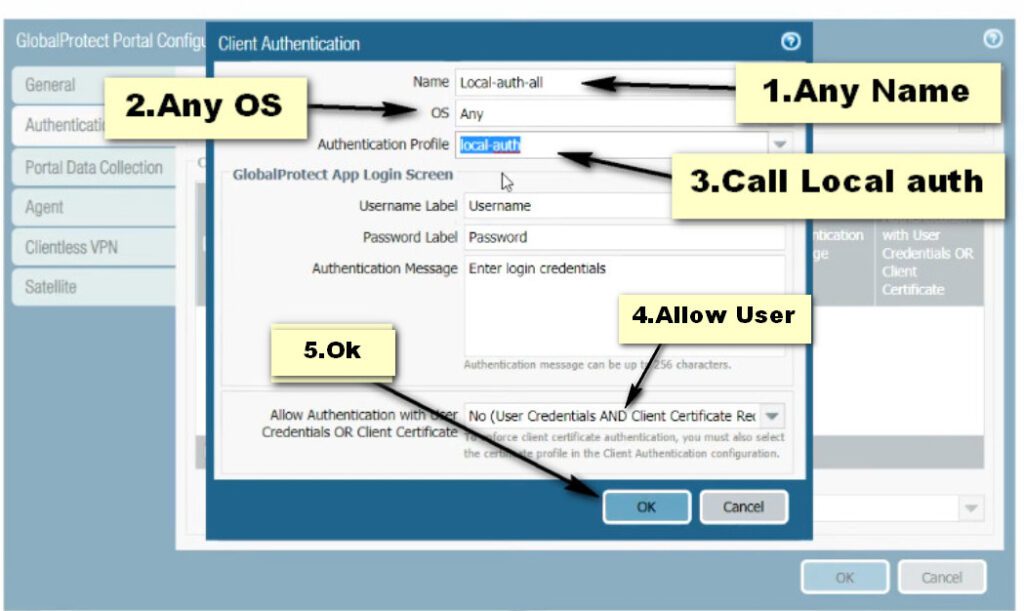
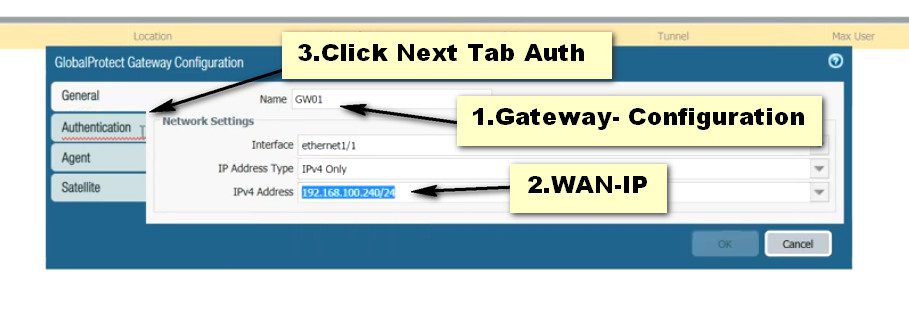
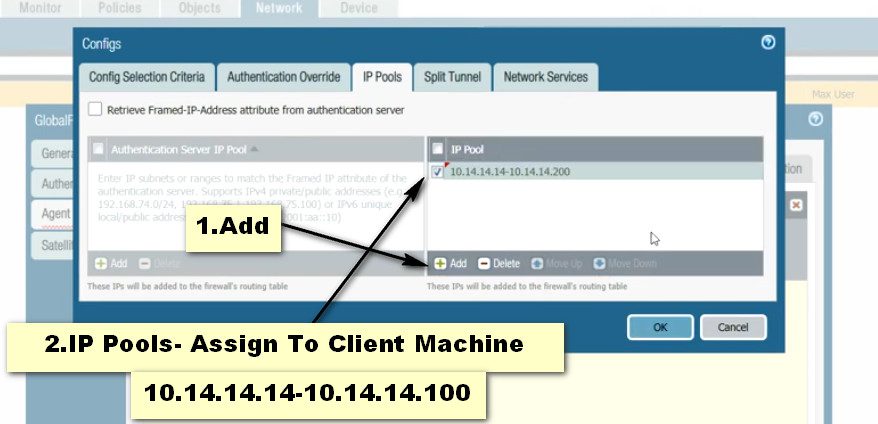
Step 7. Portal Configuration for GlobalProtect.
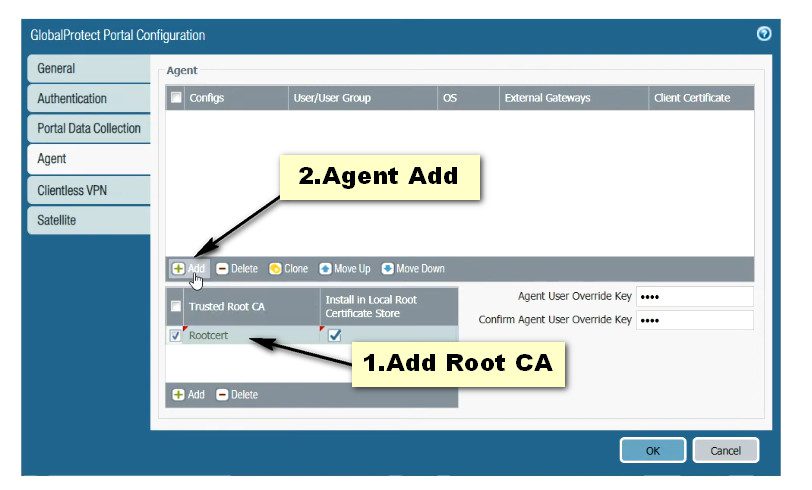
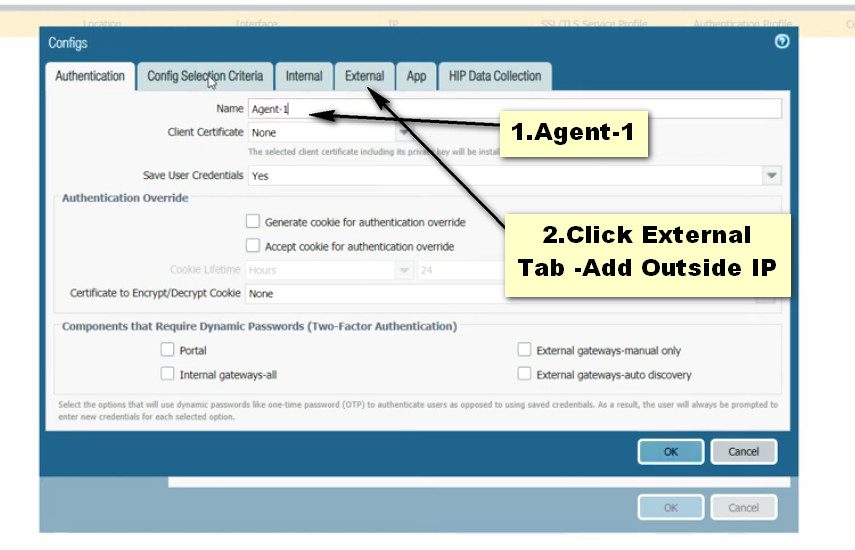
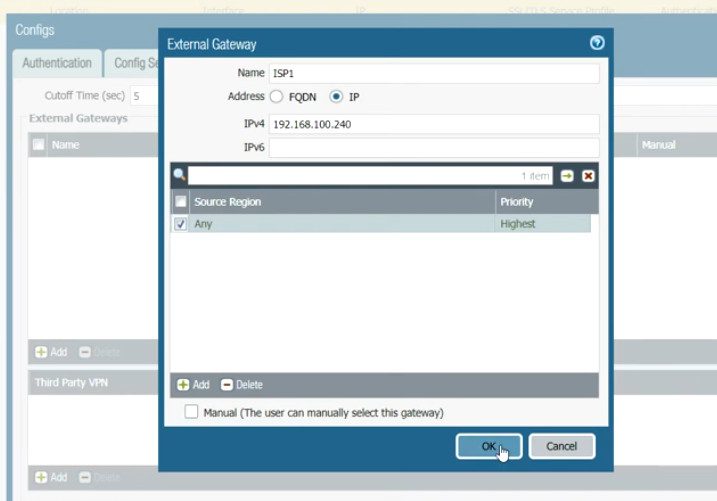
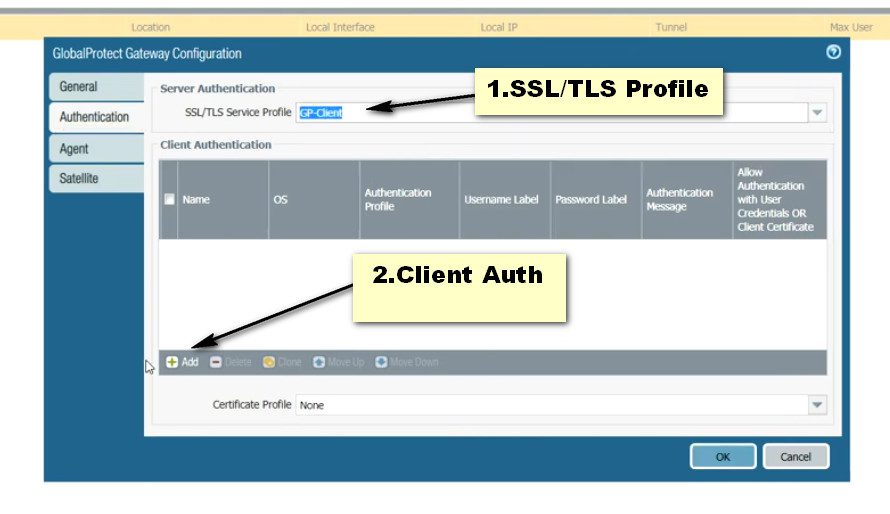
Click on the GlobalProtect >> Portals >> Add. Open the General tab and Provide the name for GloablProtect Portal Configuration. Open the Authentication Tab, open the SSL/TLS service profile which you are created in Step 2. In Client Authentication, click on ADD. Now, Open the Agent tab, and select the Trusted RootCA (created in Step 1) and check the option “Install in Local Root Certificate Store” Open the User/User Group tab and choose OS and User/User Group you have on your environment. Open the External tab and Add an External Gateway. Enter the Name to External Gateway and provide IP, Source Region and Priority details and click OK.