Creating an effective AntiSpyware security profile in Palo Alto Networks can help protect your network from spyware and other malicious software. Here’s a general guide on how to configure it:
Steps to Configure AntiSpyware Security Profile
Log in to the Palo Alto Networks Firewall: Access the web interface using your admin credentials.
Navigate to the Security Profiles:
Go to Objects > Security Profiles > Anti-Spyware.
Create a New Profile:
Click on Add to create a new Anti-Spyware profile.
Give your profile a meaningful name.
Configure Settings:
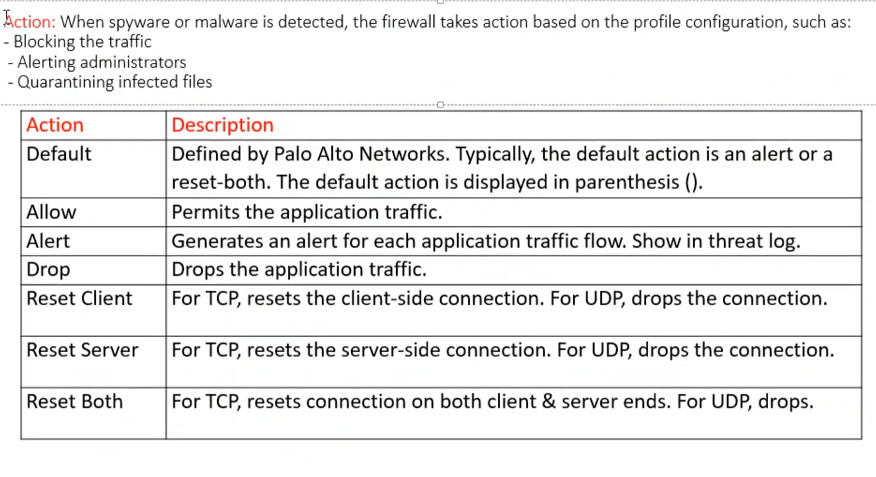
Actions: Set actions for detected threats (e.g., alert, block, reset).
Logging: Enable logging for traffic matched by the profile for better visibility.
Advanced Options: Configure specific settings like:
Packet Capture: Enable if you want to capture packets related to detected spyware.
Custom URL Categories: Add or edit categories as needed.
Enable Specific Signatures:
Review the default signatures and enable or disable them based on your organizational needs.
Apply the Profile to Security Policies:
Go to Policies > Security.
Select the relevant security rule(s) and attach the AntiSpyware profile you just created.
Commit the Changes:
Click on Commit to apply your changes to the firewall.
Monitor and Review:
Regularly check the logs and monitor for any alerts or blocks related to spyware.
Best Practices
Regular Updates: Ensure that your signature database is updated regularly to protect against new threats.
Review Logs: Periodically review logs for any suspicious activity.
Integrate with Other Security Profiles: Consider using in conjunction with other profiles like Antivirus, Vulnerability Protection, and URL Filtering for a comprehensive security approach.