- 8777701917
- info@saikatinfotech.com
- Basirhat W.B

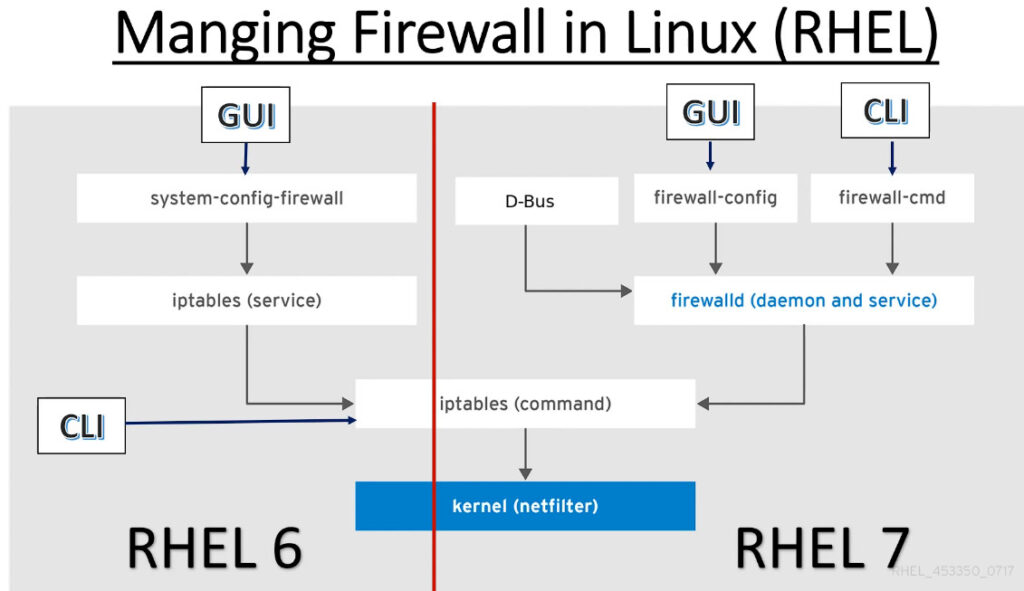
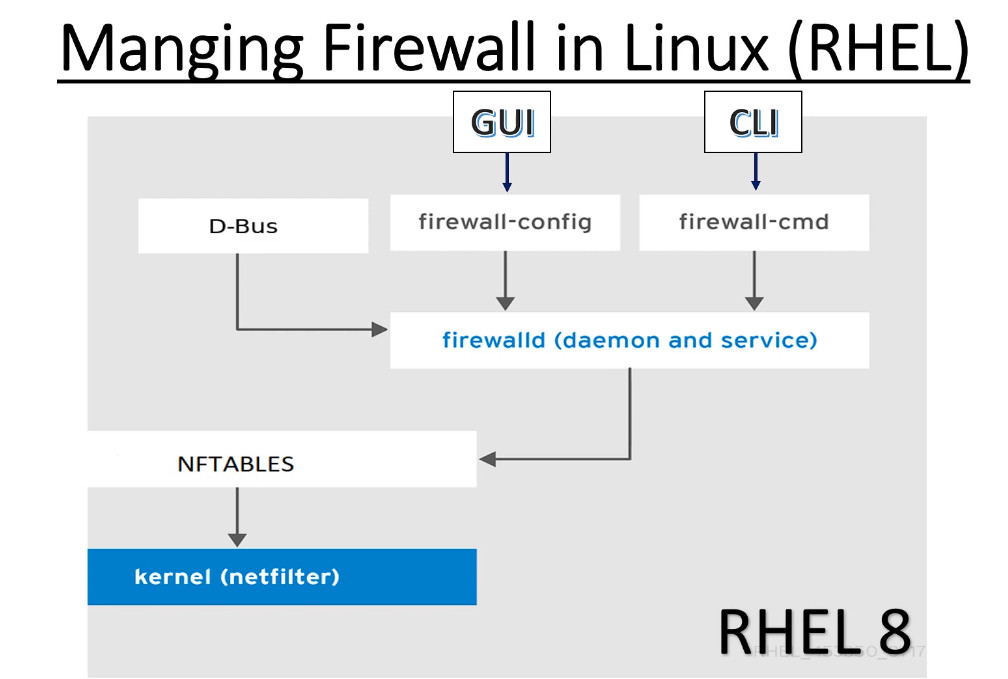
Basic Concepts in Firewalld
Before we begin talking about how to actually use the firewall-cmd utility to manage your firewall configuration, we should get familiar with a few basic concepts that the tool introduces.
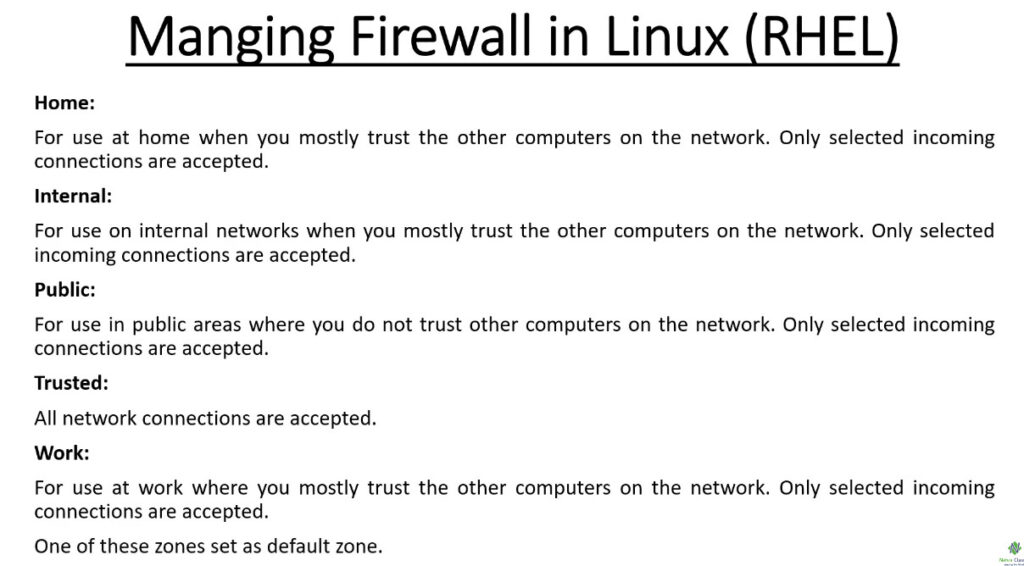
The firewalld daemon manages groups of rules using entities called “zones”. Zones are basically sets of rules dictating what traffic should be allowed depending on the level of trust you have in the networks your computer is connected to. Network interfaces are assigned a zone to dictate the behavior that the firewall should allow.
For computers that might move between networks frequently (like laptops), this kind of flexibility provides a good method of changing your rules depending on your environment. You may have strict rules in place prohibiting most traffic when operating on a public WiFi network, while allowing more relaxed restrictions when connected to your home network. For a server, these zones are not as immediately important because the network environment rarely, if ever, changes.
Regardless of how dynamic your network environment may be, it is still useful to be familiar with the general idea behind each of the predefined zones for firewalld. In order from least trusted to most trusted, the predefined zones within firewalld are:
icmp-host-prohibited or icmp6-adm-prohibited message.To use the firewall, we can create rules and alter the properties of our zones and then assign our network interfaces to whichever zones are most appropriate.
Rule Permanence
In firewalld, rules can be designated as either permanent or immediate. If a rule is added or modified, by default, the behavior of the currently running firewall is modified. At the next boot, the modifications will be thrown out and the old rules will be applied.
Most firewall-cmd operations can take the --permanent flag to indicate that the non-ephemeral firewall should be targeted. This will affect the rule set that is reloaded upon boot. This separation means that you can test rules in your active firewall instance and then reload if there are problems. You can also use the --permanent flag to build out an entire set of rules over time that will all be applied at once when the reload command is issued.
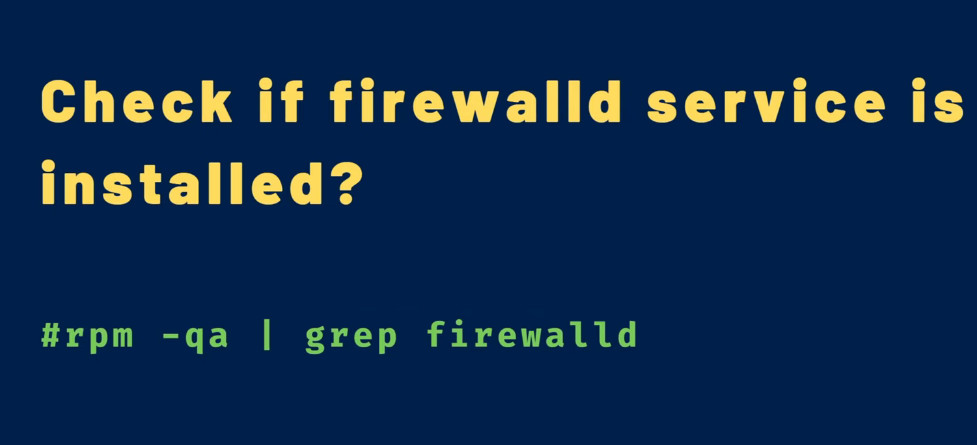
Install and Enable Your Firewall to Start at Boot
sudo yum install firewalld
sudo systemctl enable firewalld
sudo reboot
We can verify that the service is running and reachable by typing
sudo firewall-cmd –state
We can see which zone is currently selected as the default by typing
firewall-cmd –get-default-zone
Since we haven’t given firewalld any commands to deviate from the default zone, and none of our interfaces are configured to bind to another zone, that zone will also be the only “active” zone (the zone that is controlling the traffic for our interfaces). We can verify that by typing:
firewall-cmd –get-active-zones
Here, we can see that our example server has two network interfaces being controlled by the firewall (eth0 and eth1). They are both currently being managed according to the rules defined for the public zone.
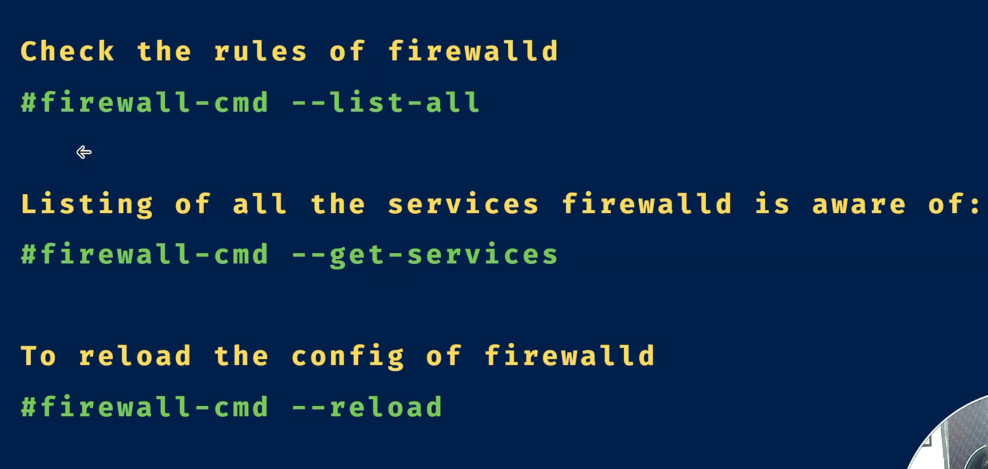
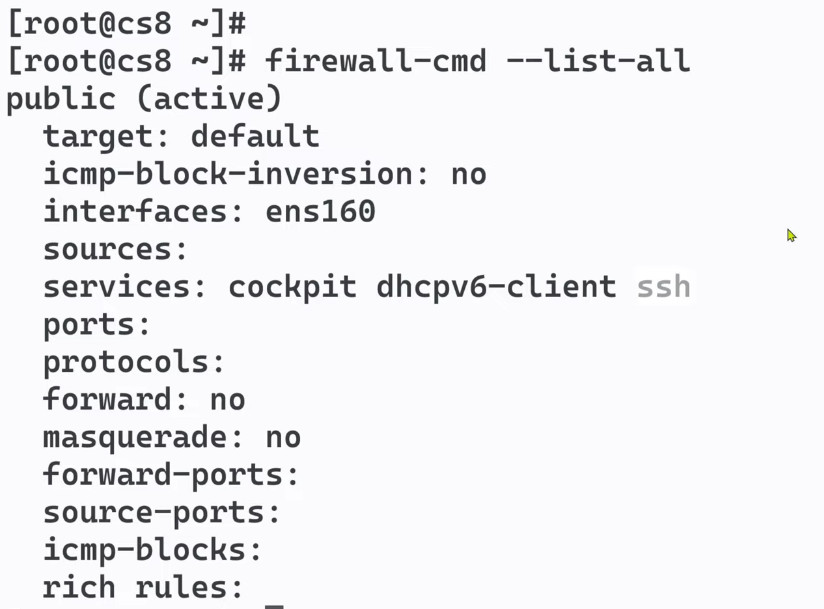
How do we know what rules are associated with the public zone though? We can print out the default zone’s configuration by typing:
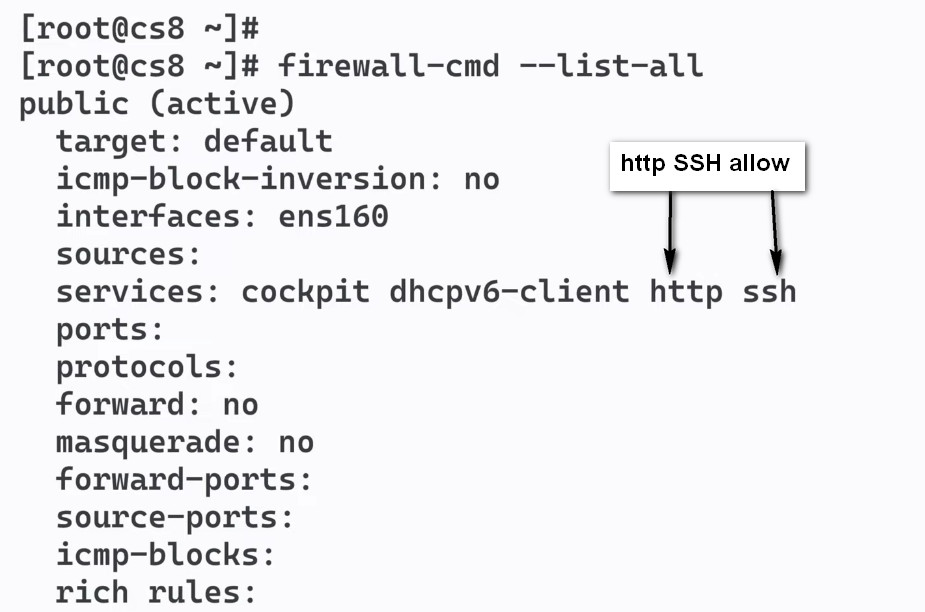
sudo firewall-cmd –list-all
To get a list of the available zones, type:
firewall-cmd –get-zones
Output
public
interfaces: eth0 eth1
Here, we can see that our example server has two network interfaces being controlled by the firewall (eth0 and eth1). They are both currently being managed according to the rules defined for the public zone.
How do we know what rules are associated with the public zone though? We can print out the default zone’s configuration by typing:
sudo firewall-cmd –list-all
We can tell from the output that this zone is both the default and active and that the eth0 and eth1 interfaces are associated with this zone (we already knew all of this from our previous inquiries). However, we can also see that this zone allows for the normal operations associated with a DHCP client (for IP address assignment) and SSH (for remote administration).
Exploring Alternative Zones
Now we have a good idea about the configuration for the default and active zone. We can find out information about other zones as well.
To get a list of the available zones, type:
firewall-cmd –get-zones
Output
block dmz drop external home internal public trusted work
We can see the specific configuration associated with a zone by including the --zone= parameter in our --list-all command:
sudo firewall-cmd –zone=home –list-all
You can output all of the zone definitions by using the --list-all-zones option. You will probably want to pipe the output into a pager for easier viewing:
sudo firewall-cmd –list-all-zones | less
Selecting Zones for your Interfaces
Unless you have configured your network interfaces otherwise, each interface will be put in the default zone when the firewall is booted.
Changing the Zone of an Interface
You can transition an interface between zones during a session by using the –zone= parameter in combination with the –change-interface= parameter. As with all commands that modify the firewall, you will need to use sudo.
For instance, we can transition our eth0 interface to the “home” zone by typing this:
sudo firewall-cmd –zone=home –change-interface=eth0
We can verify that this was successful by asking for the active zones again:
firewall-cmd –get-active-zones
Output
home
interfaces: eth0
public
interfaces: eth1
Adjusting the Default Zone
If all of your interfaces can best be handled by a single zone, it’s probably easier to select the best default zone and then use that for your configuration.
You can change the default zone with the –set-default-zone= parameter. This will immediately change any interface that had fallen back on the default to the new zone:
sudo firewall-cmd –set-default-zone=home
Output
success
Setting Rules for your Applications
The basic way of defining firewall exceptions for the services you wish to make available is fairly straightforward. We’ll run through the basic idea here.
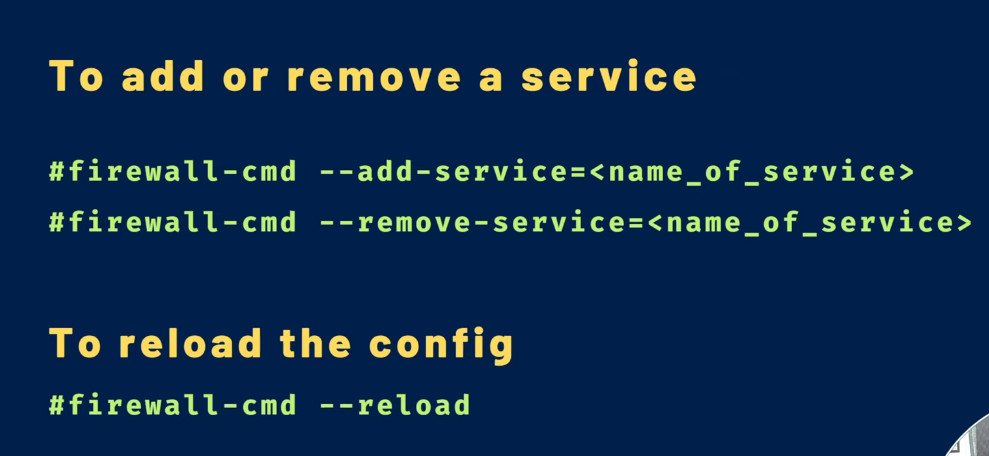
Adding a Service to your Zones
The simplest method is to add the services or ports you need to the zones you are using. Again, you can get a list of the available services with the –get-services option:
firewall-cmd –get-services
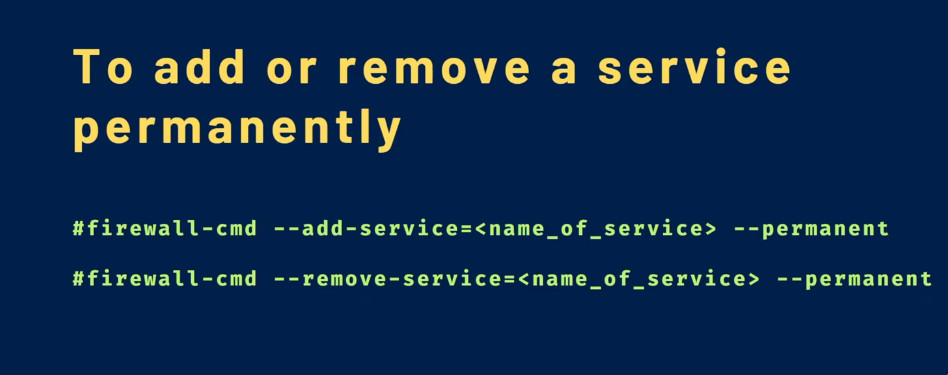
You can enable a service for a zone using the --add-service= parameter. The operation will target the default zone or whatever zone is specified by the --zone= parameter. By default, this will only adjust the current firewall session. You can adjust the permanent firewall configuration by including the --permanent flag.
For instance, if we are running a web server serving conventional HTTP traffic, we can allow this traffic for interfaces in our “public” zone for this session by typing:
sudo firewall-cmd –zone=public –add-service=http
You can leave out the --zone= if you wish to modify the default zone. We can verify the operation was successful by using the --list-all or --list-services operations:
sudo firewall-cmd –zone=public –list-services
Output
dhcpv6-client http ssh
Once you have tested that everything is working as it should, you will probably want to modify the permanent firewall rules so that your service will still be available after a reboot. We can make our “public” zone change permanent by typing:
sudo firewall-cmd –zone=public –permanent –add-service=http
Output
success
You can verify that this was successful by adding the --permanent flag to the --list-services operation. You need to use sudo for any --permanent operations:
sudo firewall-cmd –zone=public –permanent –list-services
Output
dhcpv6-client http ssh
Your “public” zone will now allow HTTP web traffic on port 80. If your web server is configured to use SSL/TLS, you’ll also want to add the https service. We can add that to the current session and the permanent rule-set by typing:
sudo firewall-cmd –zone=public –add-service=https
sudo firewall-cmd –zone=public –permanent –add-service=https
What If No Appropriate Service Is Available?
The firewall services that are included with the firewalld installation represent many of the most common requirements for applications that you may wish to allow access to. However, there will likely be scenarios where these services do not fit your requirements.
In this situation, you have two options.
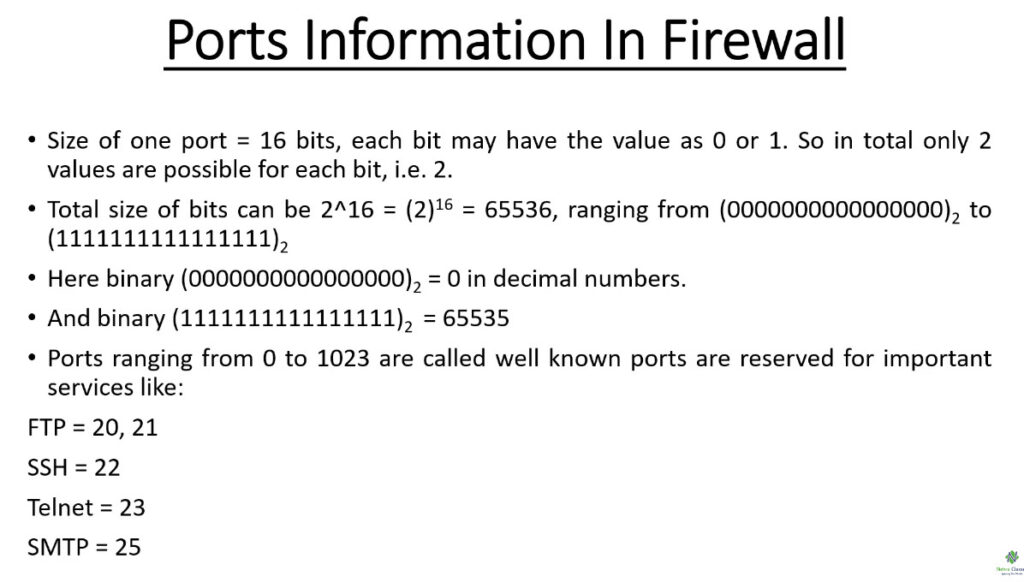
Opening a Port for your Zones
One way to add support for your specific application is to open up the ports that it uses in the appropriate zone(s). This is done by specifying the port or port range, and the associated protocol for the ports you need to open.
For instance, if our application runs on port 5000 and uses TCP, we could add this to the “public” zone for this session using the –add-port= parameter. Protocols can be either tcp or udp:
sudo firewall-cmd –zone=public –add-port=5000/tcpOutput
Output
success
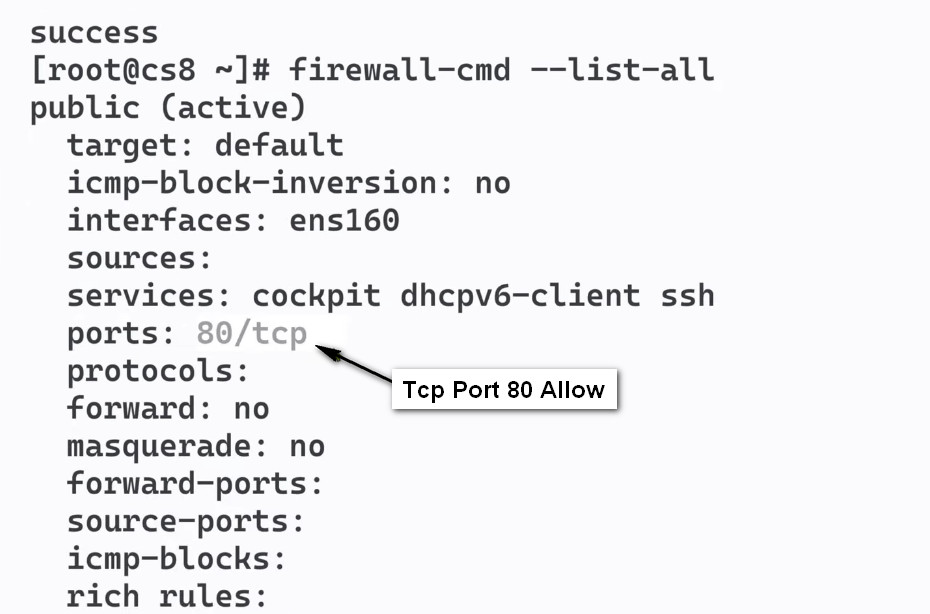
We can verify that this was successful using the –list-ports operation:
sudo firewall-cmd –zone=public –list-ports
Output
5000/tcp
It is also possible to specify a sequential range of ports by separating the beginning and ending port in the range with a dash. For instance, if our application uses UDP ports 4990 to 4999, we could open these up on “public” by typing:
sudo firewall-cmd –zone=public –add-port=4990-4999/udp
After testing, we would likely want to add these to the permanent firewall. You can do that by typing:
sudo firewall-cmd –zone=public –permanent –add-port=5000/tcp
sudo firewall-cmd –zone=public –permanent –add-port=4990-4999/udp
sudo firewall-cmd –zone=public –permanent –list-ports
Output
success
success
5000/tcp 4990-4999/udp
Start and Enable Firewalld
systemctl start firewalld
systemctl enable firewall
Stop and Disable Firewalld
systemctl stop firewalld
systemctl disable firewalld
Checking the status of Firewalld
firewall-cmd –state
View the status of the FirewallD daemon
systemctl status firewalld
To reload a FirewallD configuration:
firewall-cmd –reload
Firewall Zones
Zones are a predefined set of rules for various scenarios. Different zones allow different network services and incoming traffic types while denying everything else. Zones can also be applied to other network interfaces. For example, with separate interfaces for both an internal and the Internet, you can allow DHCP on an internal zone but only HTTP and SSH on an external zone.
To view the default zone:
firewall-cmd –get-default-zone
Changing the default Zone of firewalld
firewall-cmd –set-default-zone=internal
View the Zones in use
firewall-cmd –get-active-zones
Example output:
public
interfaces: eth0
Get configurations for all zones
firewall-cmd –list-all-zones
View default available services
firewall-cmd –get-services
Let us now see how to enable a service. We will try to enable the HTTP service.
firewall-cmd –zone=public –add-service=http –permanent
Disable the HTTP service
firewall-cmd –zone=public –remove-service=http –permanent
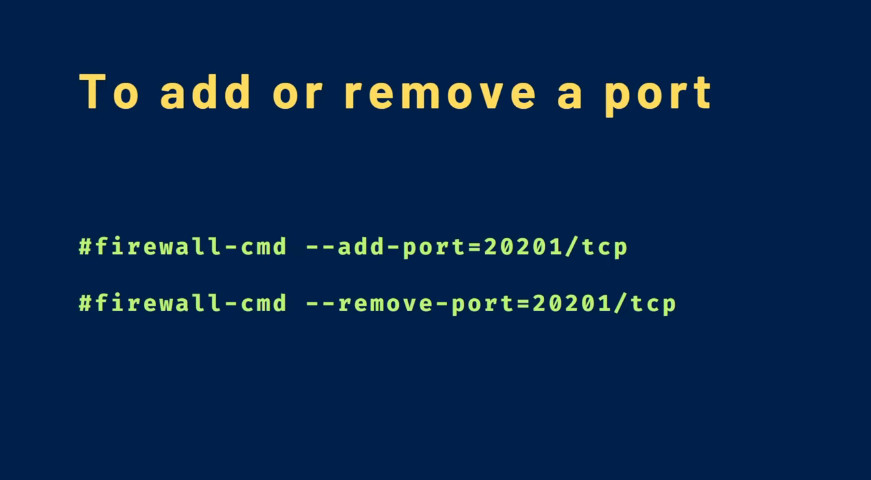
Allowing or Denying an Arbitrary Port/Protocol
With an example, let us see how to allow or disable TCP traffic on port 12345.
firewall-cmd –zone=public –add-port=12345/tcp –permanent
firewall-cmd –zone=public –remove-port=12345/tcp –permanent
Permenant rule for HTTP and HTTPS
Reload FirewallD so the rules take effect immediately:
firewall-cmd –reload
firewall-cmd –zone=dmz –list-all
Allow traffic from a particular host
Allowing all IPv4 traffic from host 198.10.10.0
firewall-cmd –zone=public –add-rich-rule ‘rule family=”ipv4″ source address=198.10.10.0 accept’
Allow traffic(TCP) from a host to specific port
Allow IPv4 traffic from host 198.10.10.0 to port 22.
firewall-cmd –zone=public –add-rich-rule ‘rule family=”ipv4″ source address=”198.10.10.0″ port port=22 protocol=tcp accept’
Discard traffic(TCP) from a host
Deny IPv4 traffic over TCP from host 198.10.10.0 to port 22.
firewall-cmd –zone=public –add-rich-rule ‘rule family=”ipv4″ source address=”198.10.10.0″ port port=22 protocol=tcp reject’
Allow traffic(TCP) from a host and forward to different port within system
Allow IPv4 traffic over TCP from host 198.10.10.0 to port 80 and forward it locally to port 6789.
firewall-cmd –zone=public –add-rich-rule ‘rule family=ipv4 source address=198.10.10.0 forward-port port=80 protocol=tcp to-port=6532’
Foward traffic (TCP) from one port to another on a different host
Forward all IPv4 traffic on port 80 to port 8080 on host 198.20.10.0 (masquerade should be active on the zone).
firewall-cmd –zone=public –add-rich-rule ‘rule family=ipv4 forward-port port=80 protocol=tcp to-port=8080 to-addr=198.51.100.0’
Firewall Zone Rules
To see which rules are associated with the default zone, use:
sudo firewall-cmd –list-all
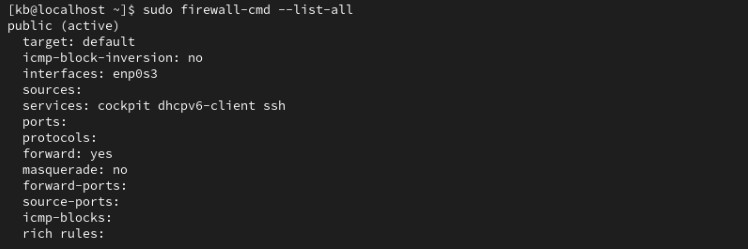
The elements are:
target. Indicates if it is a default zone.icmp-block-inversion. An optional element that inverts ICMP-block handling.interfaces. Lists all network interfaces controlled by this zone.sources. Specifies the sources for this zone (IP addresses).services. Shows allowed services. For example, it shows service names like ssh or dhcpv6-client. For a complete list of services available through firewalld, run: firewall-cmd --get-services.ports. Lists port numbers allowed through the firewall. This is useful for allowing services that are not predefined in firewalld.protocols. Shows the protocols associated with the zone.masquerade. Displays if IP masquerading is enabled. When enabled, it allows IP forwarding, enabling your server to act as a router.forward-ports. Shows a list of all forwarded ports.source-ports. Lists all source ports and protocols relating to this zone.icmp-blocks: Displays blocked ICMP traffic.rich rules. A list with all advanced rules.