- 8777701917
- info@saikatinfotech.com
- Basirhat W.B

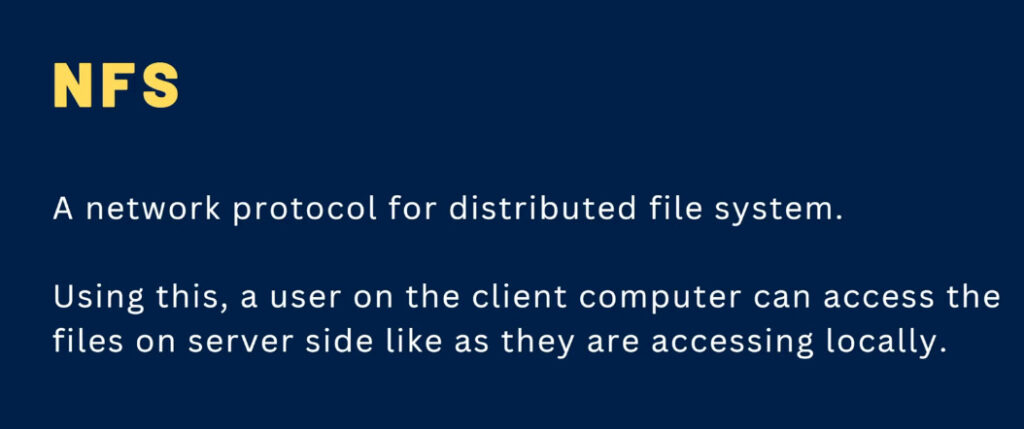
NFS stands for Network File System. It is a protocol that allows computers to share files and directories over a network. NFS enables one computer (the client) to access files on another computer (the server) as though they were stored locally. This system is commonly used in UNIX and Linux environments, though it can be used on other operating systems as well.
Here are some key points about NFS:
File Sharing Over the Network: NFS allows users and programs to access files on remote systems in a similar way they access files on their local system. This makes it convenient for managing and sharing data across different machines.
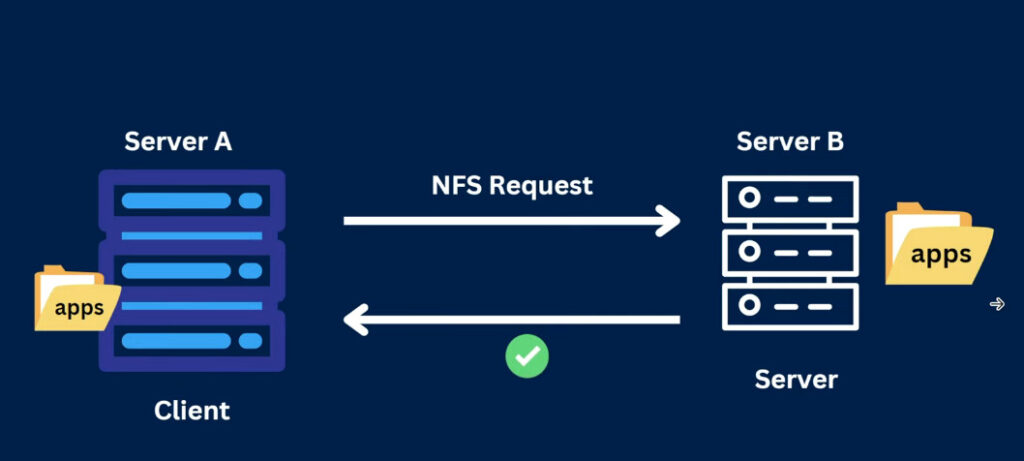
Protocol: NFS operates using a client-server model where the server hosts the file system and the client accesses it over the network. The communication is based on remote procedure calls (RPC).
Versions: The NFS protocol has evolved over time. Some common versions include:
Cross-platform: Although originally designed for UNIX systems, modern versions of NFS can be used on Windows, macOS, and other systems with compatible software.
Security: NFS can use various authentication and encryption mechanisms (such as Kerberos) to enhance security, but traditionally, it has been criticized for not providing strong security by default.
Mounting: Clients use the mount command to access shared directories from an NFS server. Once mounted, the shared directory behaves like a local directory.
In summary, NFS is a protocol used to share file systems over a network, allowing seamless access to remote data.
Network File System (NFS) is a distributed file system protocol that allows you to share files and directories over a network. In a CentOS 9 environment, setting up an NFS server can be essential for facilitating file sharing between server and client systems. This guide will walk you through the process of installing and configuring an NFS server on CentOS 9.
Step 1: Installing NFS Packages
Begin by updating your system’s package index. Then, install the necessary NFS packages:
sudo dnf update
sudo dnf install nfs-utils
Step 2: Configuring the NFS Server
Edit the NFS configuration file to set up the directories you will share:
sudo nano /etc/exports
Add the following lines, adjusting the path and client settings to your requirements:
/sharedirectory clientIP(rw,sync,no_subtree_check)
Replace ‘/sharedirectory’ with the directory you want to share, and ‘clientIP’ with the IP address of the client machine.
Step 3: Exporting the Shared Directory
After configuring your shared directories, export them and restart the NFS service:
sudo exportfs -rav
sudo systemctl restart nfs-server
Step 4: Allowing NFS Through the Firewall
Ensure the firewall allows traffic on the NFS service by adding the necessary rules:
sudo firewall-cmd –permanent –add-service=nfs
sudo firewall-cmd –reload
Step 5: Enabling and Starting the NFS Server
Enable the NFS server to start on boot, and then start the service:
sudo systemctl enable nfs-server
sudo systemctl start nfs-server
Step 6: Configuring NFS Client Systems
On client systems, install the NFS utilities and mount the shared directory:
sudo dnf install nfs-utils
sudo mount serverIP:/sharedirectory /localdirectory
Replace ‘serverIP’ with the NFS server’s IP address, ‘/sharedirectory’ with the shared directory, and ‘/localdirectory’ with the desired mount point on the client system.
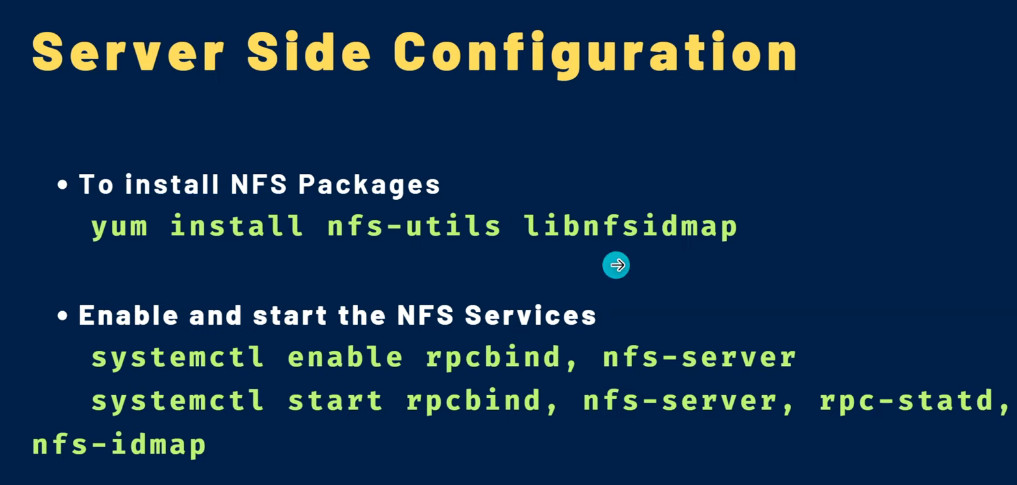
Install NFS Packages
yum install nfs-utils libnfsidmap
Enable and start the NFS Services
systemctl enable rpcbind, nfs-server
systemctl start rpcbind, nfs-server, rpc-statd, nfs-idmap
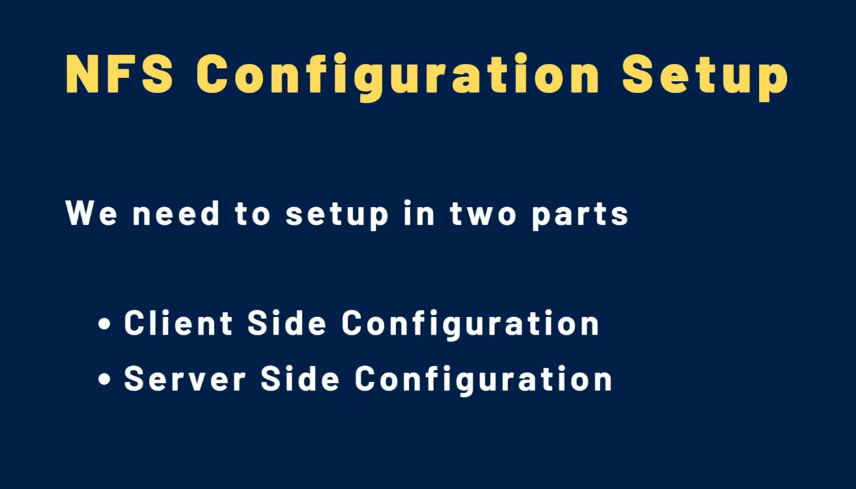
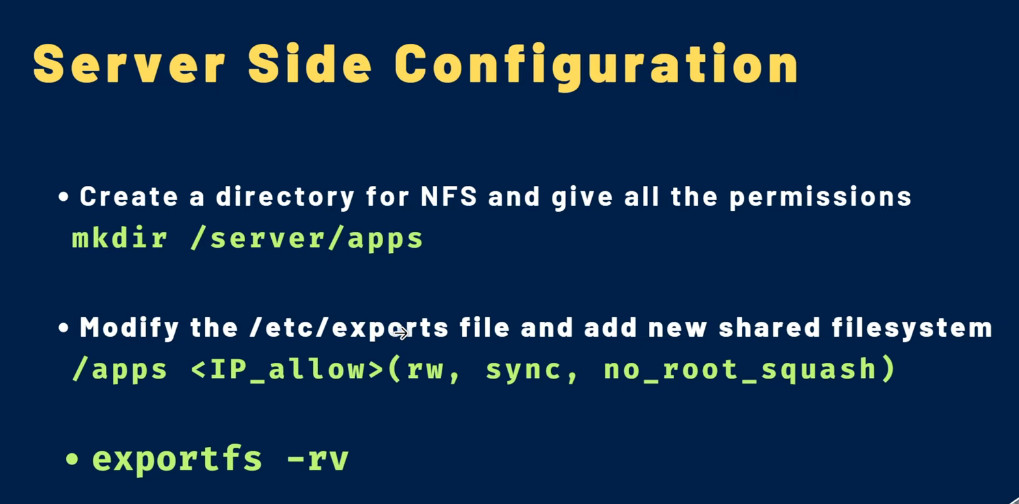
Server Side Configuration
Create a directory for NFS and give all the permissions
mkdir /server/apps
Modify the /etc/exports file and add new shared filesystem
/apps <IP_Allow 1 machne & *Means Network Avilable All Machine >(rw, sync, no_root_squash)
exportfs -rv

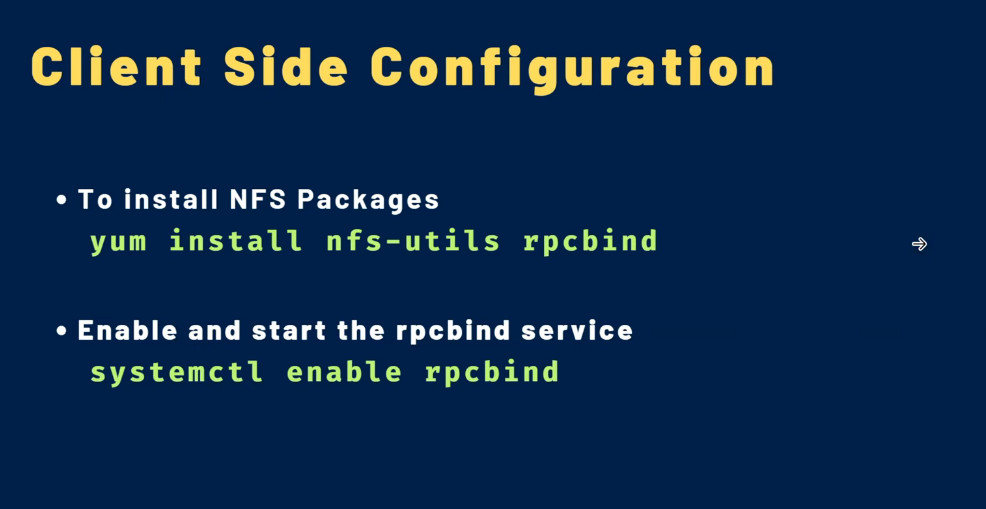
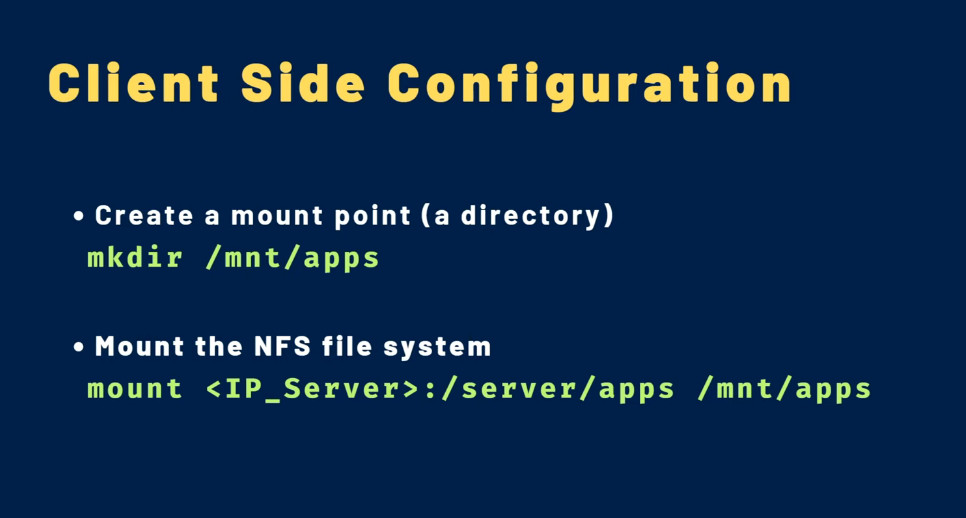
Client Side Configuration
yum install nfs-utils rpcbind
Enable and start the rpcbuild service
systemctl enable rpcbind
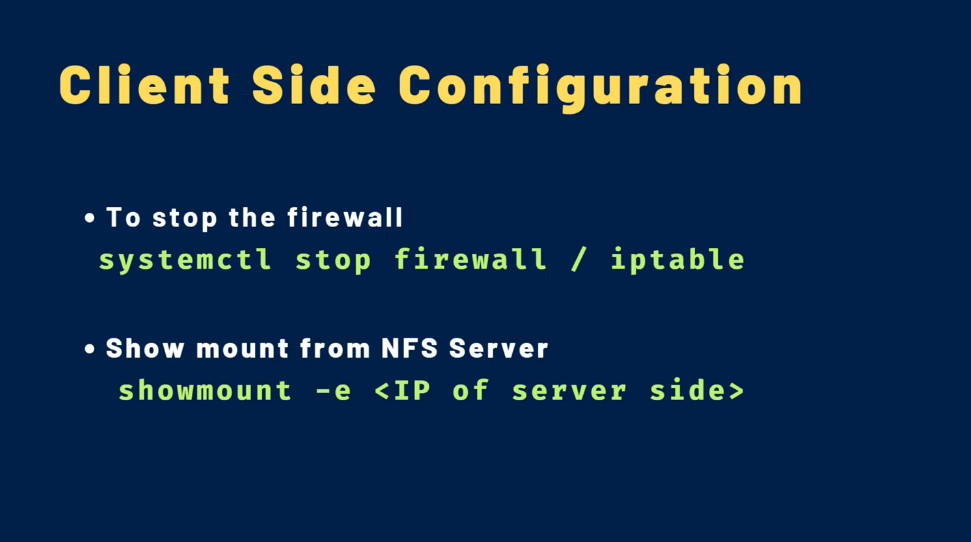
To stop the Firewall
systemctl stop firewall / iptable
Show mount from NFS Server
showmount -e <IP of Server Side>
Create a Mount point (a directory)
mkdir /mnt/apps
Mount the NFS file System
mount <IP_Servers>:/server/apps /mnt/apps
How to Install NFS Server and Client on RHEL
sudo dnf update
sudo dnf install rpcbind nfs-utils -y
2.The next step is to enable the NFS services as shown.
sudo systemctl enable nfs-server
sudo systemctl enable rpcbind
3.It’s crucial to verify that all the NFS services are running
sudo systemctl status nfs-server
sudo systemctl status rpcbind
4.Be sure to also configure the firewall in order to allow inbound NFS services as follows.
sudo firewall-cmd –permanent –add-service={nfs,rpc-bind,mountd}
sudo firewall-cmd –reload
5.Create an NFS Share Directory
With all the NFS services installed and running as expected,
it’s time to create the NFS share directory,
which is the directory that will contain
files that will be accessed by NFS clients in the network.
In this case, we will create an NFS share
directory called my_nfsshare in our home directory.
mkdir -p /home/tecmint/my_nfsshare
6.Next, assign directory permissions.
For demonstration purposes, we will assign global
permissions that will accord NFS clients read, write,
and execute permissions.
sudo chmod 777 -R /home/tecmint/my_nfsshare
7.Export an NFS Share Directory
sudo nano /etc/exports
8.Add the following entry.
Be sure to replace the server-ip with your NFS server’s IP address.
/home/tecmint/my_nfsshare server-ip/24(rw,sync,no_root_squash)
9.Finally export the NFS share directory or filesystem.
sudo exportfs -rv
10.Run the following command to view the NFS shares.
showmount -e localhost
Configure NFS Client
sudo dnf update
sudo dnf install rpcbind nfs-utils -y
sudo systemctl enable rpcbind
1. Configure NFS Client
showmount -e 10.128.15.213
The next step is to mount the NFS share
from the server to the client. To do this,
we first need to create a mount directory. In this case, we will create a directory called nfs_backup.
mkdir nfs_backup
2.Thereafter, we will mount the NFS share to the mount
directory that we have just created in the root home directory
mount -t nfs 10.128.15.213:/home/tecmint/my_nfsshare ~/nfs_backup
3.To persist the NFS share, edit the /etc/fstab file.
vim /etc/fstab
Then add the following entry.
10.128.15.213:/home/tecmint/my_nfsshare /root/nfs_backup nfs defaults 0 0
4.Removing NFS Mount
umount ~/nfs_backup
Some more important commands for NFS.
showmount -e – Shows the available shares on your local machine
showmount -e ip-address – Lists the available shares at the remote server
showmount -d – Lists all the sub-directories
exportfs -v – Displays a list of shared files and options on a server
exportfs -a – Exports all shares listed in /etc/exports, or given name
exportfs -u – Unexports all shares listed in /etc/exports, or given name
exportfs -r – Refresh the server’s list after modifying /etc/exports
export file configuration Example nehra
/mnt/nfs_share/docs 192.168.0.144(rw,sync,no_all_squash,root_squash)