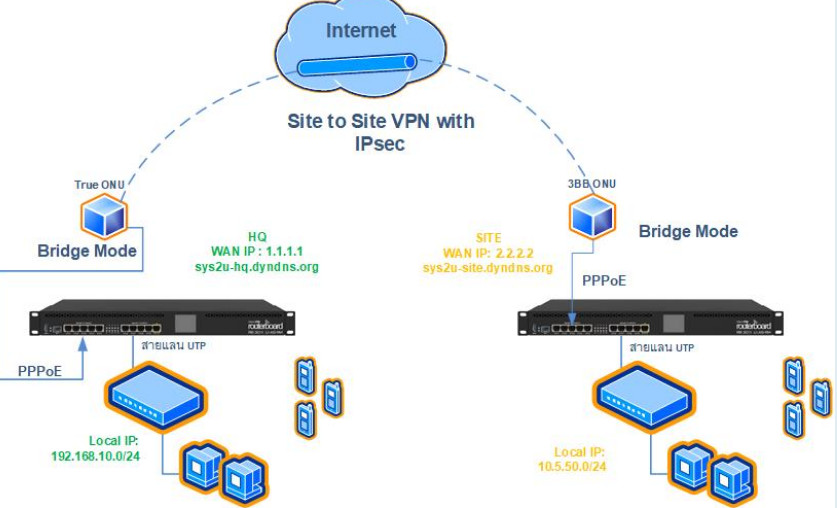
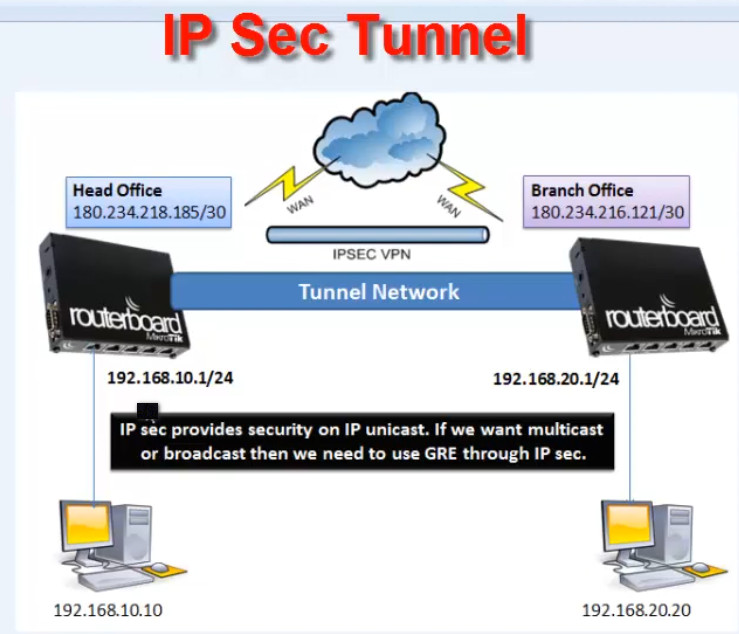
Setting up a Site-to-Site IPsec VPN on MikroTik routers allows two remote networks to securely communicate over the internet using encrypted tunnels. This setup involves creating an IPsec tunnel between two MikroTik routers at different locations, ensuring secure and private data transmission between them.
Here’s a step-by-step guide to configure a MikroTik Site-to-Site IPsec VPN:
Requirements:
Two MikroTik routers (Router A and Router B).
Public IP addresses for both routers or access to the internet.
Local subnets at both sites that need to communicate securely.
Knowledge of the IP addresses, preshared key, and VPN parameters.
Steps to Configure the Site-to-Site IPsec VPN:
1. Configure the IPsec VPN on Router A (Local Router)
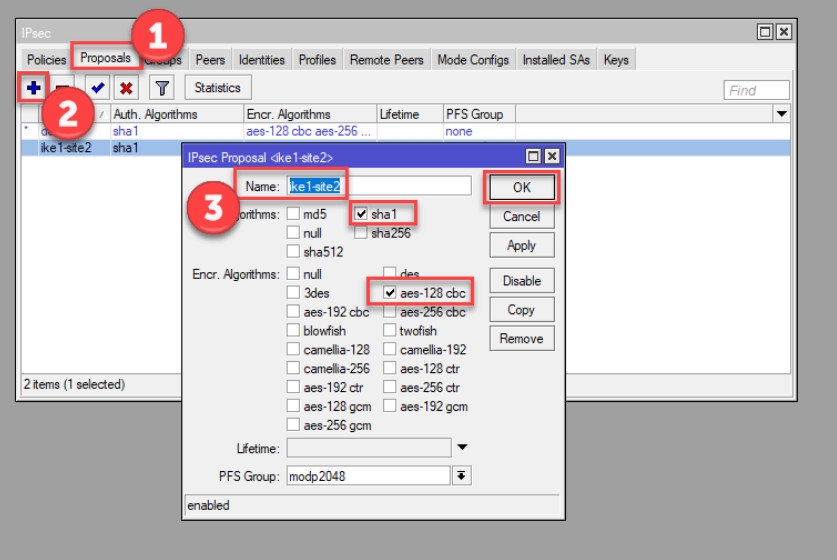
Step 1: Set up the IPsec Proposal
The proposal defines the encryption and hashing methods for the IPsec tunnel.
Go to IP > IPsec > Proposals.
Click on Add (plus sign) to create a new proposal.
Configure the following settings:
Name: vpn-proposal
Auth. Algorithm: sha256 (or use sha1 if needed).
Encr. Algorithm: aes-256 (or aes-128 as an alternative).
PFS Group: none or choose an appropriate PFS group.
Lifetime: 1d (you can adjust as per requirement).
Click Apply and OK.
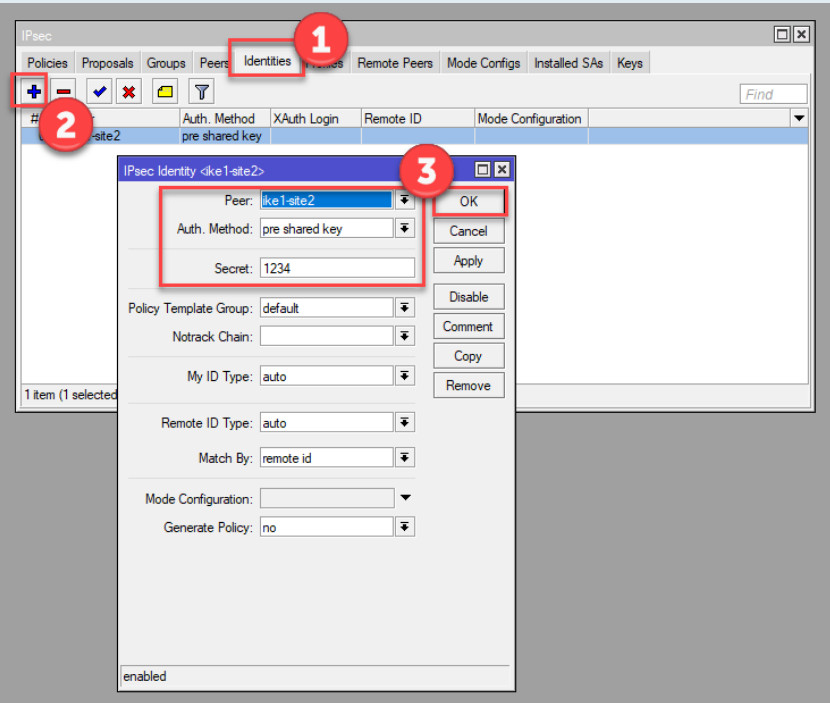
Step 2: Create an IPsec Peer
The peer defines the remote router’s IP address (the remote endpoint for the tunnel).
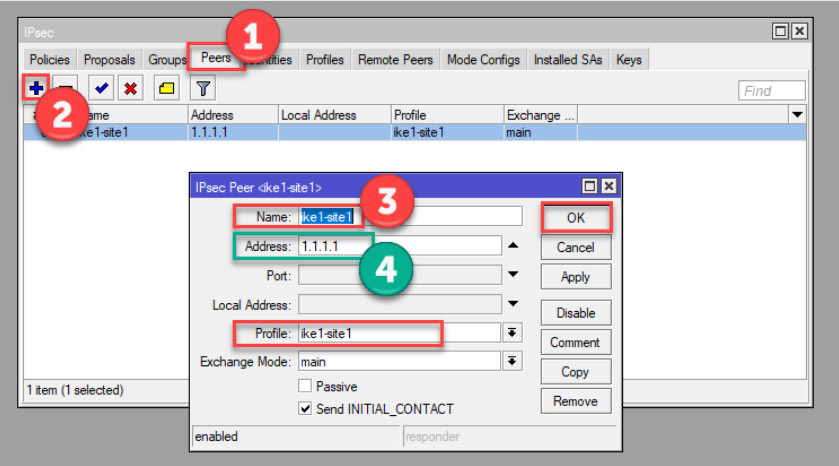
Go to IP > IPsec > Peers.
Click Add (plus sign).
Configure the following settings:
Address: The public IP of Router B (e.g., 192.168.2.1).
Port: 500 (default for IKE).
Auth. Method: pre-shared key.
Secret: Enter a secure pre-shared key (must match on both routers).
Exchange Mode: main.
My ID: auto (or specify a static ID if necessary).
Proposal Check: strict.
Send Initial Contact: yes.
Click Apply and OK.
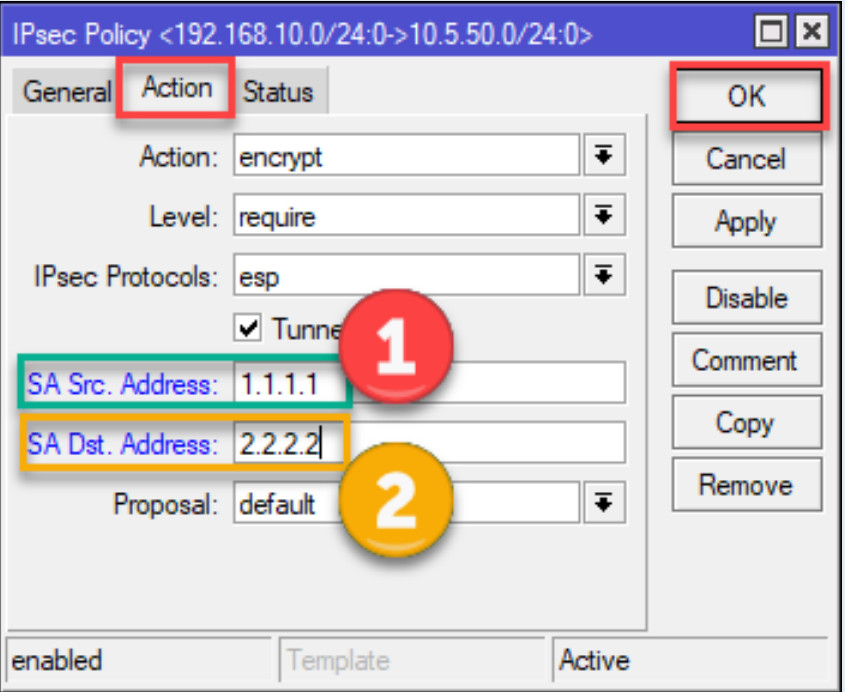
Step 3: Set up the IPsec Policy
The policy defines the traffic that will be encrypted and routed through the VPN tunnel.
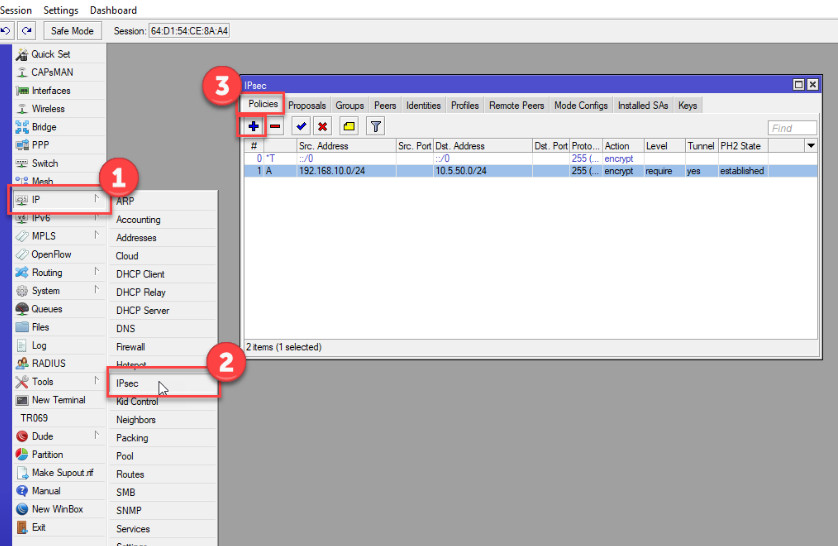
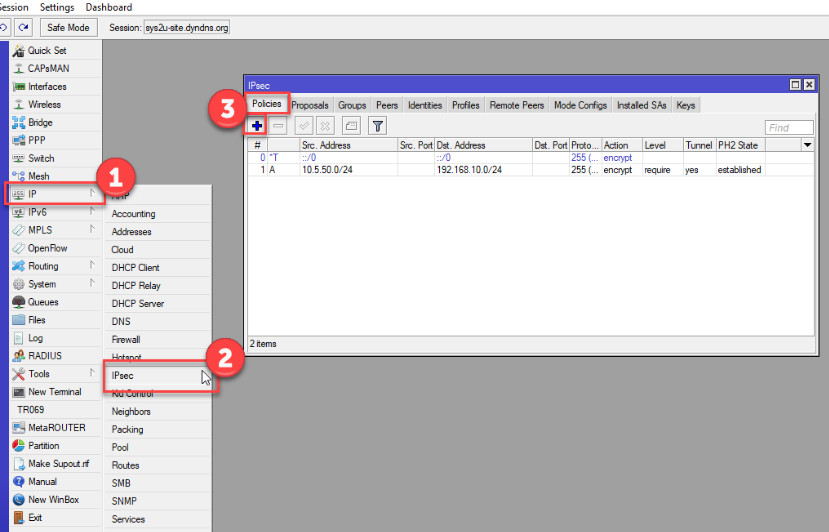
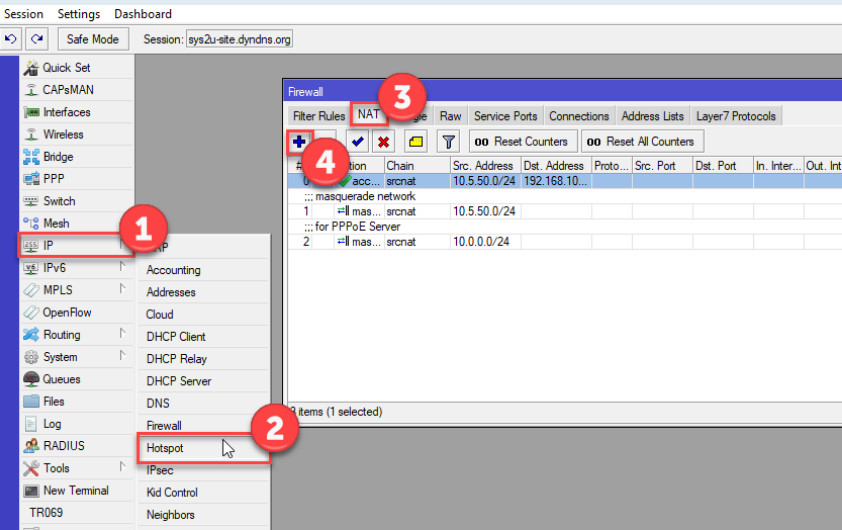
Go to IP > IPsec > Policies.
Click Add (plus sign).
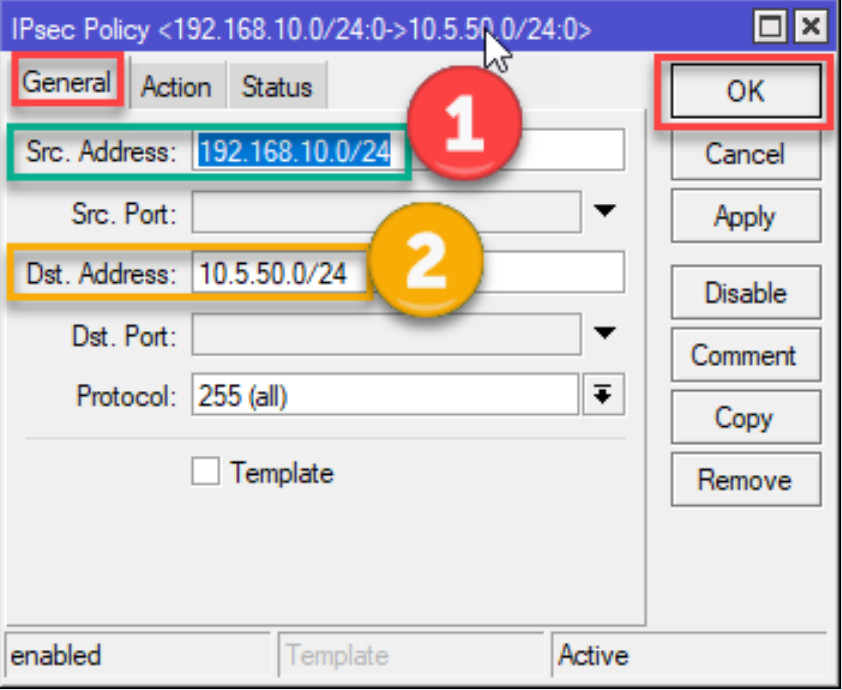
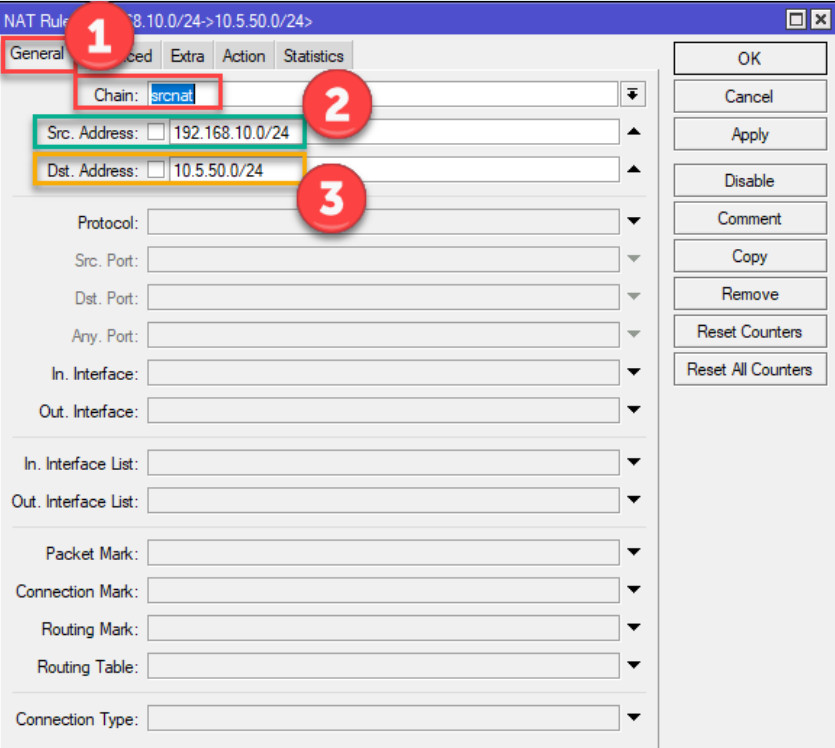
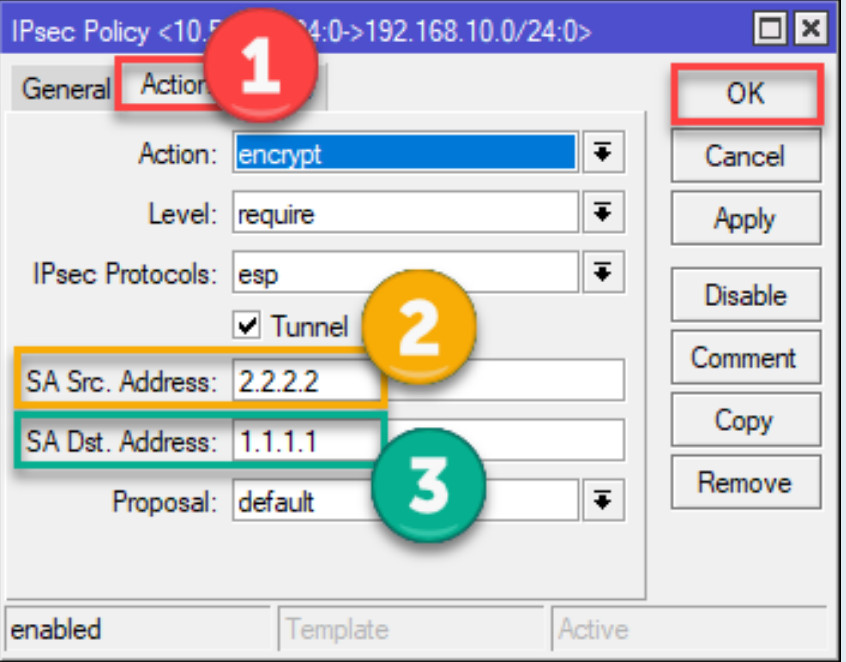
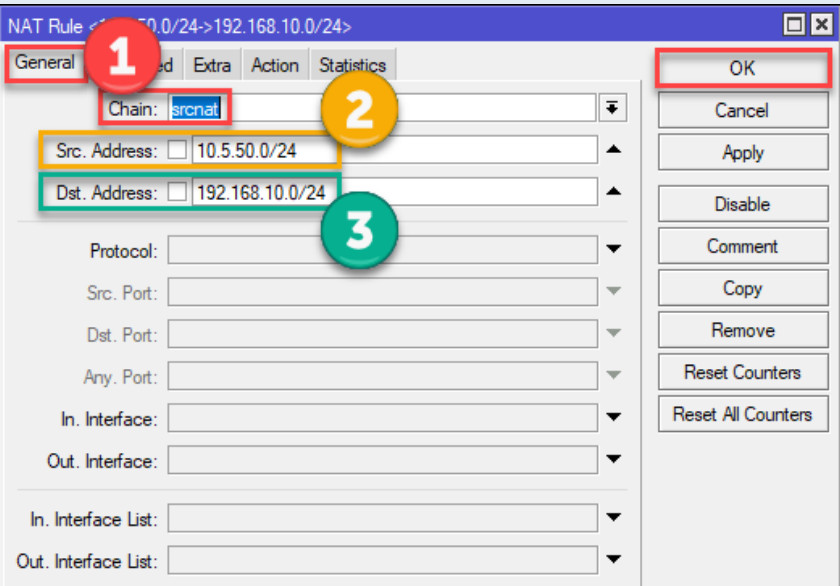
Configure the following settings:
Src. Address: The local network IP range (e.g., 192.168.1.0/24).
Dst. Address: The remote network IP range (e.g., 192.168.2.0/24).
Protocol: all (or specify tcp or udp if needed).
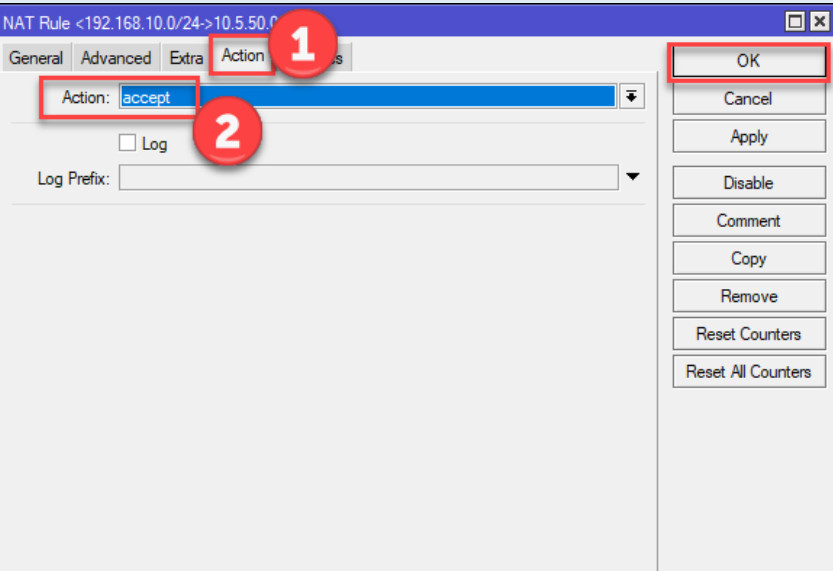
Action: encrypt.
Level: require.
IPsec Proposal: Choose the vpn-proposal you created earlier.
Tunnel: Check the box to enable tunnel mode.
Click Apply and OK.
Step 4: Enable IPsec
Ensure the IPsec service is enabled on Router A.
Go to IP > IPsec > Settings.
Ensure that IPsec is enabled.
Set Peer to Peer NAT Traversal if necessary (for NAT handling).
2. Configure the IPsec VPN on Router B (Remote Router)
Step 1: Set up the IPsec Proposal
Repeat the same steps as for Router A to create an IPsec proposal with matching settings:
Name: vpn-proposal
Auth. Algorithm: sha256 (or sha1)
Encr. Algorithm: aes-256
Lifetime: 1d (or your choice)
Step 2: Create an IPsec Peer
On Router B, set up the IPsec peer pointing to Router A:
Go to IP > IPsec > Peers.
Click Add (plus sign).
Configure the following settings:
Address: The public IP of Router A (e.g., 192.168.1.1).
Port: 500.
Auth. Method: pre-shared key.
Secret: Enter the same pre-shared key as on Router A.
Exchange Mode: main.
My ID: auto.
Proposal Check: strict.
Click Apply and OK.
Step 3: Set up the IPsec Policy
On Router B, configure the IPsec policy:
Go to IP > IPsec > Policies.
Click Add (plus sign).
Configure the following settings:
Src. Address: The local network IP range (e.g., 192.168.2.0/24).
Dst. Address: The remote network IP range (e.g., 192.168.1.0/24).
Protocol: all.
Action: encrypt.
Level: require.
IPsec Proposal: Choose the vpn-proposal you created.
Tunnel: Check the box to enable tunnel mode.
Click Apply and OK.
Step 4: Enable IPsec
Ensure the IPsec service is enabled on Router B as well.
Go to IP > IPsec > Settings.
Ensure IPsec is enabled.
3. Verify the Tunnel
Once the configuration is complete on both routers, you should verify that the tunnel is established.
Go to IP > IPsec > Active Peers.
Ensure that the peers are listed as established.
Ping Test:
From Router A, test the connection to a host in Router B’s subnet and vice versa.
You can use the Ping tool in Tools > Ping.
Check IPsec Logs:
If the tunnel is not establishing, check the logs for any errors related to IPsec (Log > IPsec).
4. Additional Considerations:
NAT Traversal (NAT-T): If your routers are behind NAT devices (like a home router), you may need to enable NAT-T on both routers under IP > IPsec > Settings.
Routing: Ensure that static routes or dynamic routing protocols (like OSPF, if needed) are set up to route traffic between the local and remote networks.
Firewall Rules: Ensure that necessary firewall rules are in place to allow IPsec traffic (UDP port 500 for IKE, UDP port 4500 for NAT-T, and protocol ESP).
Summary
Configure IPsec proposals with the same encryption settings on both routers.
Set up IPsec peers with matching public IP addresses and pre-shared keys.
Define IPsec policies to specify which subnets should be encrypted and routed through the tunnel.
Verify the tunnel by checking the IPsec status, pinging between networks, and reviewing logs.
This setup should establish a secure Site-to-Site IPsec VPN between two MikroTik routers.