- 8777701917
- info@saikatinfotech.com
- Basirhat W.B

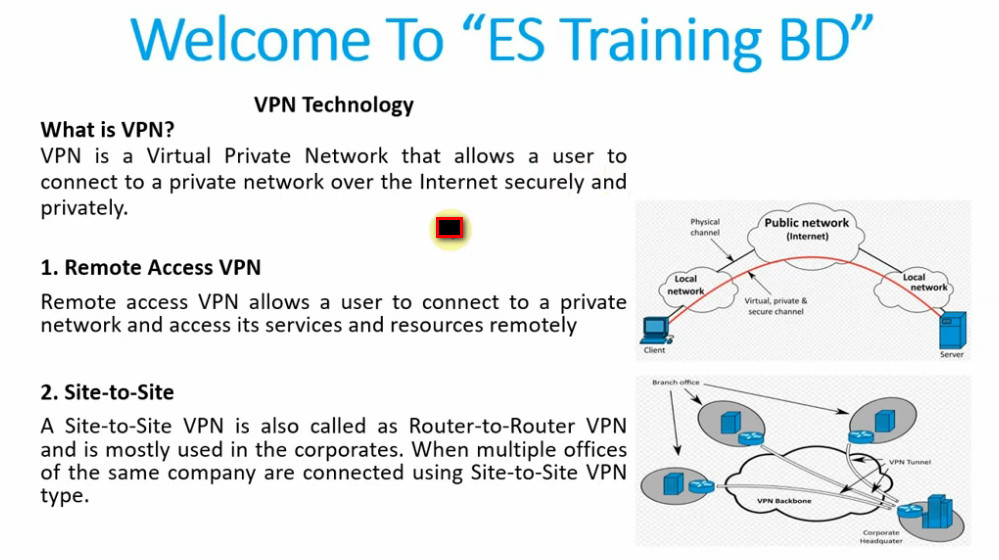
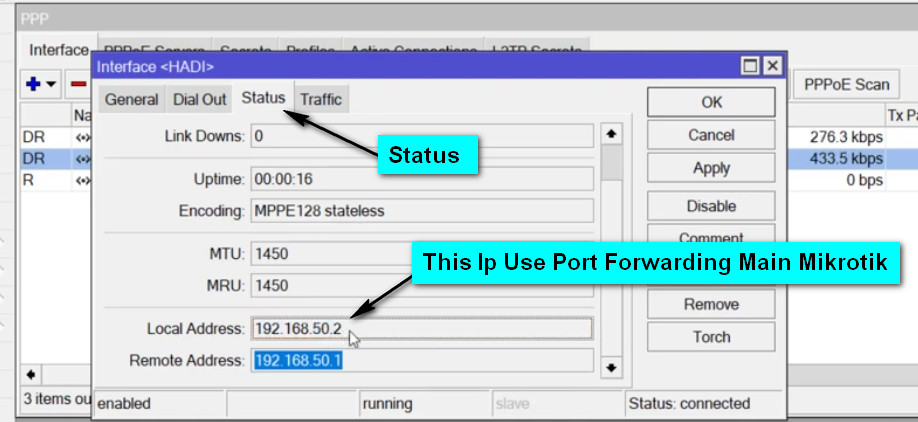
L2TP (Layer 2 Tunneling Protocol) is a VPN protocol commonly used to securely tunnel data over the internet. MikroTik, a popular router and network device manufacturer, supports L2TP VPN to allow remote users to connect to a network securely.
L2TP, by itself, does not provide encryption or strong authentication mechanisms. Therefore, L2TP is often paired with IPSec (Internet Protocol Security) to provide security (encryption and authentication). When L2TP is used in combination with IPSec, it becomes L2TP/IPSec, which provides a more secure VPN solution.
MikroTik’s L2TP VPN is useful for:
L2TP works by creating a virtual tunnel between the client (remote user) and the MikroTik router. This tunnel encapsulates the data, allowing it to traverse the internet securely. If IPSec is used, it encrypts the data to prevent unauthorized access.
Here’s a simplified overview of how it works:
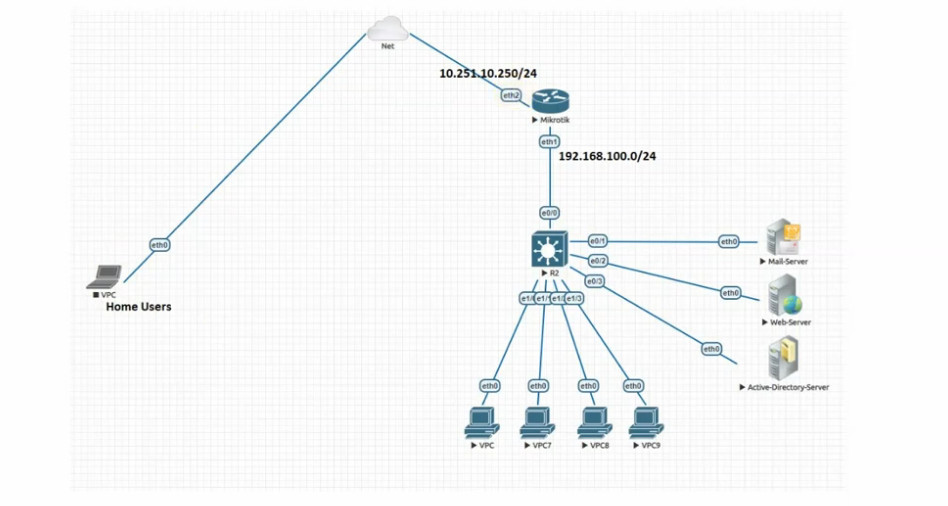
Here’s a basic guide to configuring an L2TP VPN server on a MikroTik router with IPSec:
Log in to MikroTik Router:
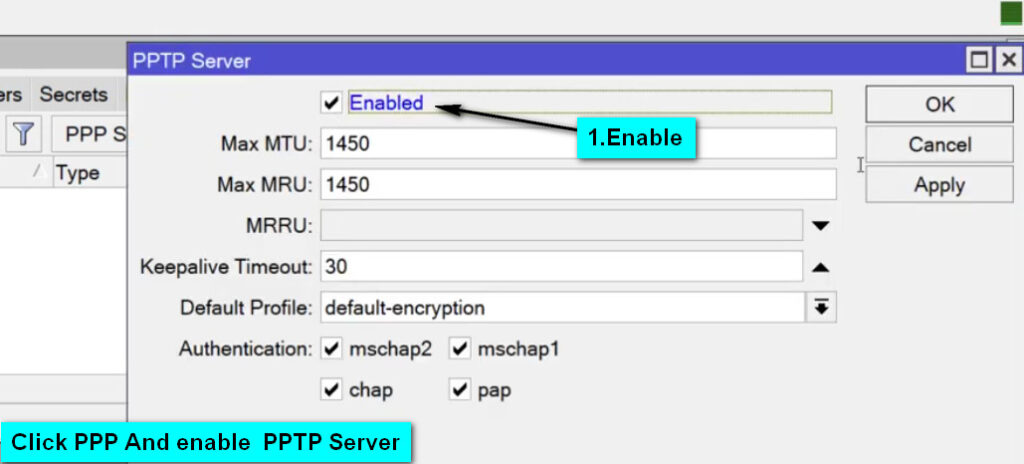
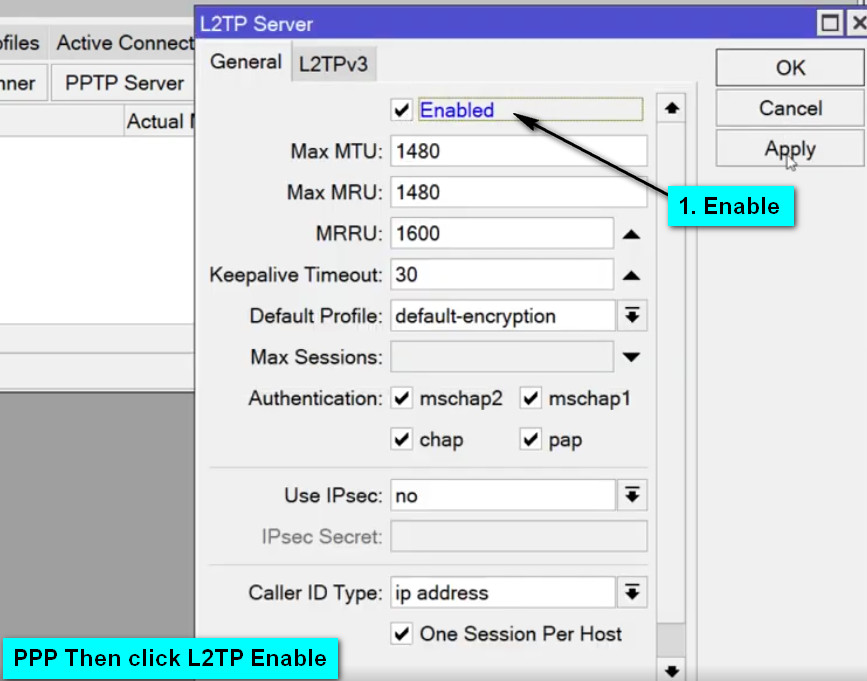
Enable L2TP Server:
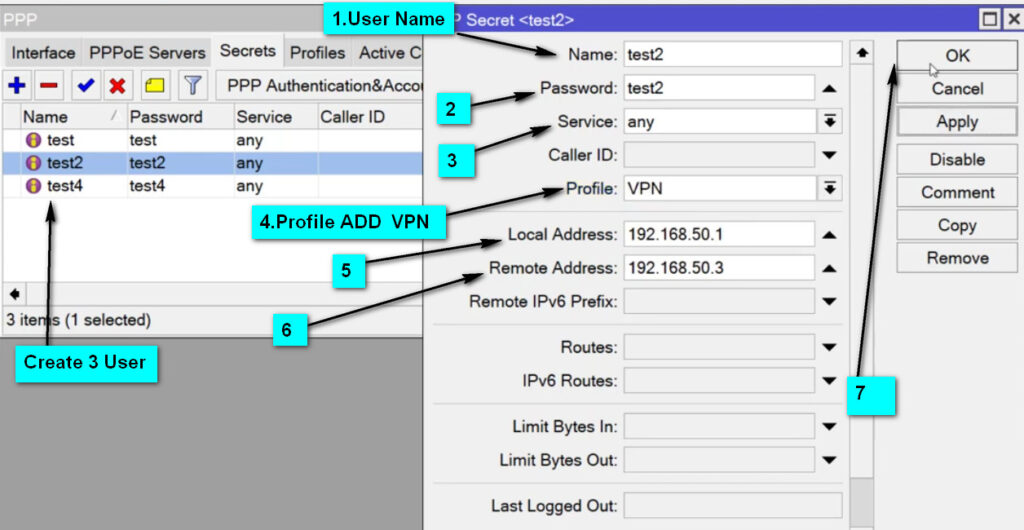
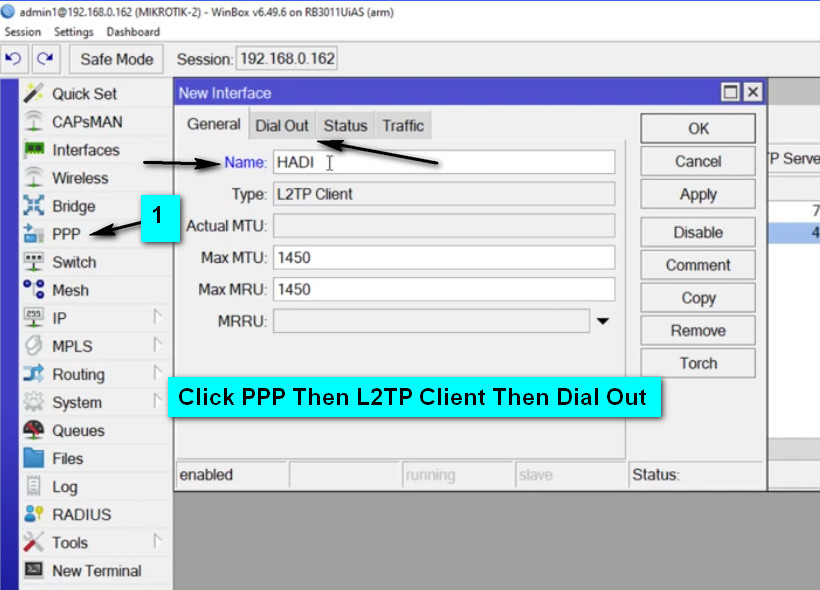
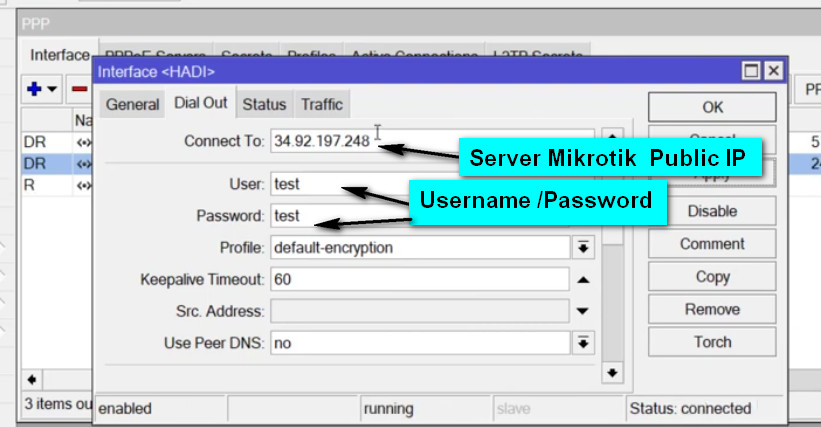
PPP → Interface → L2TP Server.Configure the L2TP Server:
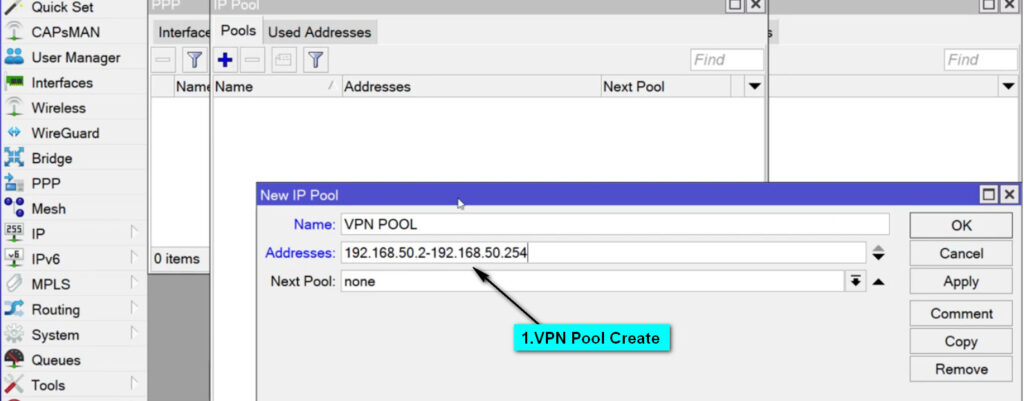
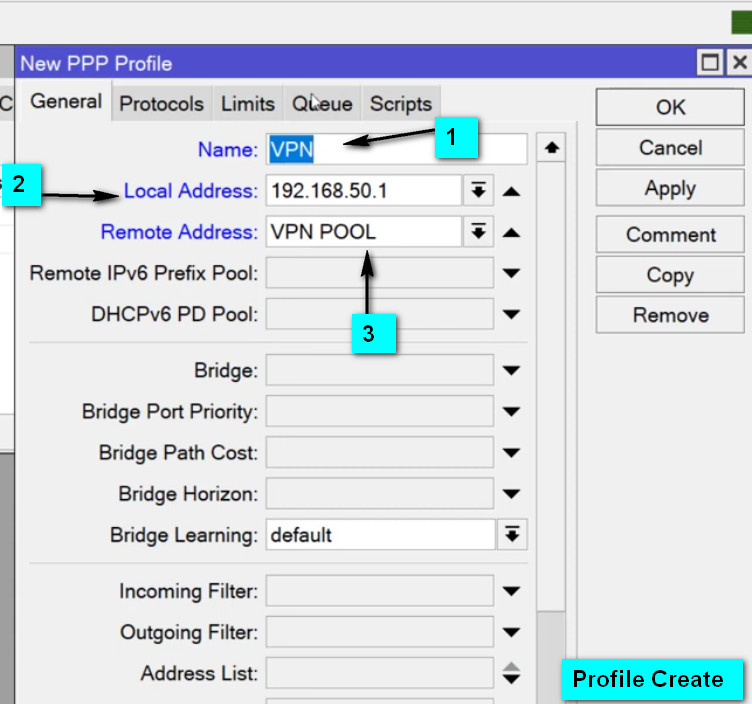
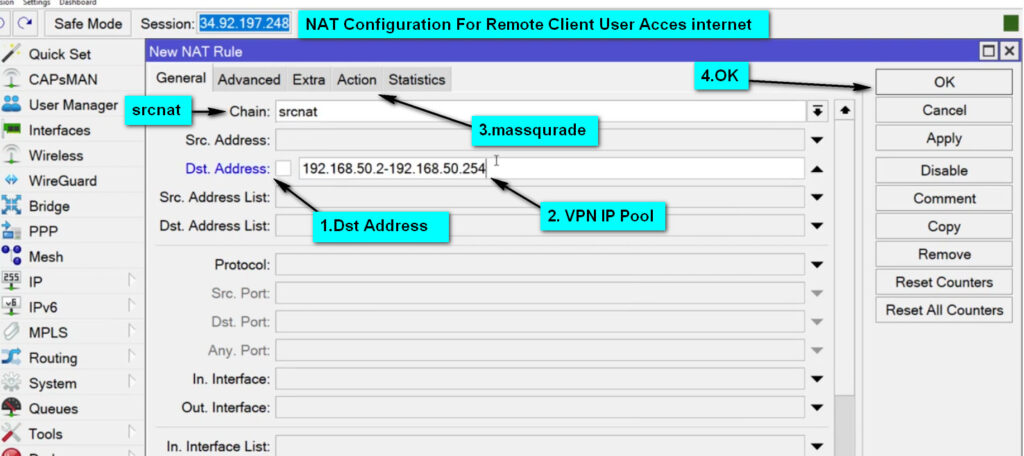
L2TP Server settings, ensure the following:PPP → Secrets tab.l2tp (this indicates that the service is for L2TP VPN).default-encryption (or create a custom profile if necessary).192.168.100.1/24) for L2TP clients to use.IP → IPSec → Profiles and click Add.IPSec Peers, defining the public IP of the client or use 0.0.0.0/0 for any remote client.IP → Firewall → Filter Rules.1701.500 (ISAKMP) and 4500 (NAT-T).IP → Firewall → NAT and add a new rule for masquerading.srcnatether1).masquerade to allow internet access for the VPN clients.MikroTik’s L2TP VPN is a reliable and secure method for remote access to your network. When combined with IPSec encryption, it offers a secure and robust solution for protecting your data while allowing remote users to access internal resources. By properly configuring the MikroTik router and client devices, you can ensure a seamless and secure remote connection.
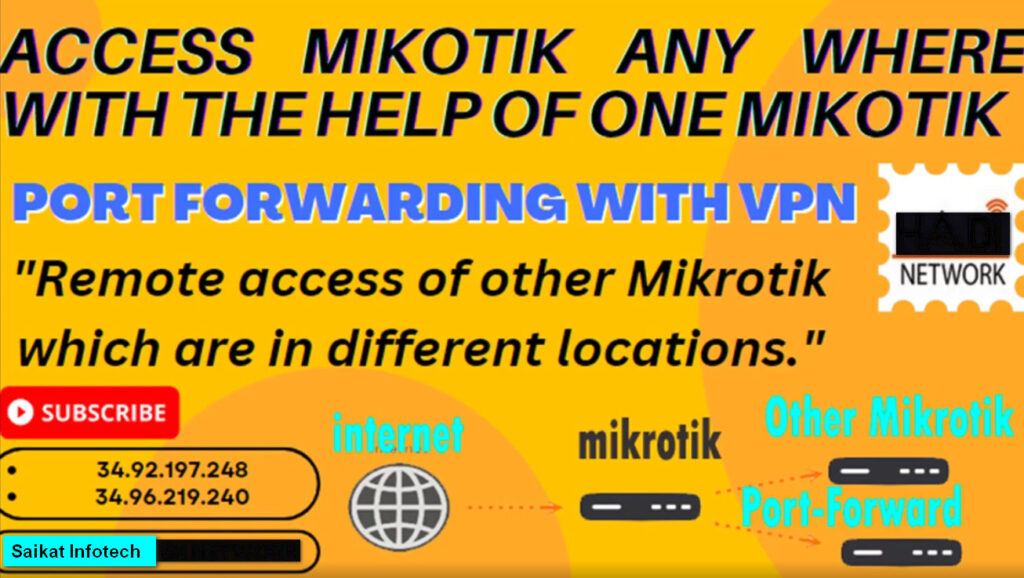
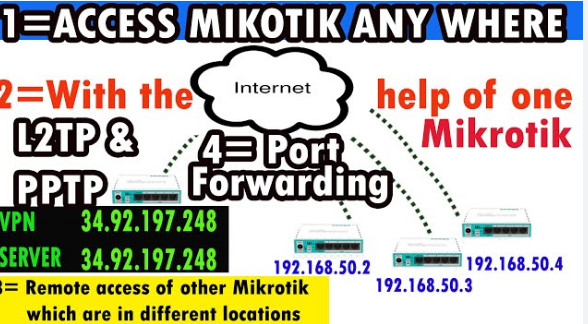
Port forwarding is a network configuration technique that directs incoming traffic on a specific port to a particular internal IP address and port on a local network. This is useful for services like web servers, game servers, or remote desktop access, where external users need to access devices or services within a private local network (LAN) from the internet.
In MikroTik routers, port forwarding is typically configured using NAT (Network Address Translation) rules. These rules are added in the MikroTik firewall to control how incoming packets are handled and forwarded to the appropriate devices inside the network.
Port forwarding is required in the following scenarios:
When an external device (e.g., a remote user) sends a request to your public IP address on a specific port (e.g., HTTP on port 80), the router checks its NAT table for the appropriate forwarding rule. If a matching rule is found, the router will forward that request to the specified internal IP address and port within the local network.
For example:
192.168.1.100 on port 80 (HTTP).80 to this internal IP address.Follow these steps to configure port forwarding on a MikroTik router using the WinBox interface or WebFig (the web interface).
Determine which service you want to forward and what port it uses. Common services and ports include:
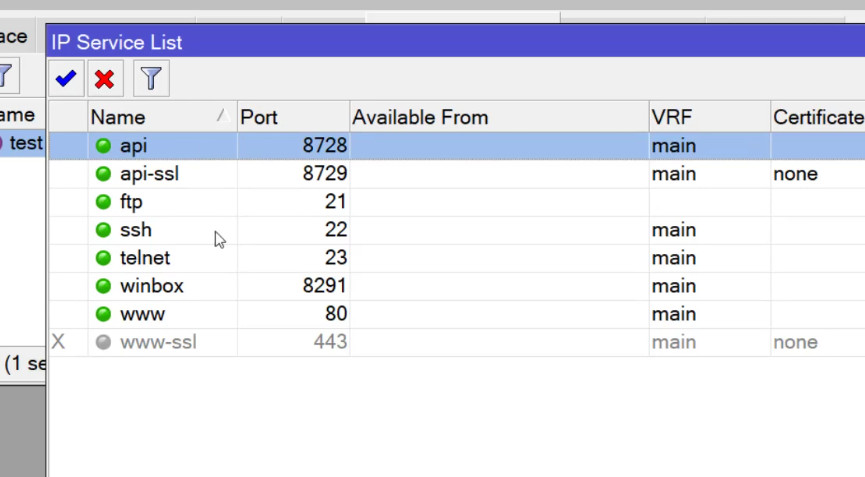
Log into your MikroTik router using WinBox, WebFig, or SSH.
Go to the NAT settings:
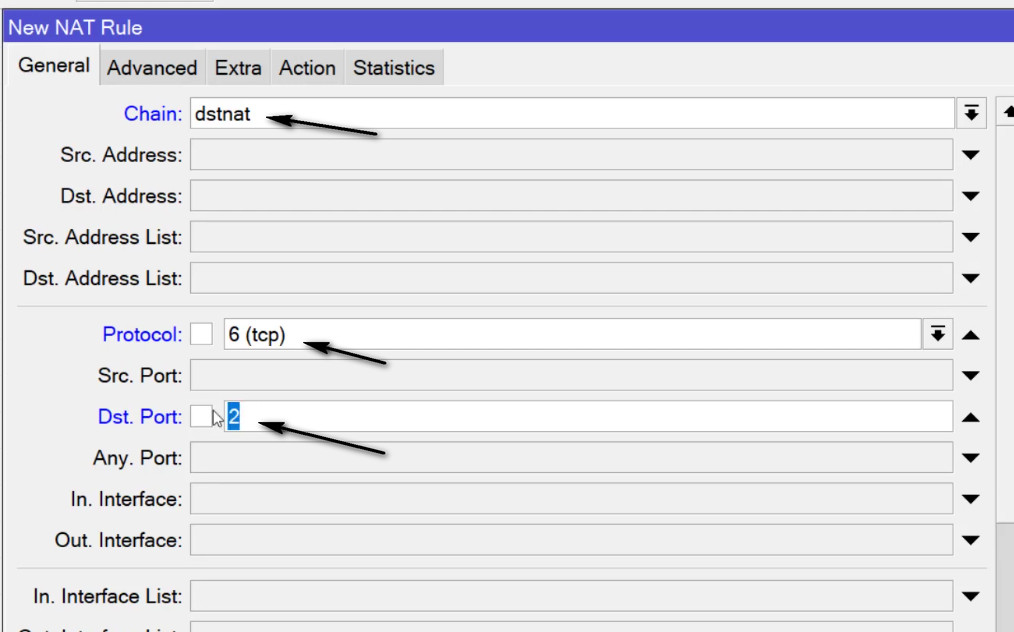
Add a new NAT rule:
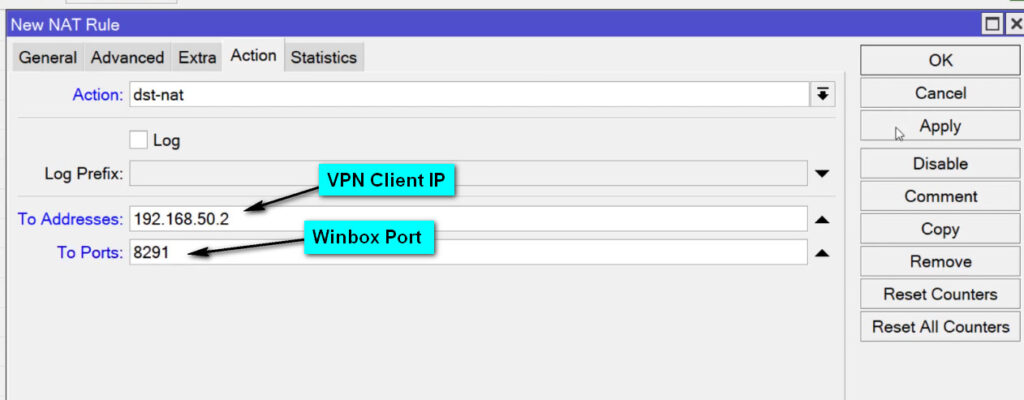
tcp for web traffic).80 for HTTP).Set the action to forward:
192.168.1.100).80 for a web server).Save the rule by clicking OK.
You want to forward HTTP traffic (port 80) to a web server with the internal IP address 192.168.1.100 running on port 80.
Configure the following in MikroTik:
dstnattcp80192.168.1.10080This rule will forward any incoming traffic on port 80 (HTTP) to the internal server at IP 192.168.1.100 on the same port.
Make sure that the firewall on the MikroTik router allows incoming traffic on the forwarded port.
80 for HTTP).inputtcp80acceptExternal Test: From an external network (e.g., using a mobile device or an external computer), try to access your public IP address followed by the forwarded port. For example:
http://<your-public-ip>:80Internal Test: You can also test by accessing the internal server from another device on the local network using the local IP address directly.
Port Forwarding with Specific Source IP: If you only want to allow port forwarding from certain IPs (e.g., a specific external user or trusted network), you can add a condition for the source IP:
Multiple Services: If you need to forward multiple ports for different services, you can create multiple NAT rules (one for each port) or use a range of ports.
Port Forwarding for a Range: If you need to forward a range of ports (e.g., for a game server), you can specify a range in the Dst. Port field:
5000-5050 for a range of ports.1:1 NAT (for multiple services on a single IP): If you want to map a set of ports directly to a particular internal server, this can be done using 1:1 NAT, which ensures the public IP is directly mapped to a local IP.
Port forwarding on a MikroTik router is an essential technique to allow external devices to access services inside a private network. It can be used to expose web servers, FTP servers, or other services securely to the internet, but it’s crucial to configure it correctly and ensure that only authorized traffic is allowed.