In this part, we’ll show how to hide or unhide partition with 4 tools, three from Windows, the last one, a professional disk and partition manager for Windows users.
1. Hide/unhide partition with Windows 11 Diskpart
▶ Hide partition
Step 1. Press “Windows” + “R” together, type “diskpart” and hit “Enter” to open Windows Diskpart.
Step 2. Now you’ll need to type some orders to hide the target partition. list volume select volume X (This “X” is the number of the drive you want to hide) remove letter X (This “X” is the drive letter of that target drive)
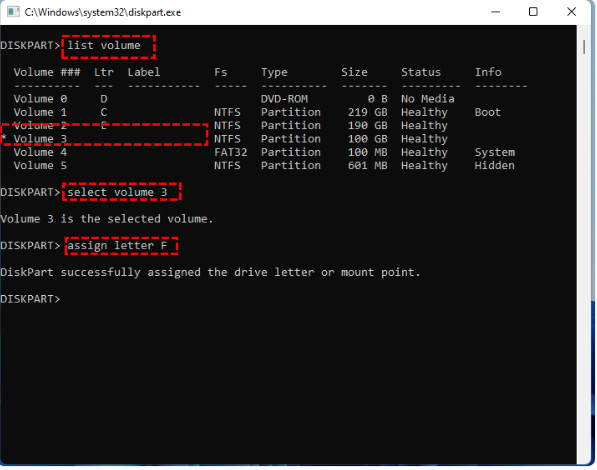
▶ Unhide partition
After you open Diskpart with the same operation of hiding partition, what you need to pay attention to is to type one different order to show the hidden drive.
Please type: list volume select volume X(This “X” is the number of the hidden drive you want to show) assign letter X(This “X” is the letter you wish to name to that hidden drive)
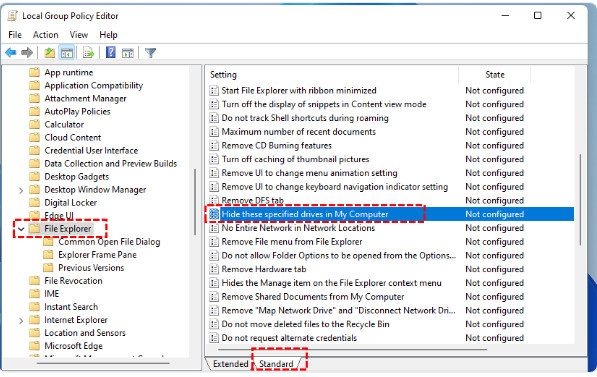
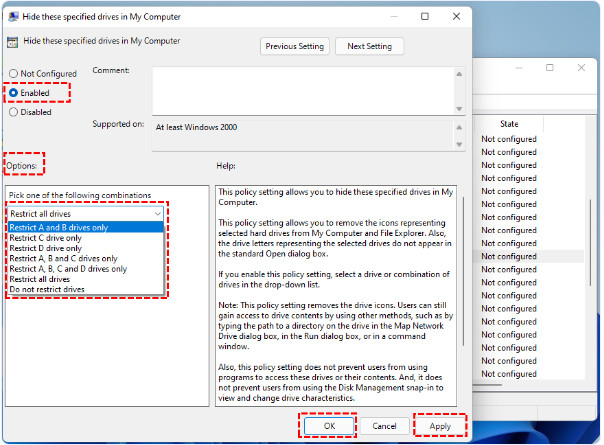
2. Hide/unhide partition with Windows 11 File Explorer
The second method is to use Local Group Policy Editor to hide or unhide partition.
Step 1. Press “Windows”+ “R”, and type “gpedit.msc” to open Local Group Policy Editor.